Surface Book 2 Repair

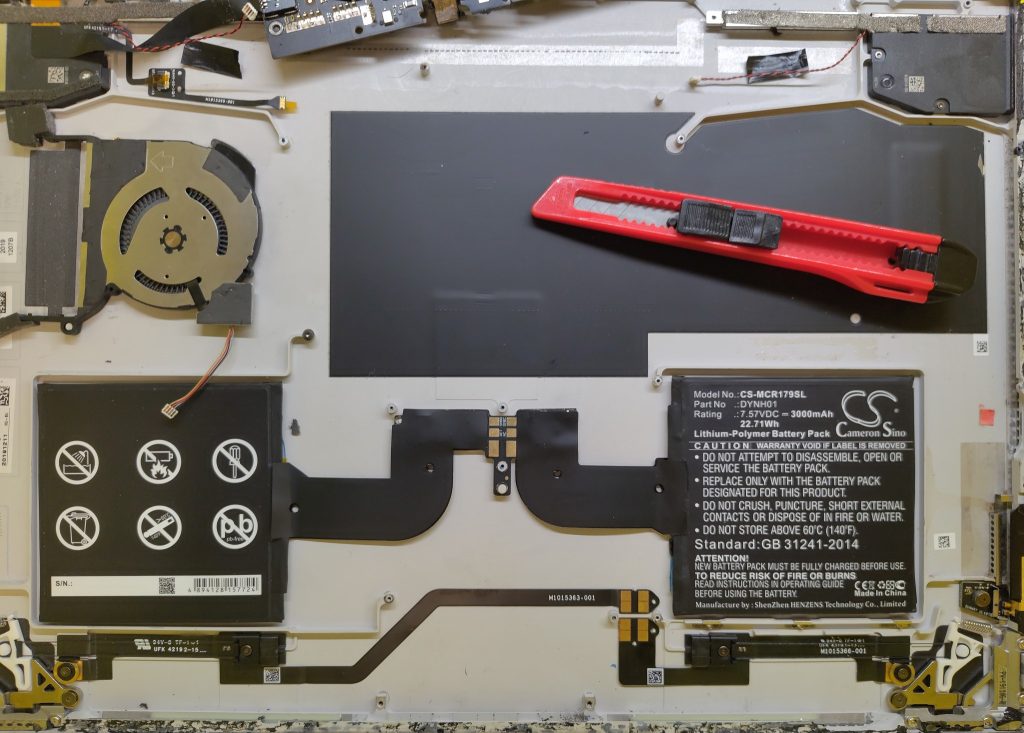
This is probably the worst repair I have recently helped with. This device has almost everything glued and horrible connector locations. The original goal was to replace the loud fan (watch the video with sound), and while we are at it, also put in a new battery and touchscreen.

My main pain-points were

  • glued in touchscreen + display assembly
    • while removing it, I did destroy two antennas that are directly below the glue layer
    • if you don’t want to make the same mistake, be really gentle on the top edge of the screen (where the cameras are)
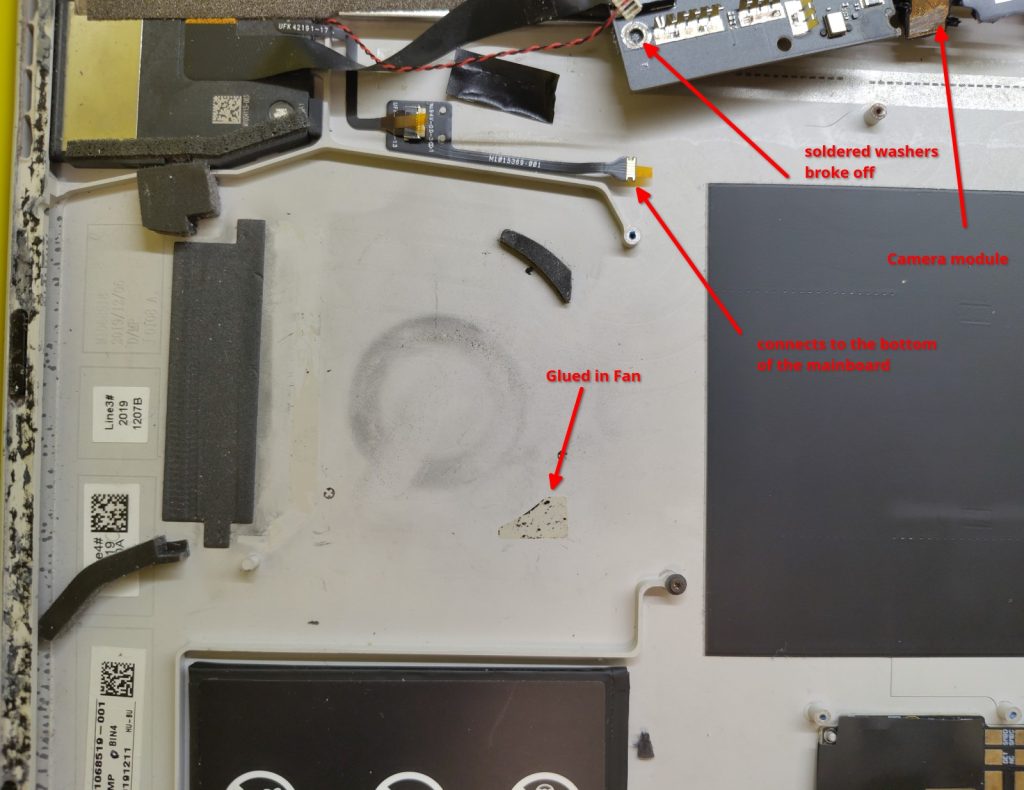
  • two cameras glued in and need to be removed together with the mainboard
    • the camera connector cannot be unplugged without removing the mainboard.
    • the mainboard cannot be removed while the camera is glued in. catch22 of disassembly
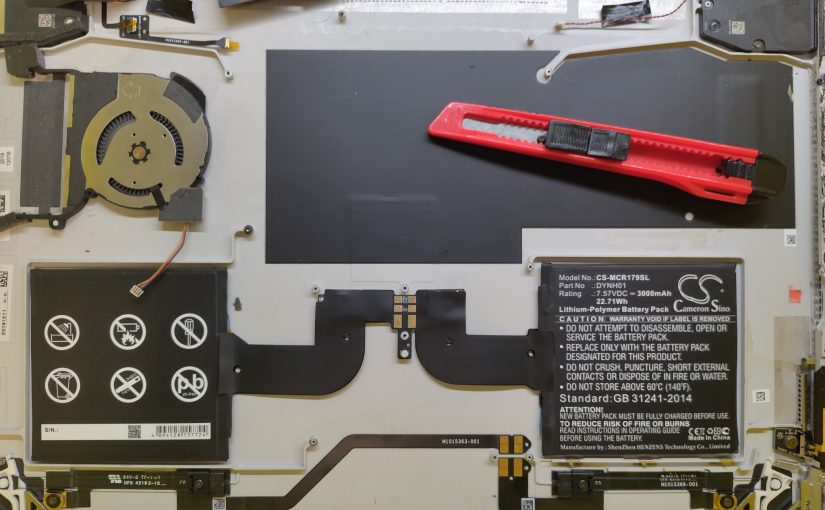
  • battery pack glued in (I mean, we are already used to it, still shitty)
  • fan glued in
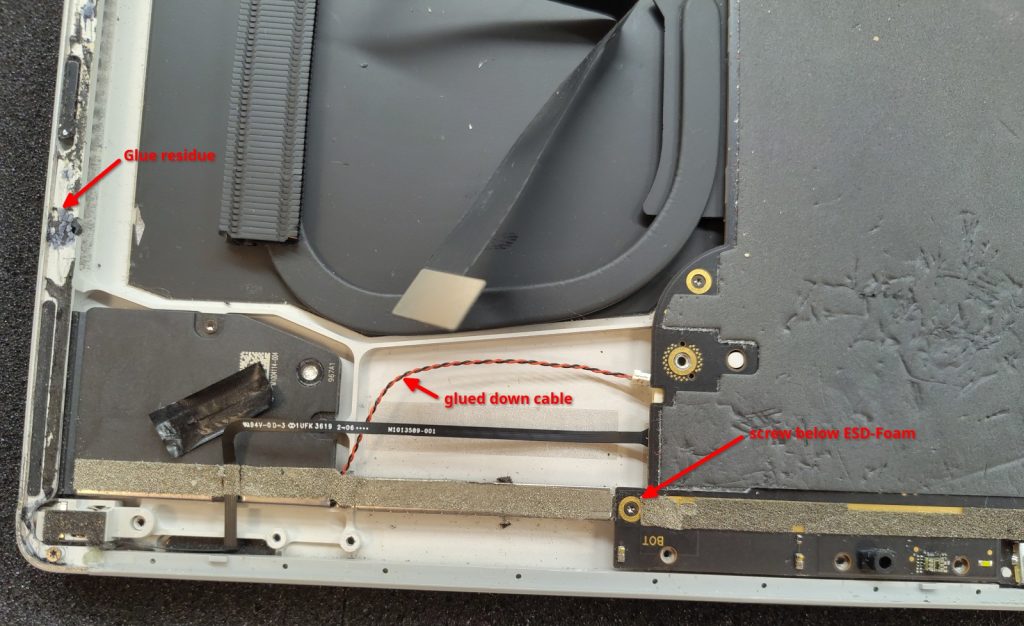
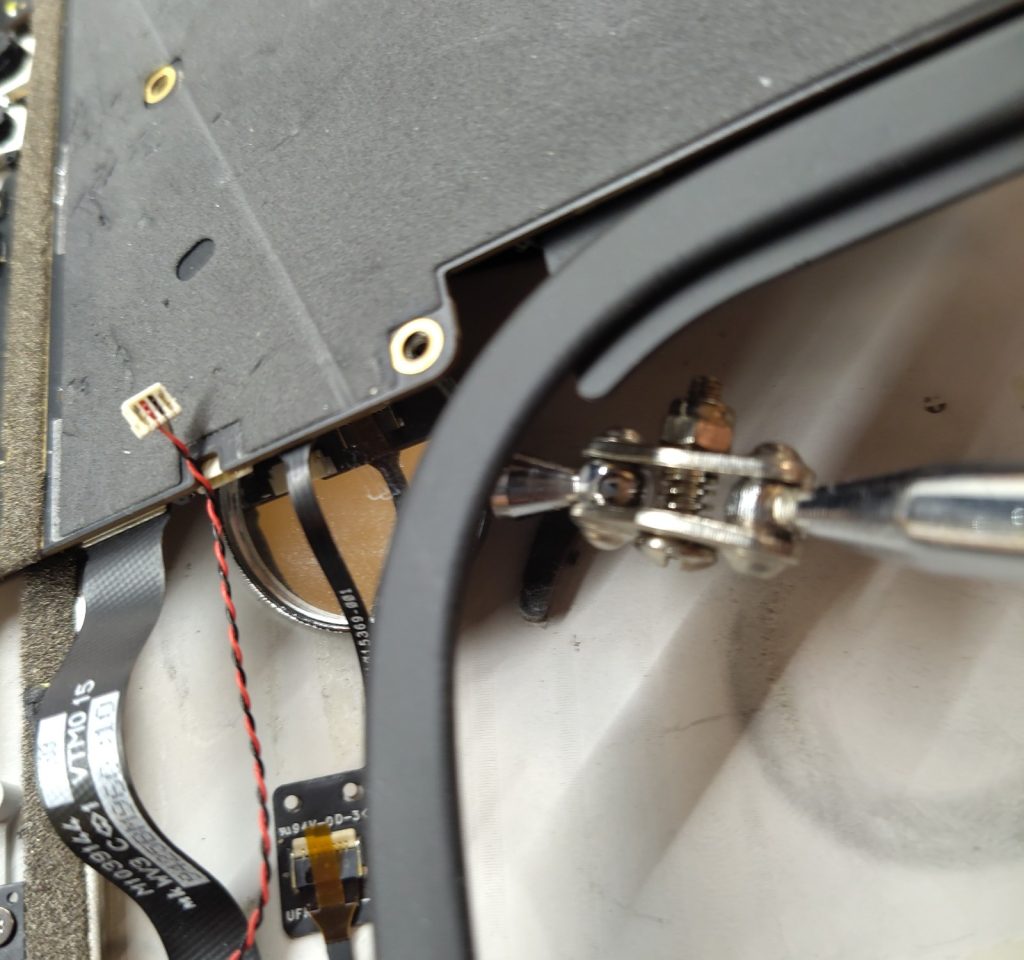
  • wires inside fixed with tape (that is actually not that painful)
  • screws hidden below ESD-foam
  • touchscreen controller glued to the back of the screen
    • and its important that the bottom of that PCB makes good contact with the case of the screen to have a reference for the capacitive sensing
    • There was a conductive glue pad, but I had nothing to replace it
  • more FPC connectors between the mainboard and the case
    • which cannot reasonably be opened and closed for disassembly
    • require a dentist mirror tweezers and magic to reassemble
  • did I already say fucking glue everywhere?
  • vendor part names and spare part numbers are confusing

I want to mention that iFixit does have a really useful page about the device https://www.ifixit.com/Guide/Microsoft+Surface+Book+2+15-Inch+Battery+Replacement/160660

Unfortunately, the images were not taken in the exact disassembly order. In the step “Detach the ribbon cables connecting the underside of the screen to the motherboard.” which is before the removal of the mainboard, the corresponding image already has the mainboard screws removed.

But that is complaining on a really high level, considering the guide even says “WARNING: This guide is missing many steps.”.

Having a 95% correct guide is still way more useful than having none at all. I am publishing those images in the hopes that they might help with your repair.

https://learn.microsoft.com/en-us/surface/surface-system-sku-reference, Surface_Book_1793

esphome lights with multiple outputs

I have some weird DIY lights fixtures at home that are controlled over wifi. When I first build them, they used a micropython firmware that speaks MQTT. I added code so they get auto-discovered by home-assistant, but never bothered to fully implement and debug it. One side-effect was that I had to restart the lights as soon as the MQTT connection broke, e.g. when restarting the home-assistant container or network outages. So after I learned about esphome, it was kinda clear that I should just scrap my own python code and write a .yaml file for esphome instead.

For most of the LED-Dimmers that was simple. There is a PCA9685 component in upstream esphome, as well as a BME280 sensor that most of my boards have as well. Sprinkle in a few GPIOs for LEDs and buttons and we were done.

There was only one light fixture I did not migrate until today: my ceiling light. The PCB was bodged and not documented. It has four powerful LEDs that need cooling, so one GPIO controls the fan. Which itself is attached to a low-side-buck-converter.

Schematic of a low-side-buck-converter.

Taken from https://electronics.stackexchange.com/questions/330471/low-side-n-mosfet-buck-converter

And to make things even more complicated, the four main LEDs all should be set to the same brightness. So multiple float-output need to be set at the same time. Unfortunately the esphome light component only allows one output. The solution for that is to add lambda code into the .yaml file.

light:
  - platform: monochromatic
    icon: "mdi:ceiling-light"
    name: "Deckenlampe"
    output: 'pwm0_dummy'
    gamma_correct: 1.0 # use 1.0 so we can get the 'real' brightnes by using the get_brightness() call
    id: "mlight"
    # we can get away with not implementing the 'on_turn_off' state, since we always turn on in the on_state call
    on_turn_off:
      - lambda: |-
          id(light09).turn_off().perform();
          id(light11).turn_off().perform();
          id(light13).turn_off().perform();
          id(light15).turn_off().perform();
          float fan_v = 0;
          id(fan_pwm).set_level(fan_v);
          id(fan_speed_sensor).publish_state(fan_v * 100); // show 0..100% value
    on_state:
      - lambda: |-
          // remote_values holds the values reported to the frontend.
          // we cannot use current_values since that is about to update in the on_state change call
          float br = id(mlight).remote_values.get_brightness();
          //ESP_LOGD("main", "===== got brightness %f", br);
          id(light09).turn_on().set_brightness(br).perform();
          id(light11).turn_on().set_brightness(br).perform();
          id(light13).turn_on().set_brightness(br).perform();
          id(light15).turn_on().set_brightness(br).perform();
          // now the fan control
          // these values were checked experimentally, there is no deeper meaning
          // with 80% there is some air movement, but the fans are not to loud
          // and 51% does turn the fans on just slightly
          float fan_v = 0;
          if (br > 0.5) {
            fan_v = 0.51; //130/255
          }
          if (br > 0.9) {
            fan_v = 0.8;  //200/255
          }
          id(fan_pwm).set_level(fan_v);
          id(fan_speed_sensor).publish_state(fan_v * 100); // show 0..100% value

The mlight entity is the only light that is exposed to the user. It has a 1.0 gamma, so its output brightness is the same as the setpoint the user selects in the home-assistant interface. It is mapped to a unused output and only serves as the dummy for controlling the 4 real outputs.

Because esphome adds a transition by default, the trick is to copy the remote_values.get_brightness() value over to the other lights. Then do a lookup for the the fan speed and publish it as template sensor. If you use current_values instead, the lights will always lag behind the actual commanded setpoint, because the on_change handler is executed at the beginning of the transition.