I am in need for a z-measurement device for my cnc. So I checked ebay and got me a used mitotuyo depth gauge for ~60€. It has an ‘SPC’-Interface for digital readout. Fortunately there is some information on the Web on howto access that interface.
DIY connector
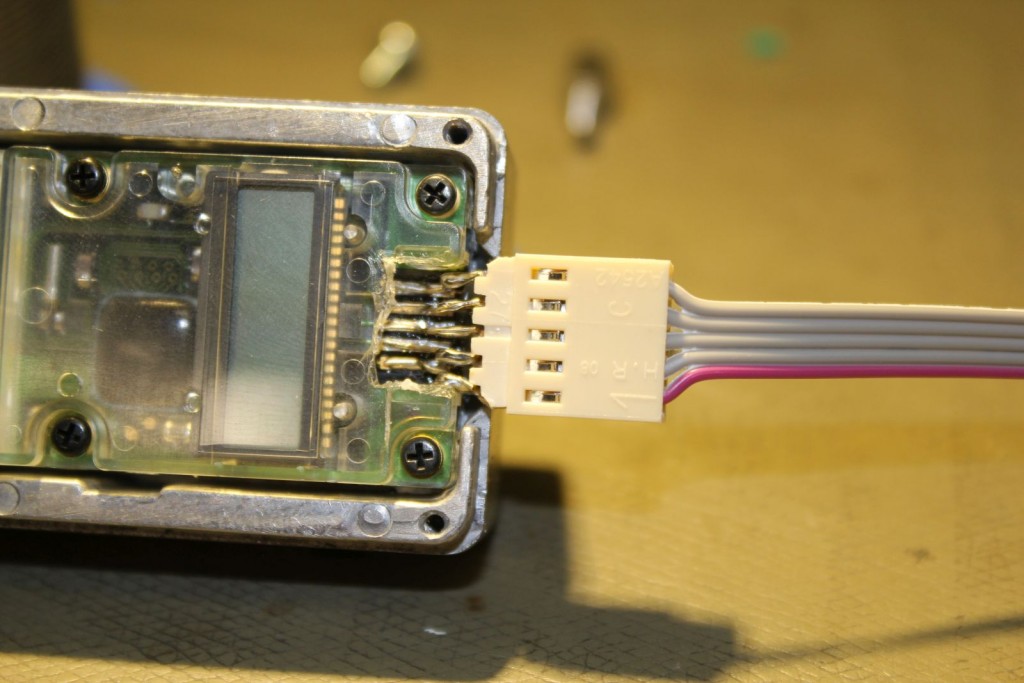
I didn’t want to buy an expensive Mitutoyo-cable, so I decided to solder on my own connector.
Pinout is:
1. GND (red cable)
2. Serial Data Out (OpenCollector)
3. Serial Clock Out (OpenCollector)
4. (unused)
5. Request In
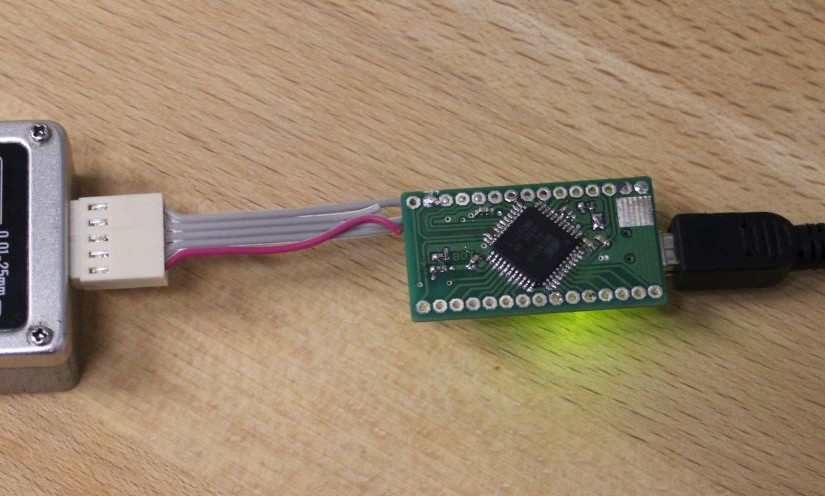
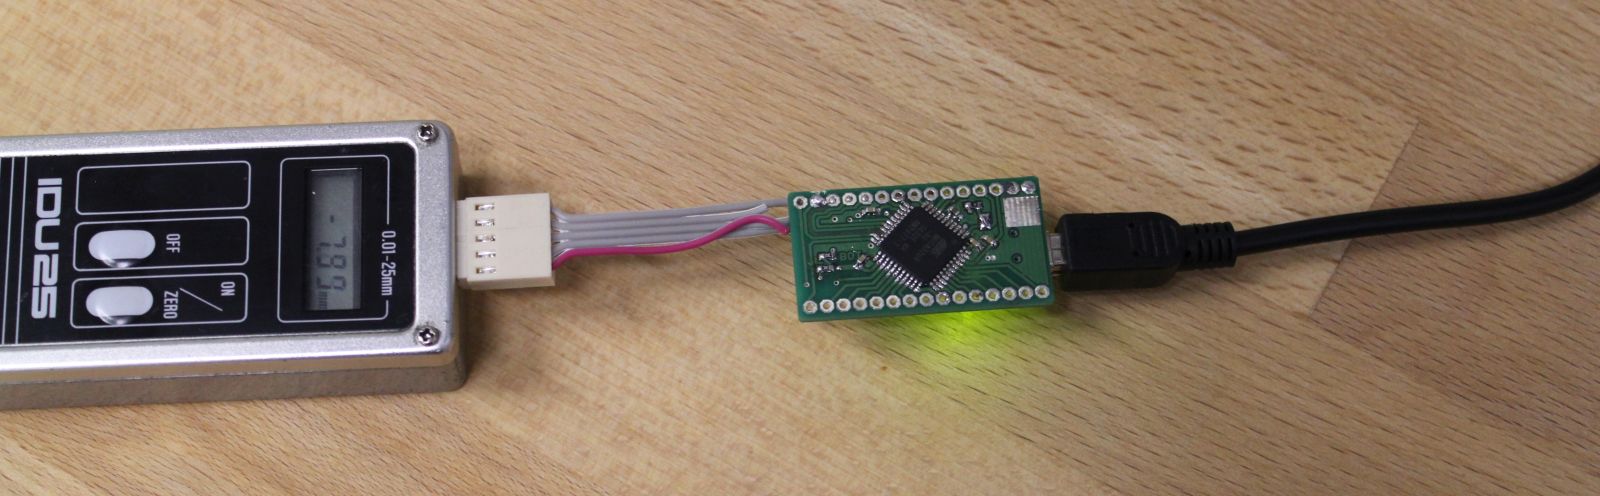
The USB-Conversion is done by a tinymega microcontroller board which features an Atmega32U4 CPU. With the LUFA USB-Stack it presents itself to the host as a virtual serial port.
The implementation of the SPC-Protocol decoding is pretty straightforward. Send a request on one pin, read in data via SPI. I chose to do all of this in software with one interrupt (not using the SPI peripheral of the CPU). You can see my implementation here on github.
caliper + tinymega
Now all that is left is to hook it up to linuxcnc. I haven’t done that yet, but most likely it only requires 10 lines of python to generate a HAL-Module.
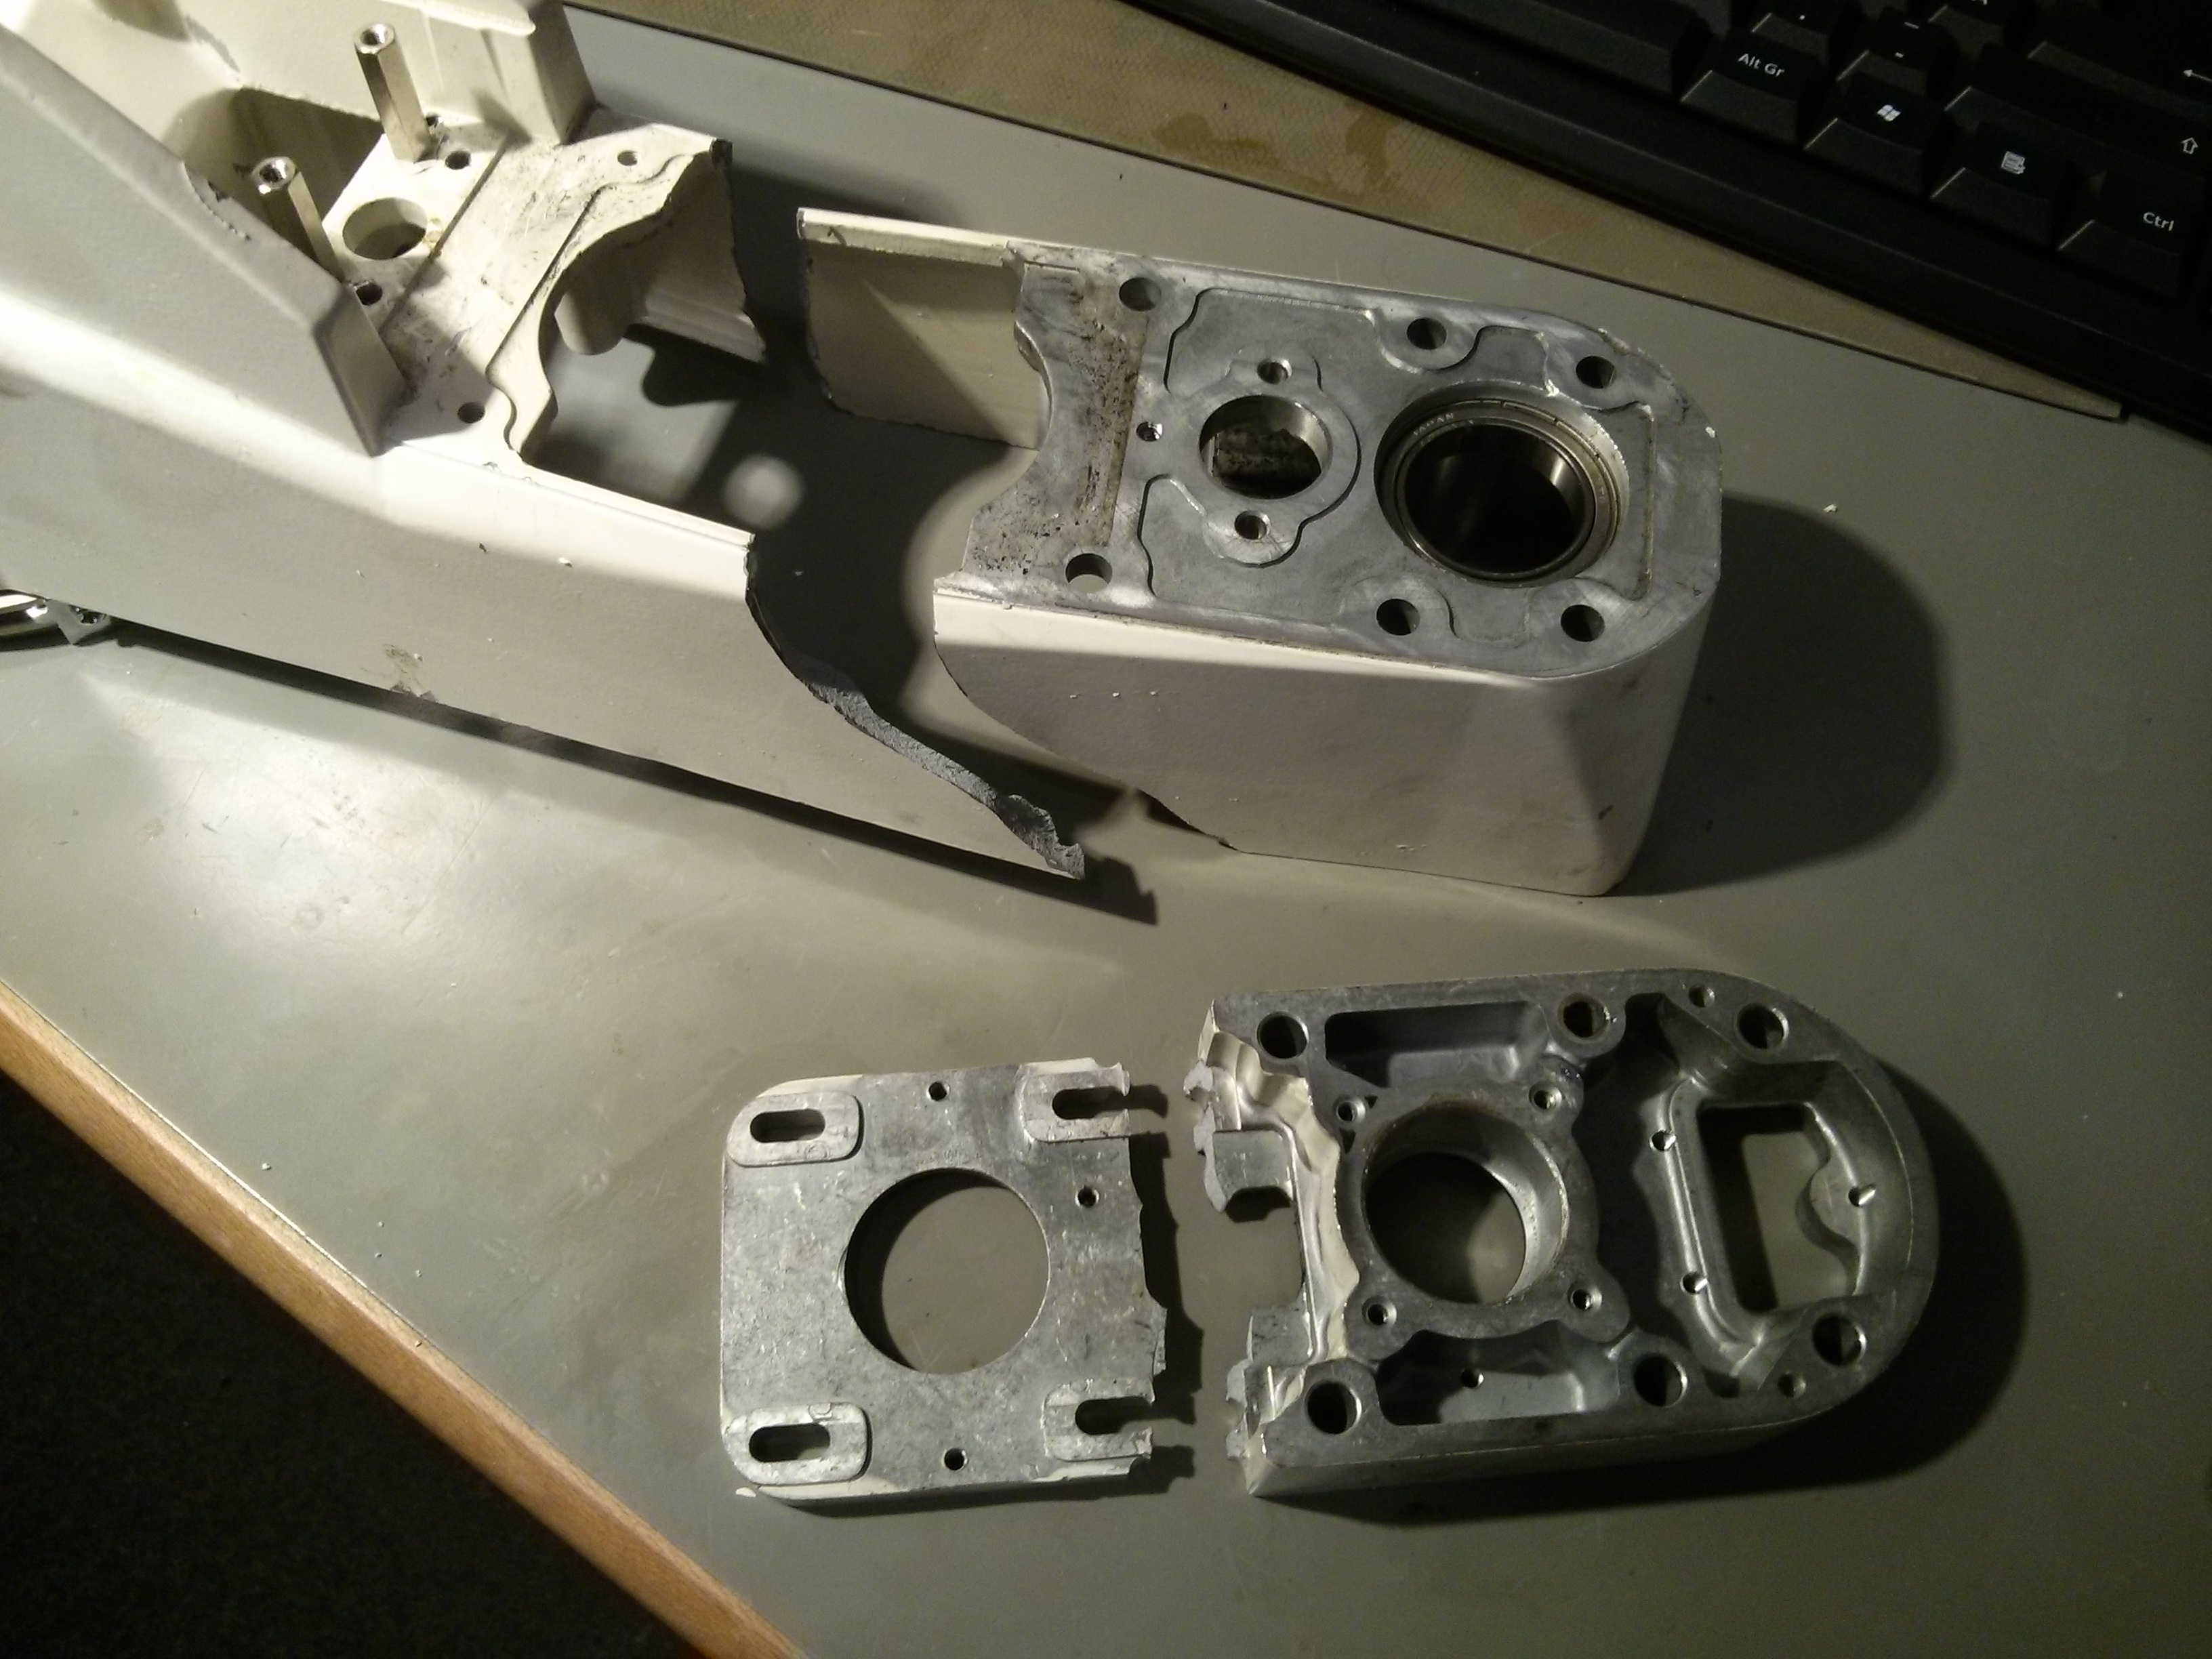
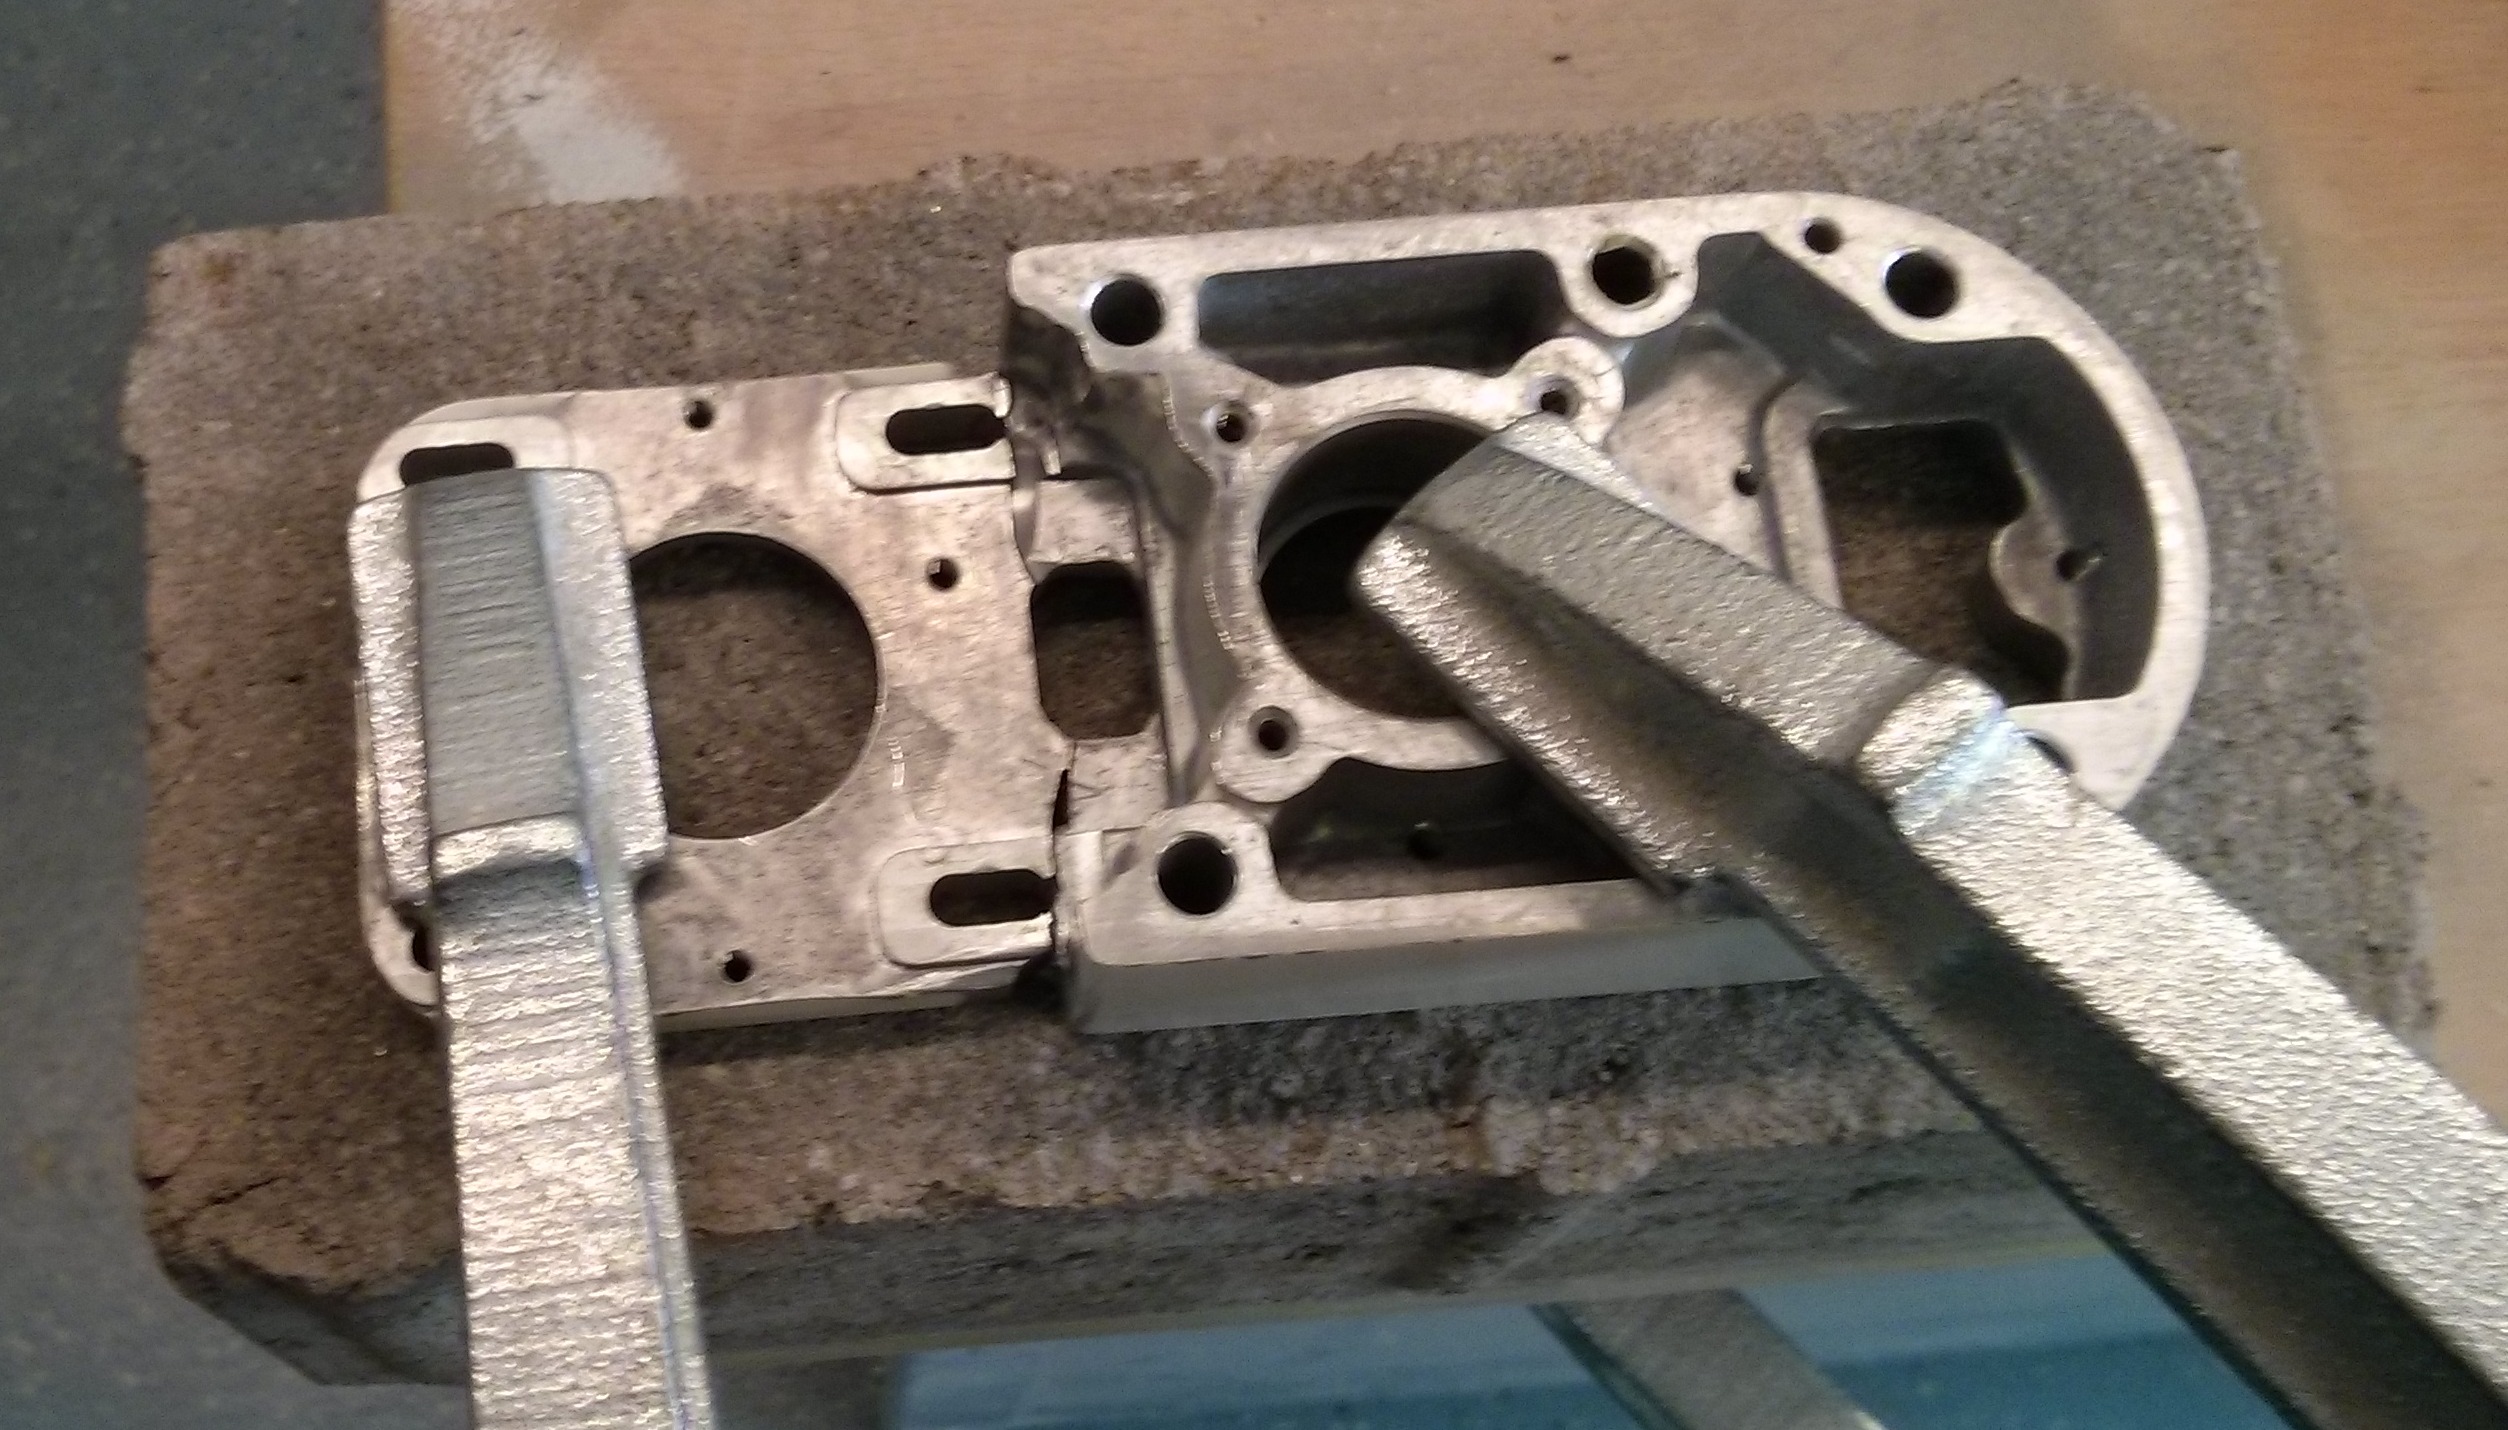
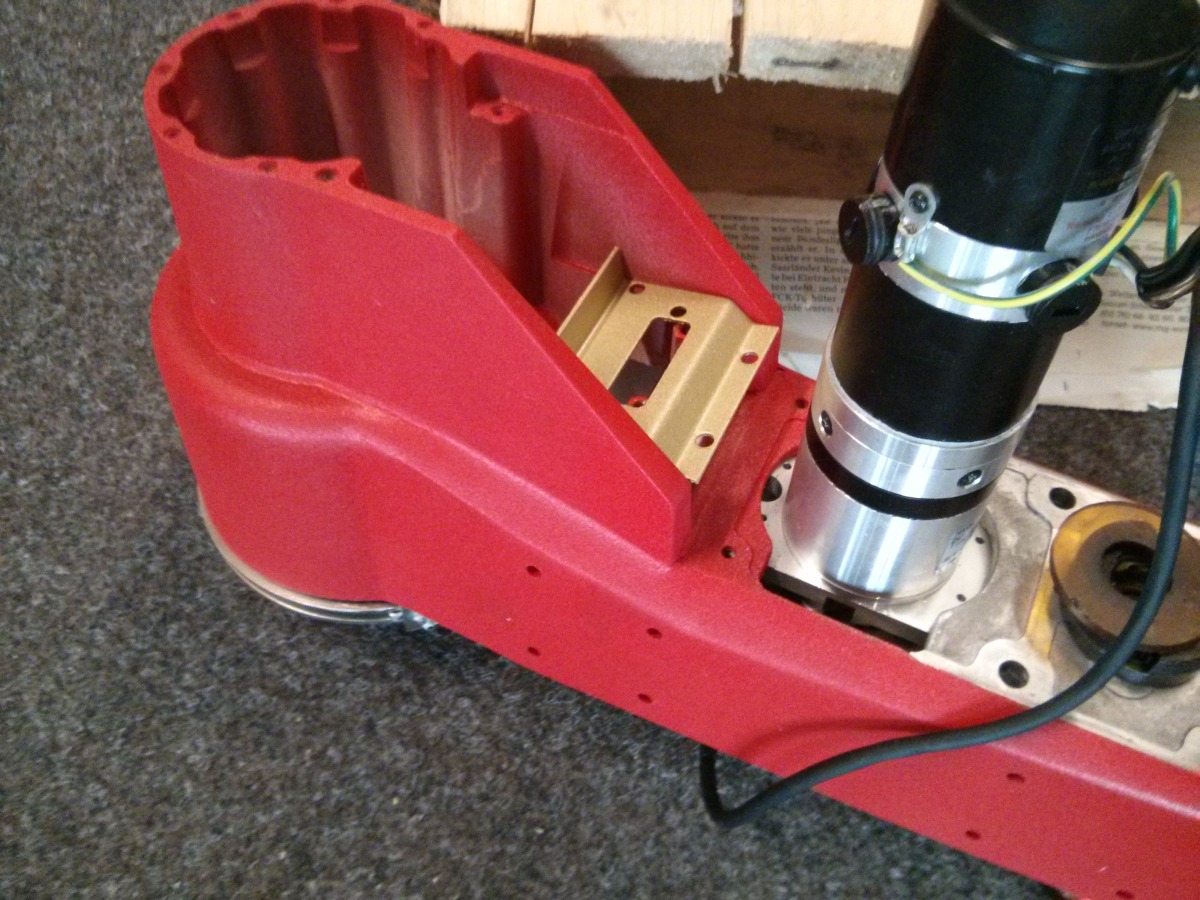
Turns out the drives of my Scara Robot are not velocity-mode drives but torque-mode drives instead. Setting the drive input to a constant voltage results in constant accelleration. I learned this the hard way by crashing the robot :-/
Even though I had it fixed on an Europalette it managed to fall on its side. Second lesson learned: even ‘small’ a 200W drive can turn the whole thing in a fraction of a second. Hitting the floor broke some pieces. But see for yourself:
B-Arm and Z-Motor-Plate destruction
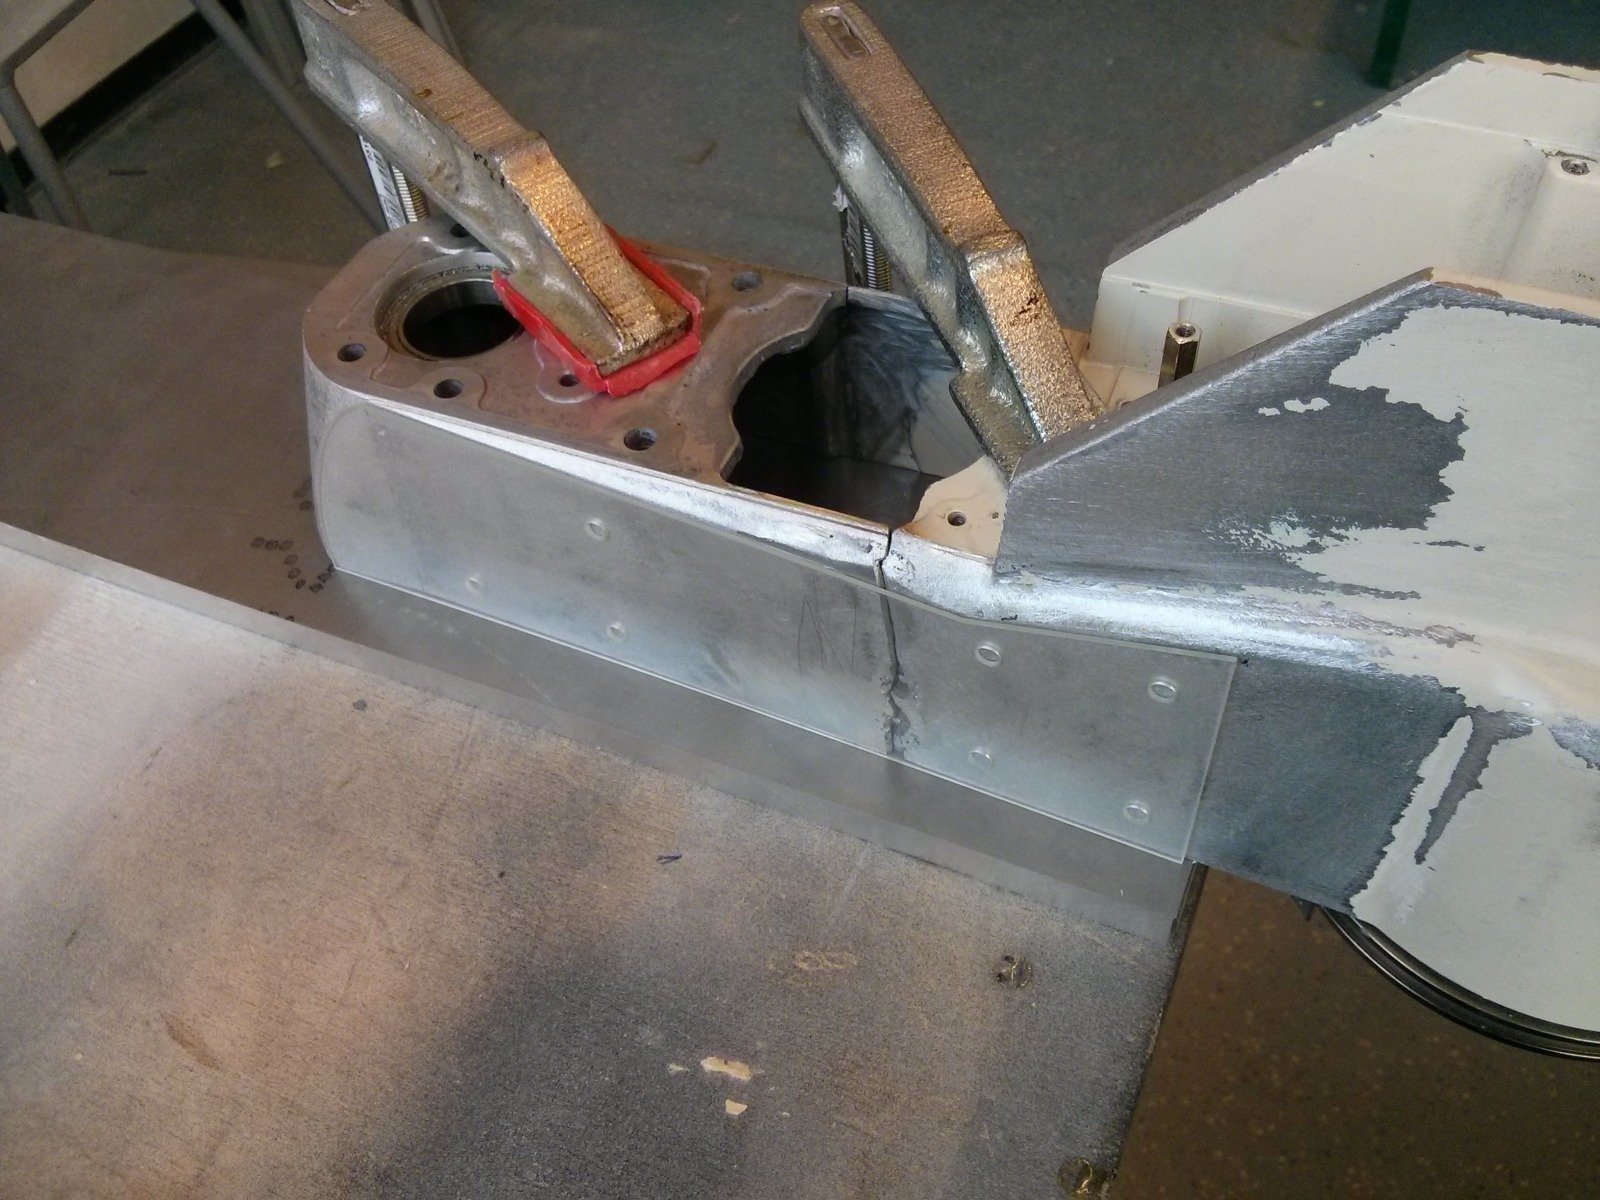
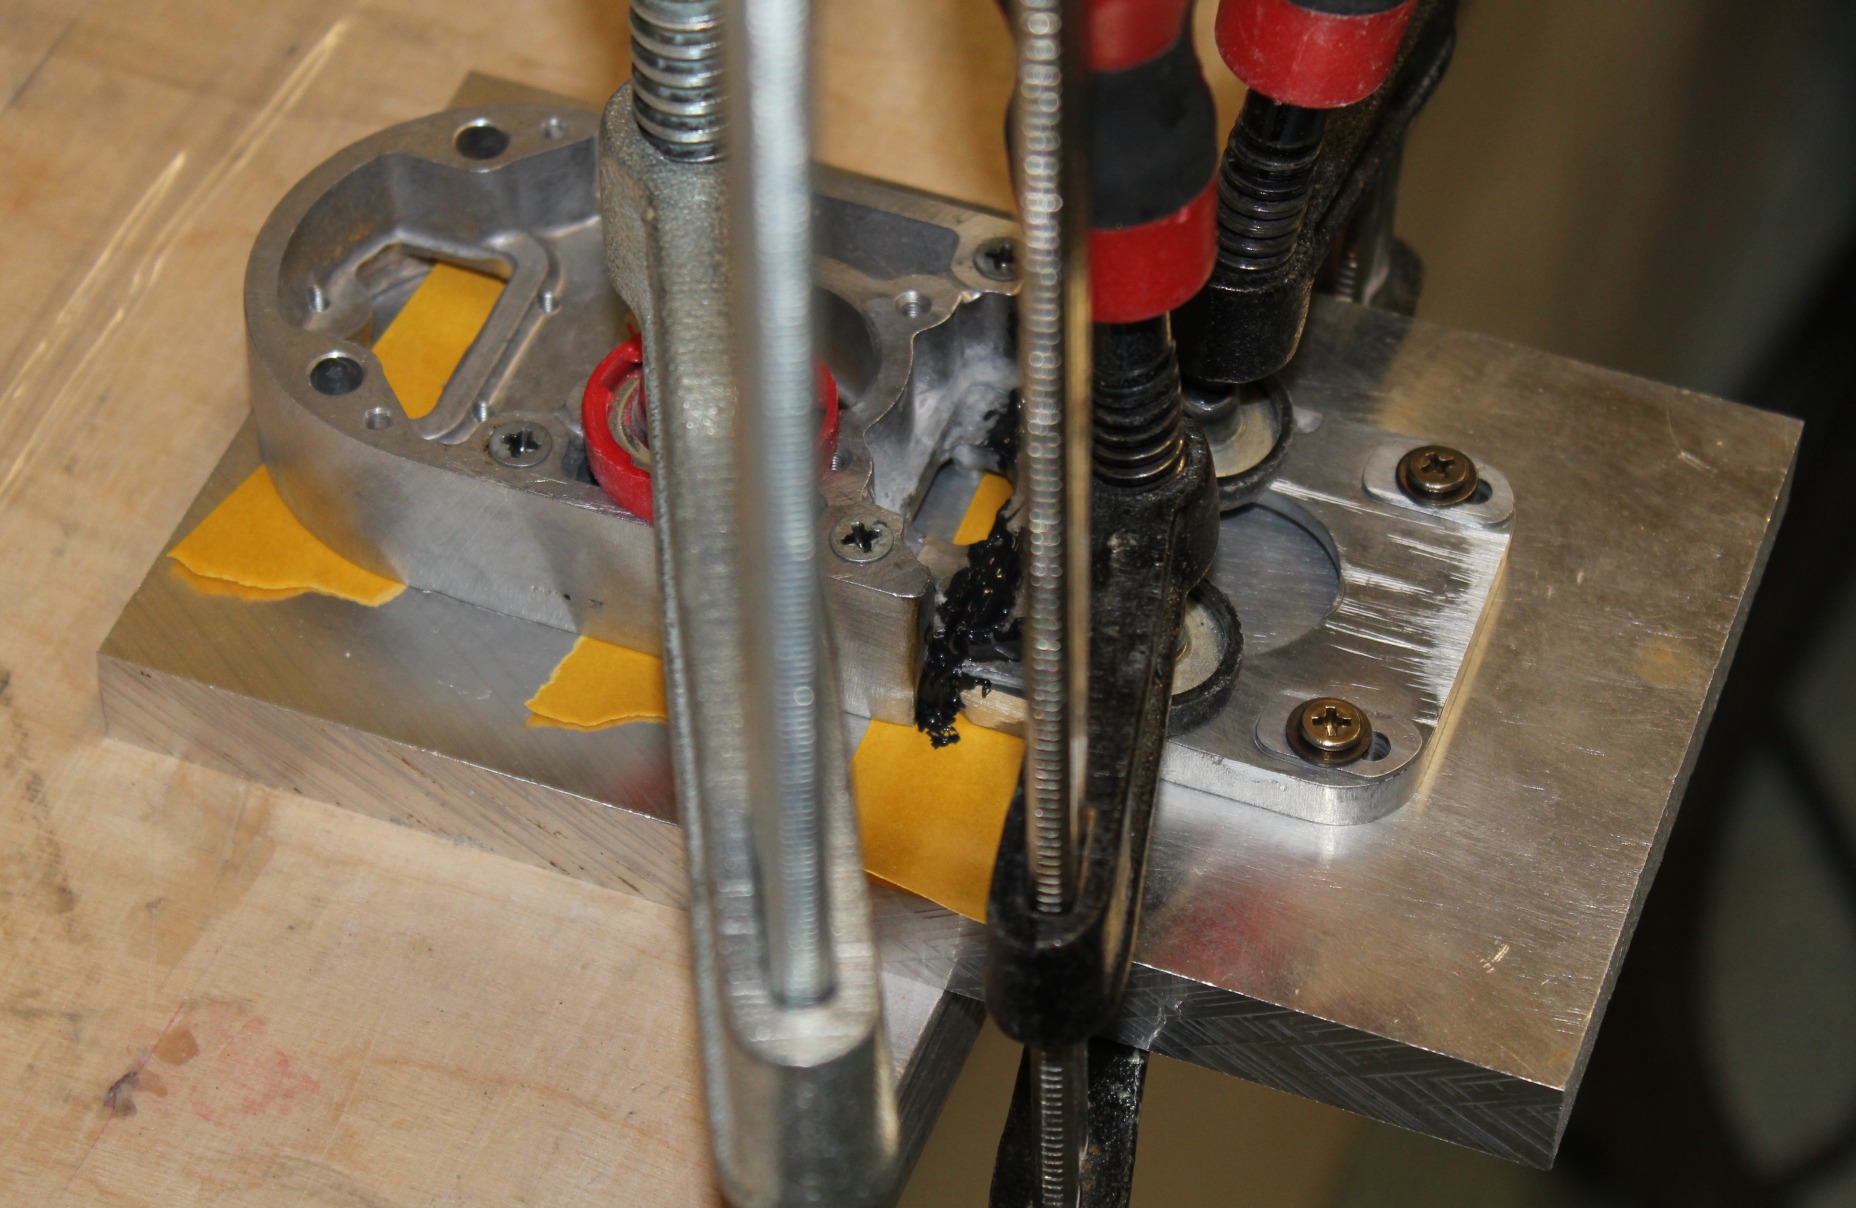
Those parts are both made out of cast aluminium. I do lack the equipment and skill to weld, so I asked a Friend of mine to do it. However, even with his long time experience he wasn’t able to fix the parts together. At first I got desperate and tried hard-soldering the Z-Motor-Mount. But even using two torches I wasnt able to get the part hot enough to accept the solder.
Z-Motor-Plate fixed with clamps ready to solder
As a last resort I deceided to glue the parts. Fortunately my sister works as a postdoc and is an expert for aluminium epoxy bonds. She did some rought calculations for me and helped select the correct adhesive: 3M Scotch-Weld DP490.
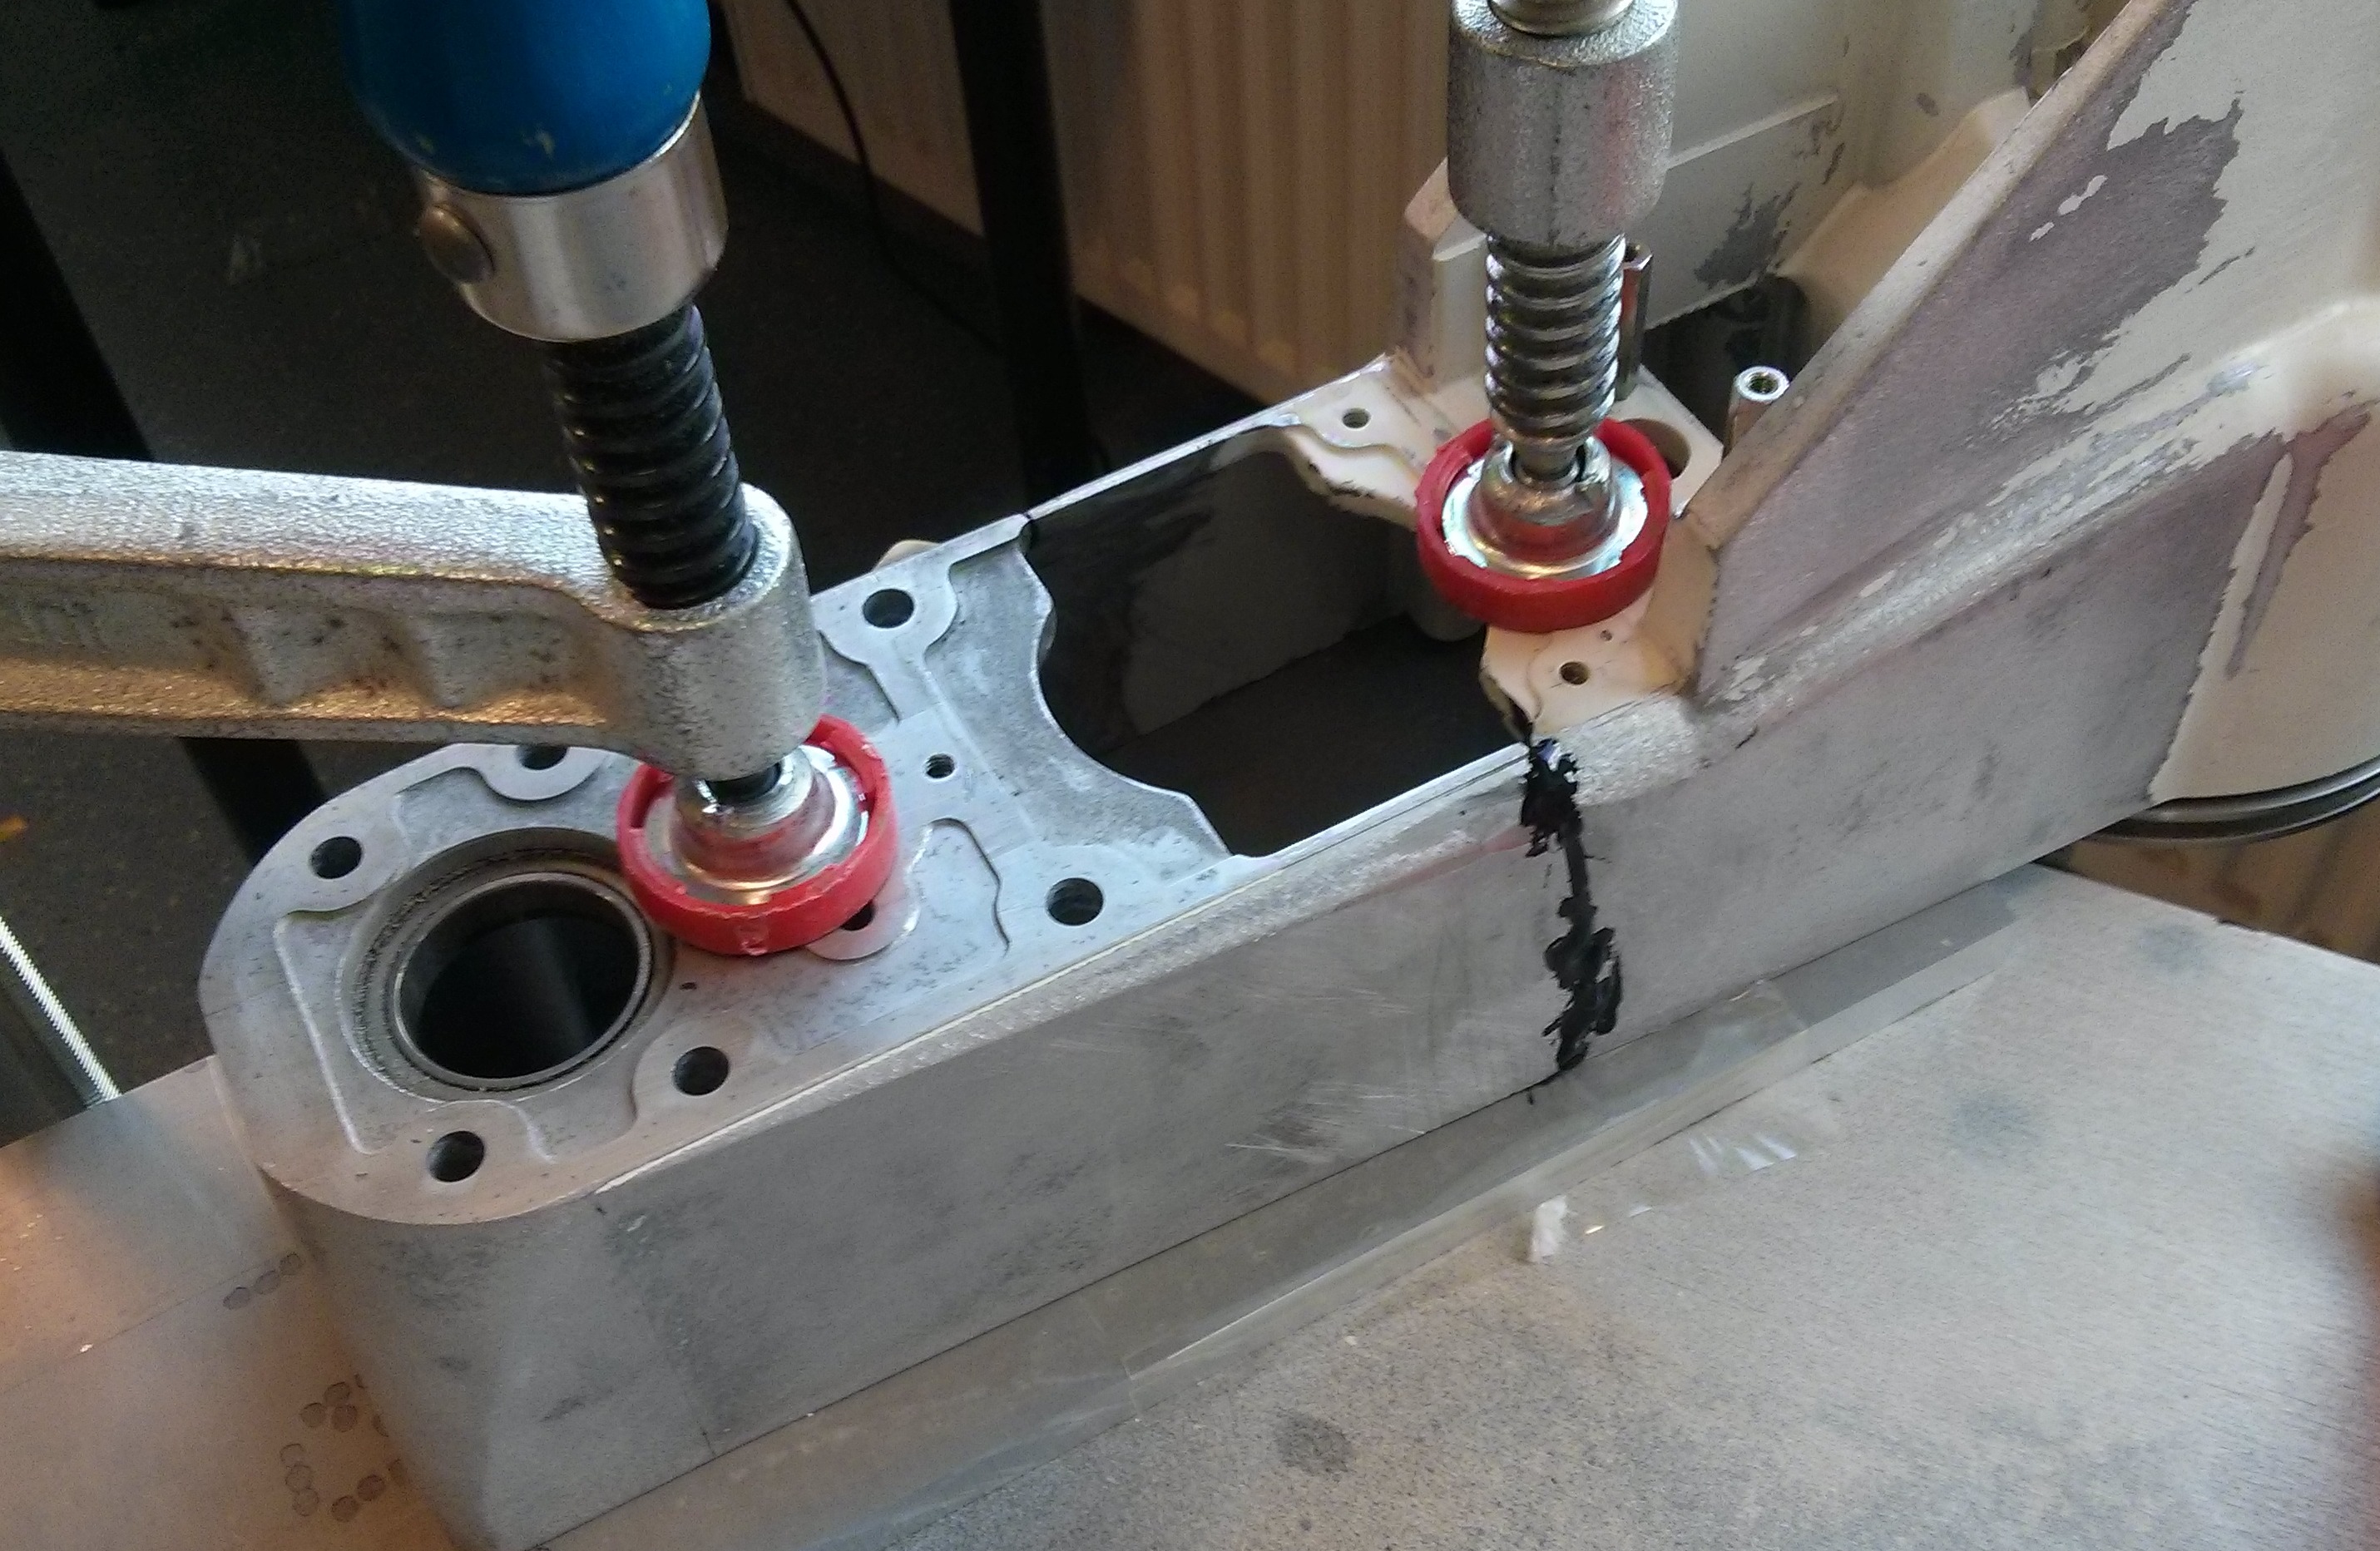
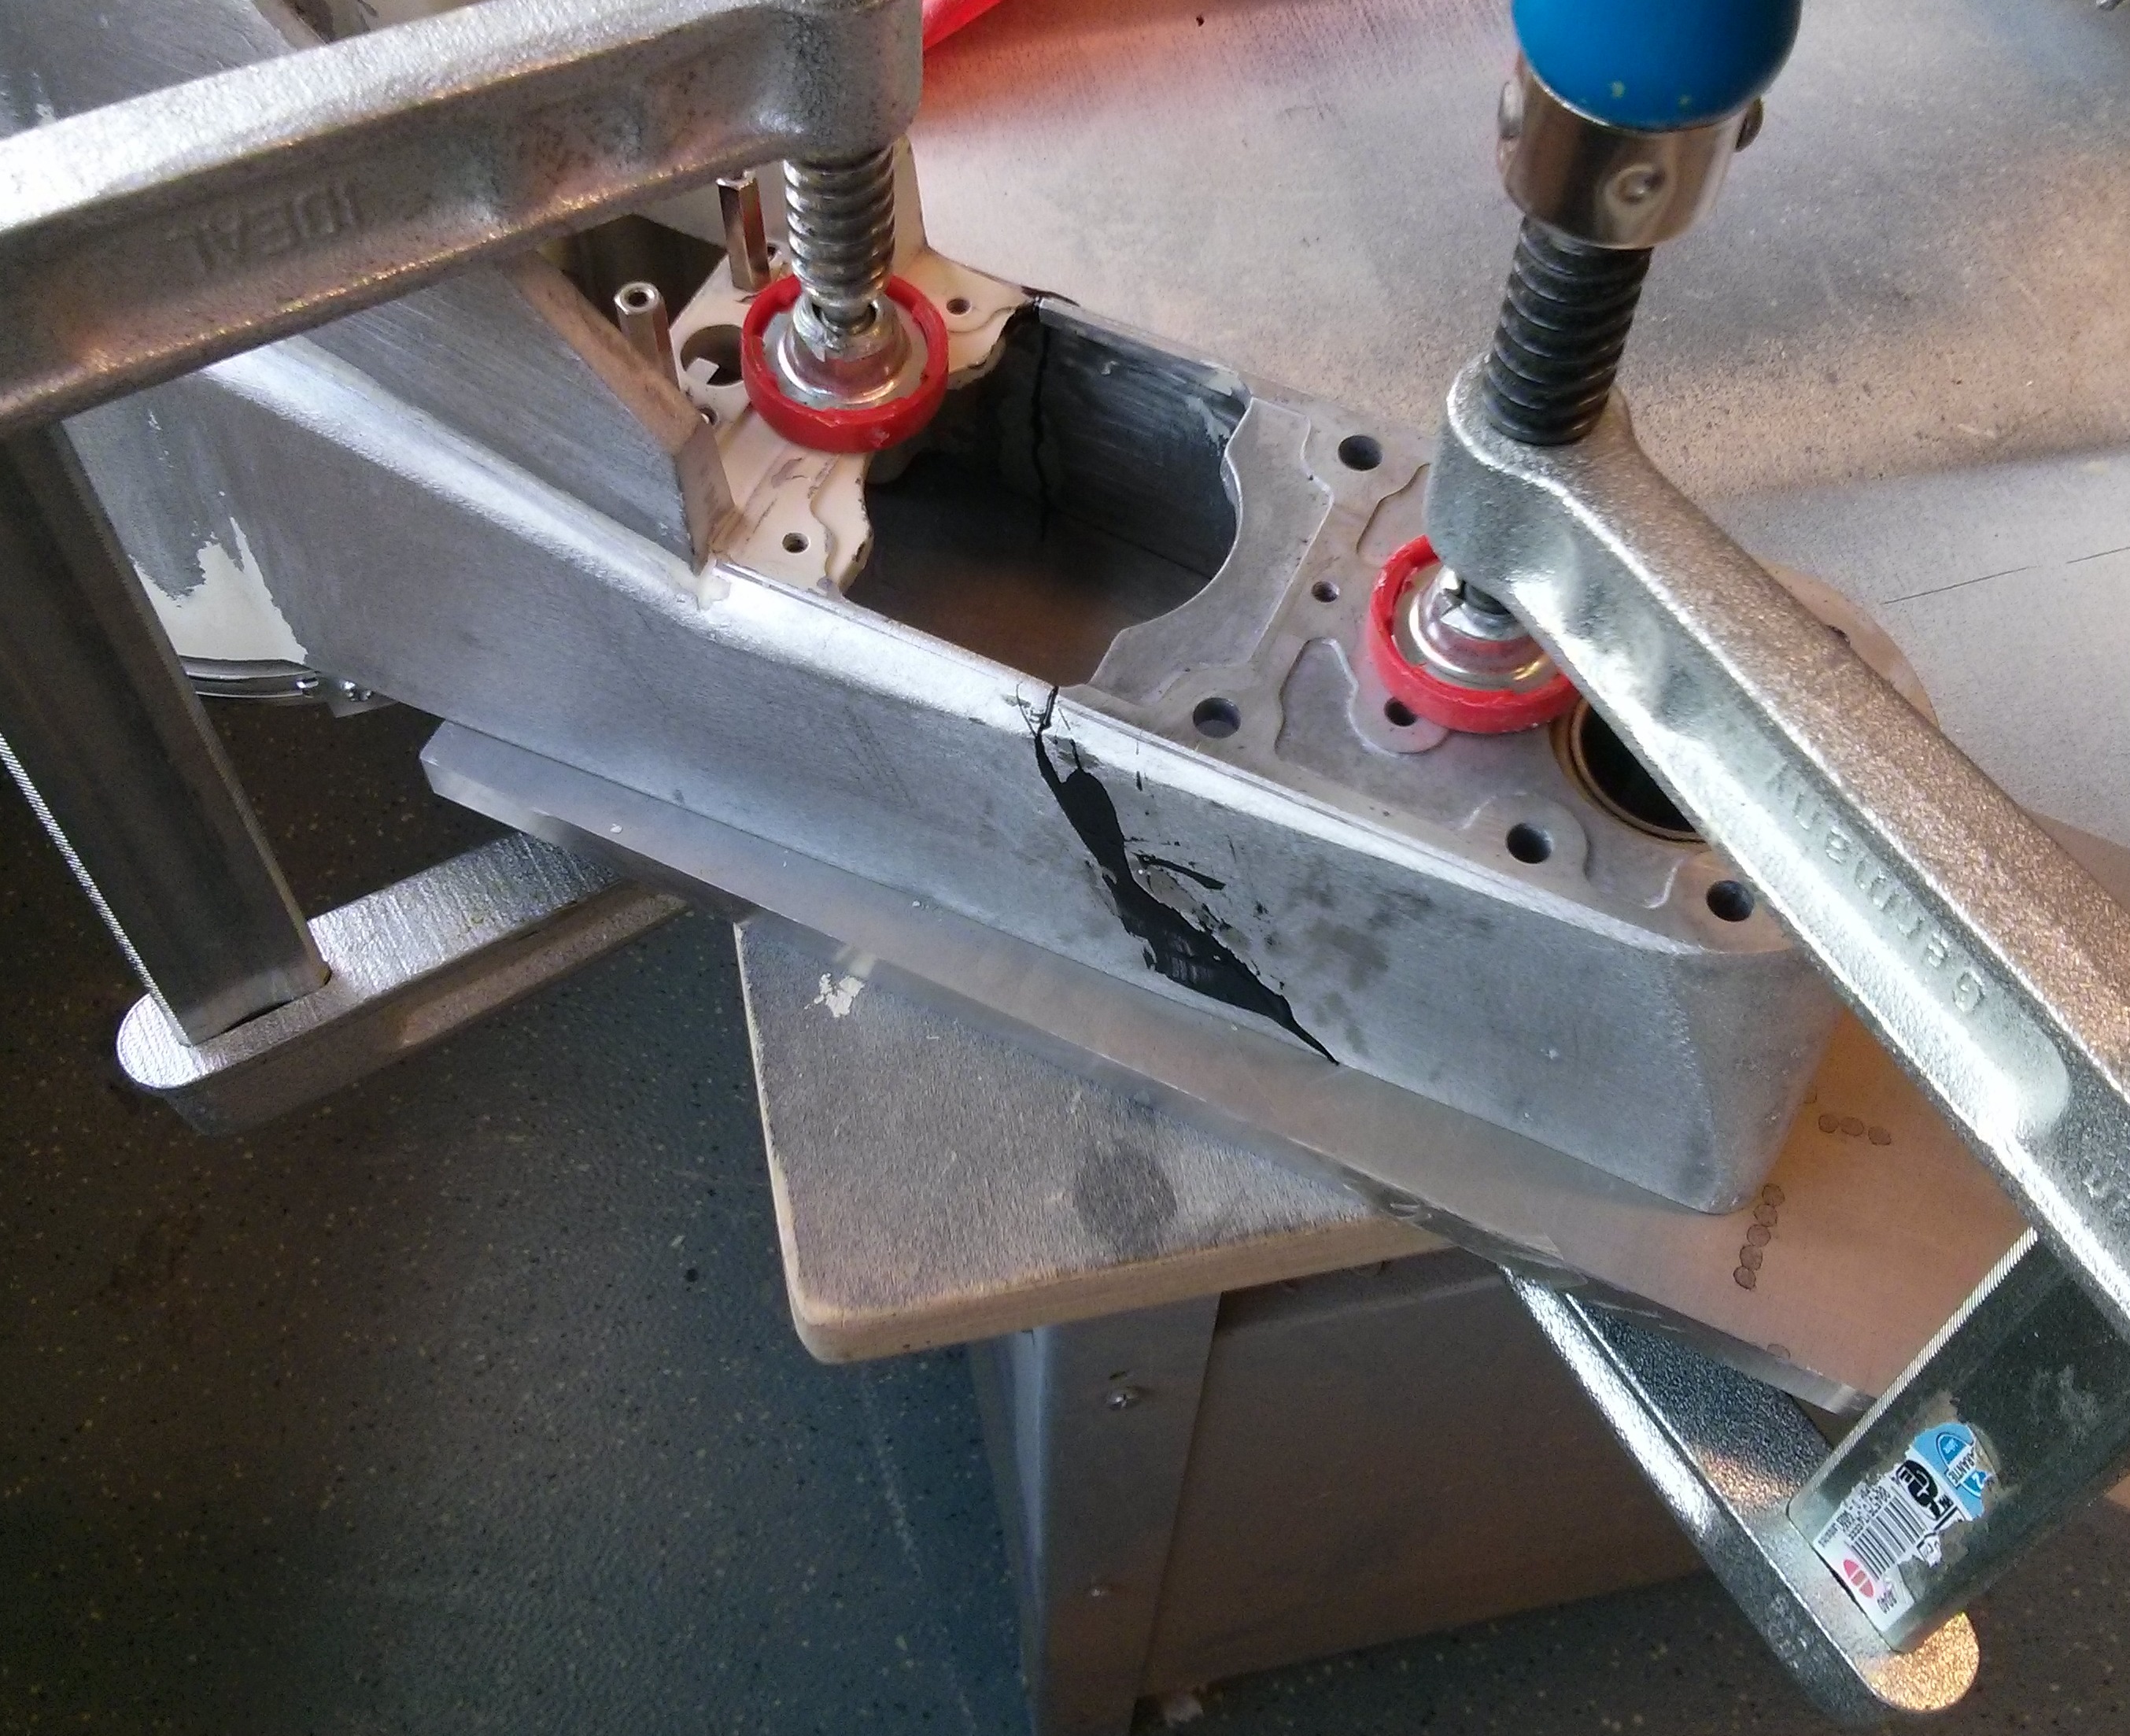
I prepared the parts by grinding away all paint and about 100microns of the aluminium. The last step helps because cast aluminium has different properties on the outer layers compared to the inner bulk material due to the casting process. I also cut some reinforcement plates from 6061 Aluminium. Then I cleaned everything several times with water/soap and acetone. Everything was clamped down on a clean plate and glued together in two steps: First the two broken bits were fixed together. After curing the residual glue was removed by grinding, then the reinforcement plates were glued. To improve the curing process I put a box over it to trap the air inside and heated everyhing which a hot air gun to 80°C. Unfortunately I didnt take that many pictures of the process:
broken B-Arm with mockup reinforcement plate
right side after first glue stop
left side after first glue stop
After that, I did some cosmetics. With a lot of car putty, grinding and even more putty and finally a red finish the part looked like this:
Fixed B-Arm with W-Motor already mounted
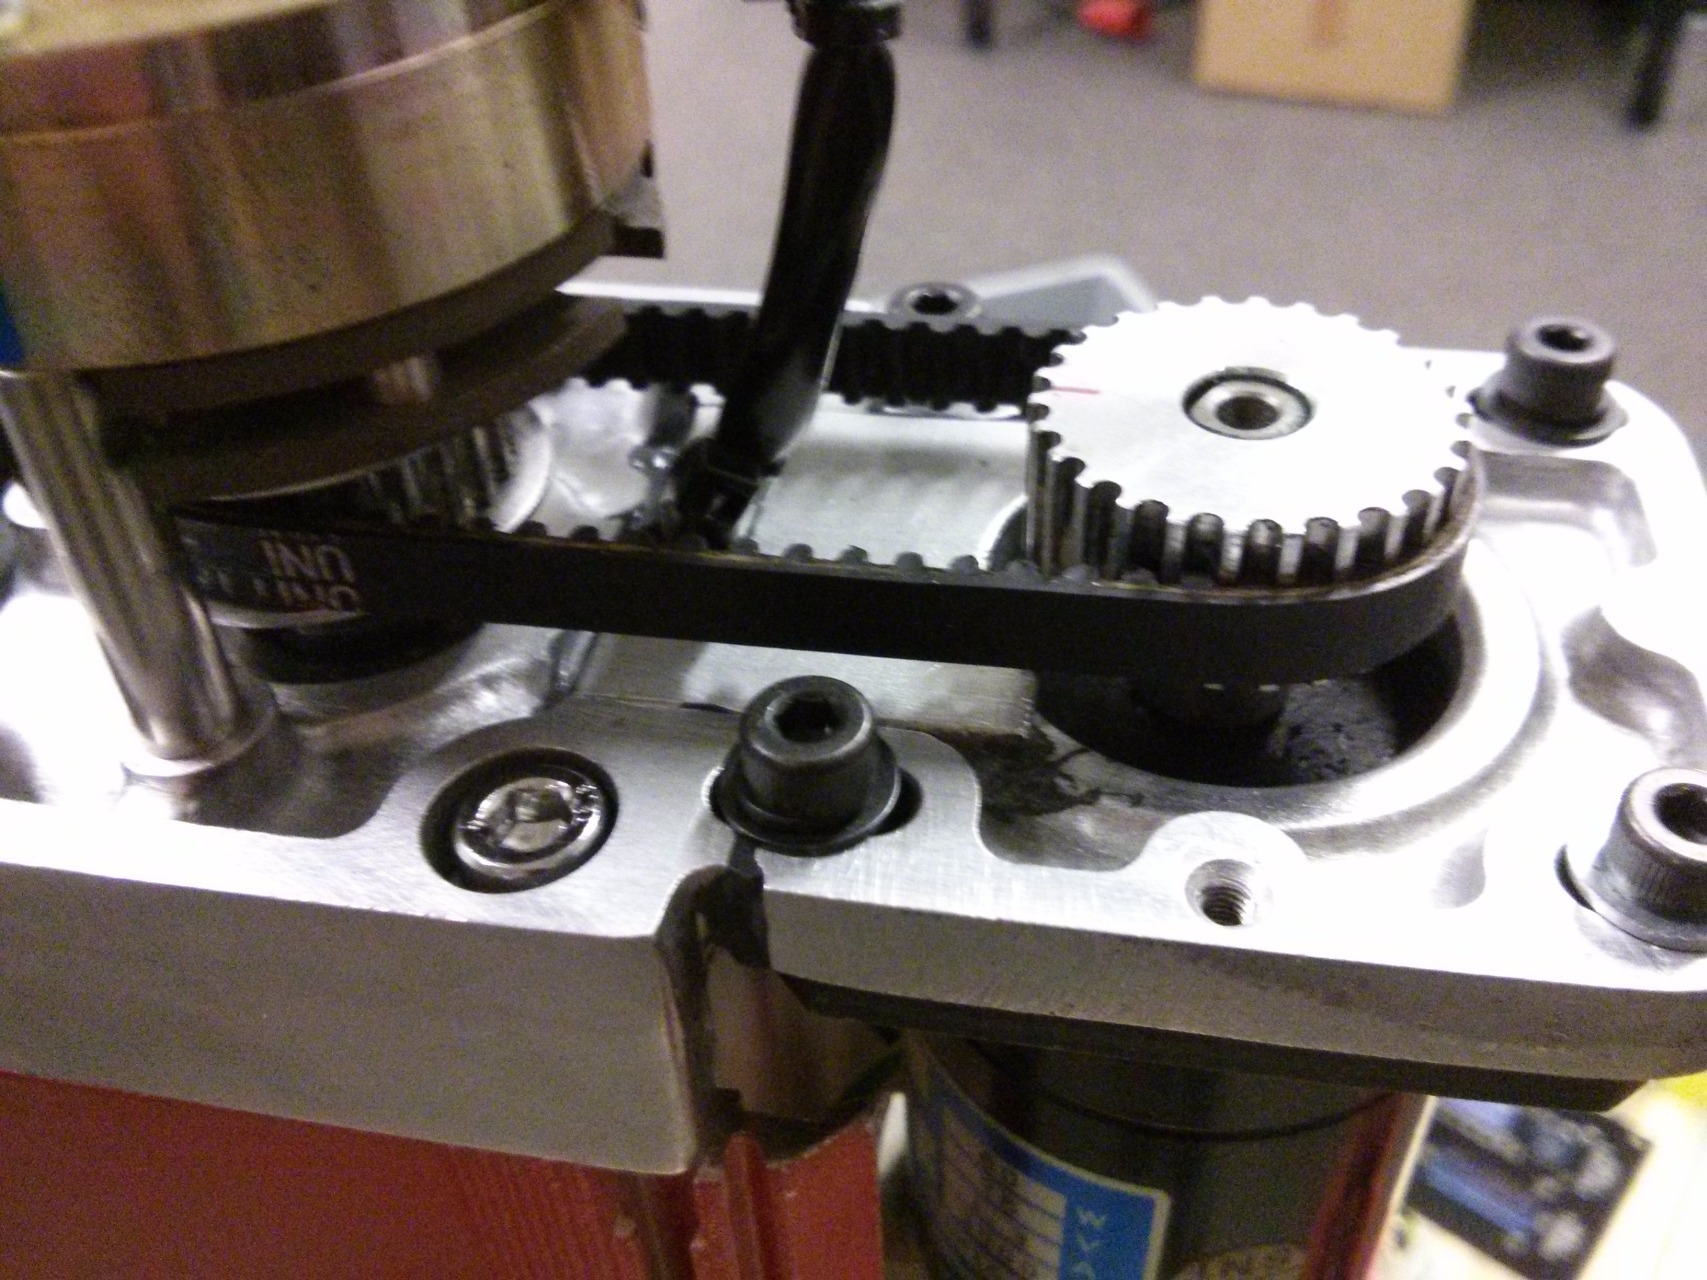
That concludes the B-Arm. Fixing the Z-Motor-Plate was basically the same. Here are some more pictures:
glueing the Z-Motor-Mount
Z-Motor-Mount fixed & assembled
That concludes the repair. I will cover the mechanical and electrical rebuild in a seperate Blogpost.
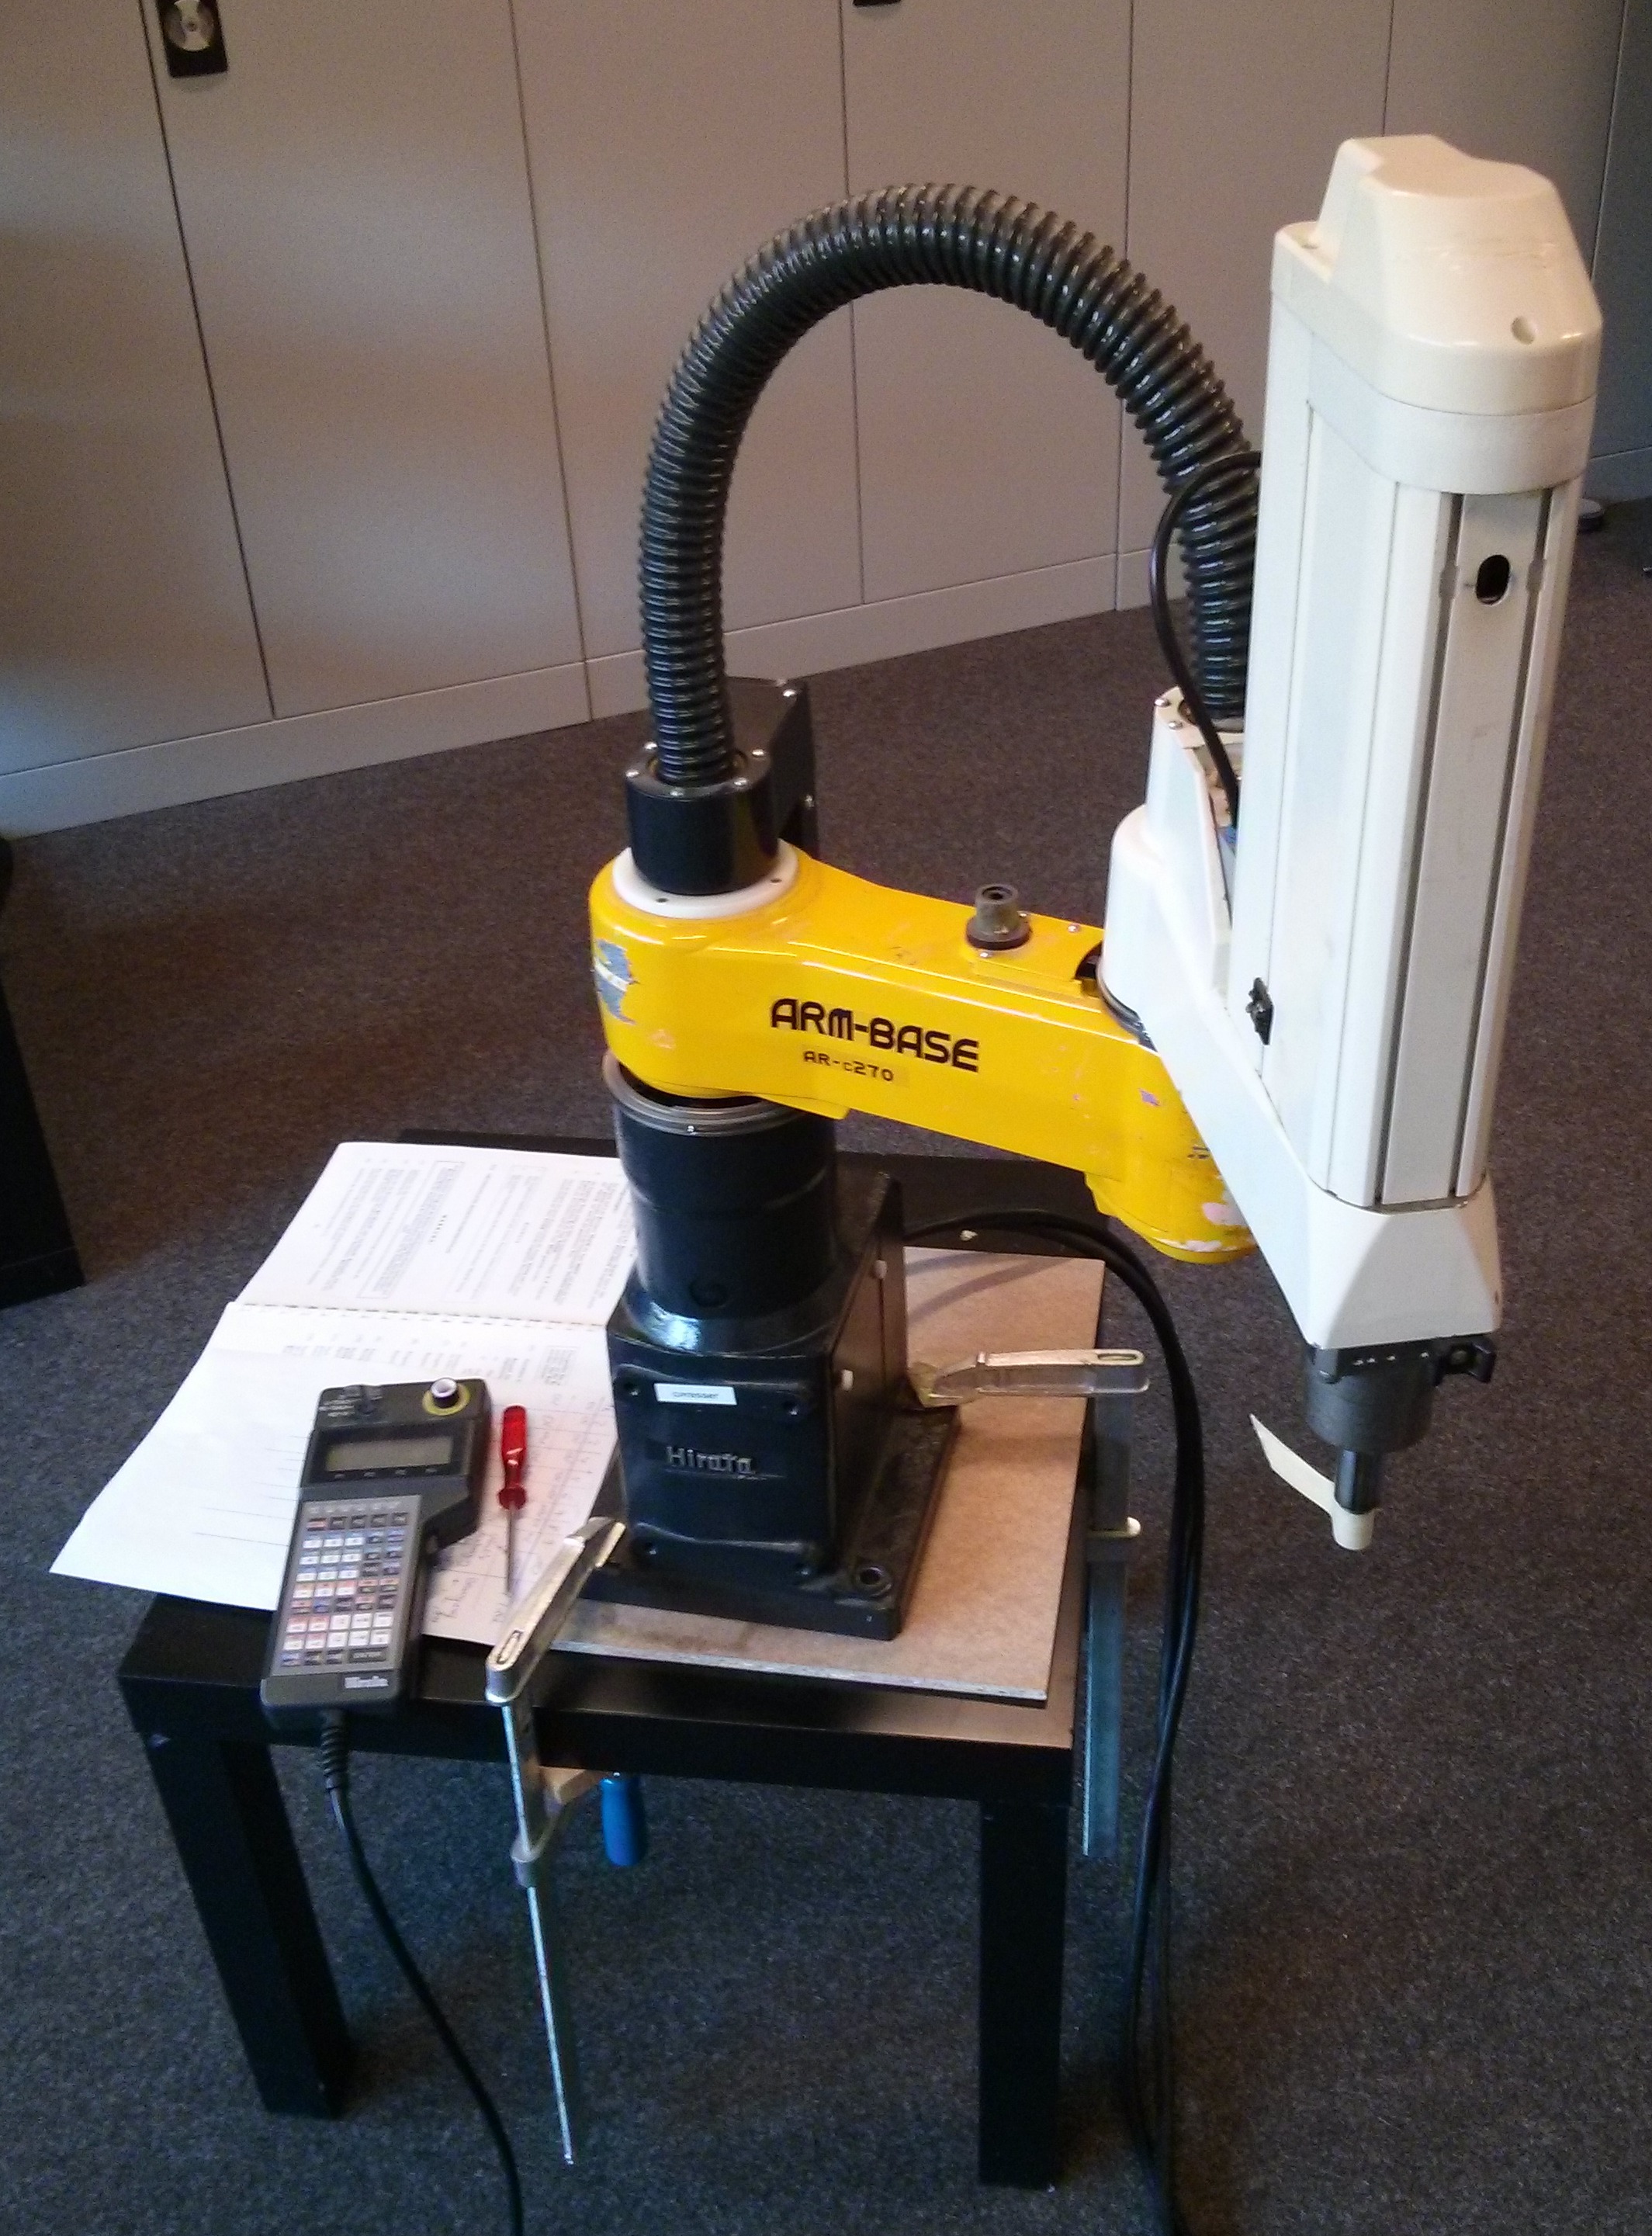
Recently I bought a Scara-Robot from Ebay. Its an older model with an outdated control. Motors, servos and encoders are in working condition. Using the Teach-Pendant I can move the Robot around.
My plan is to retrofit the control using linuxcnc. All IO will be done with a MESA 7i77+5i25 combo. I will try to reuse everything besides the original control.
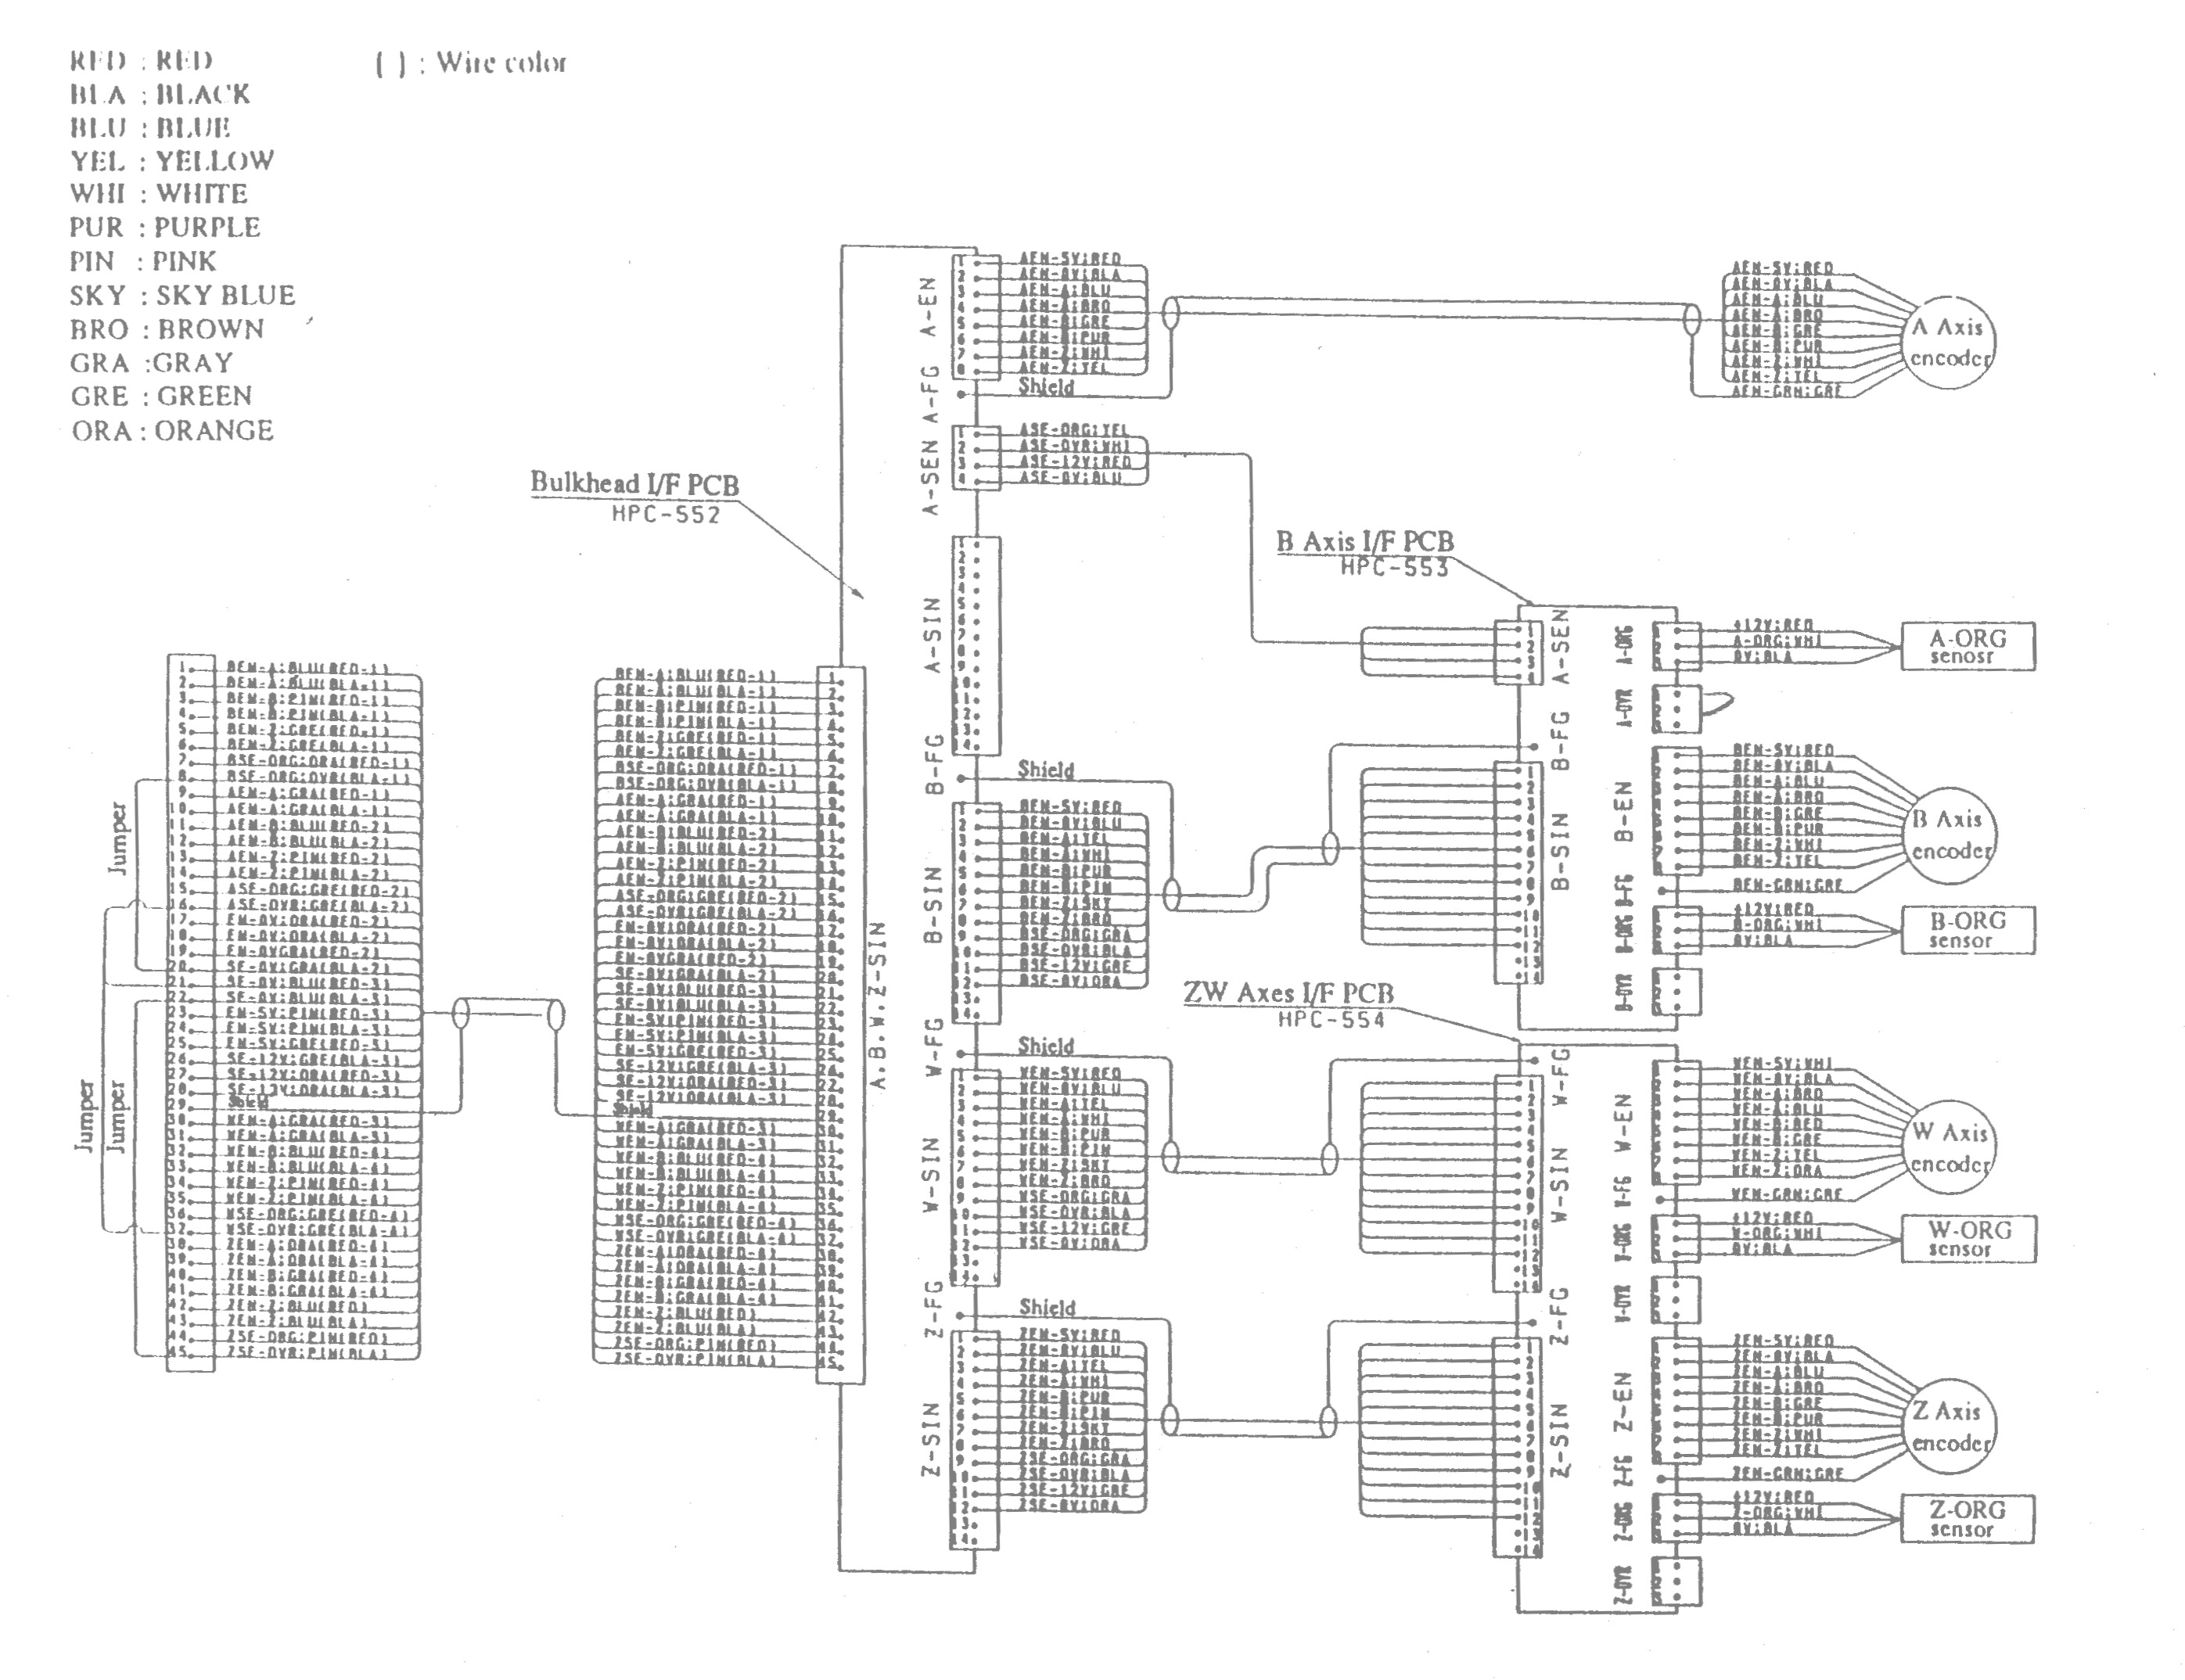
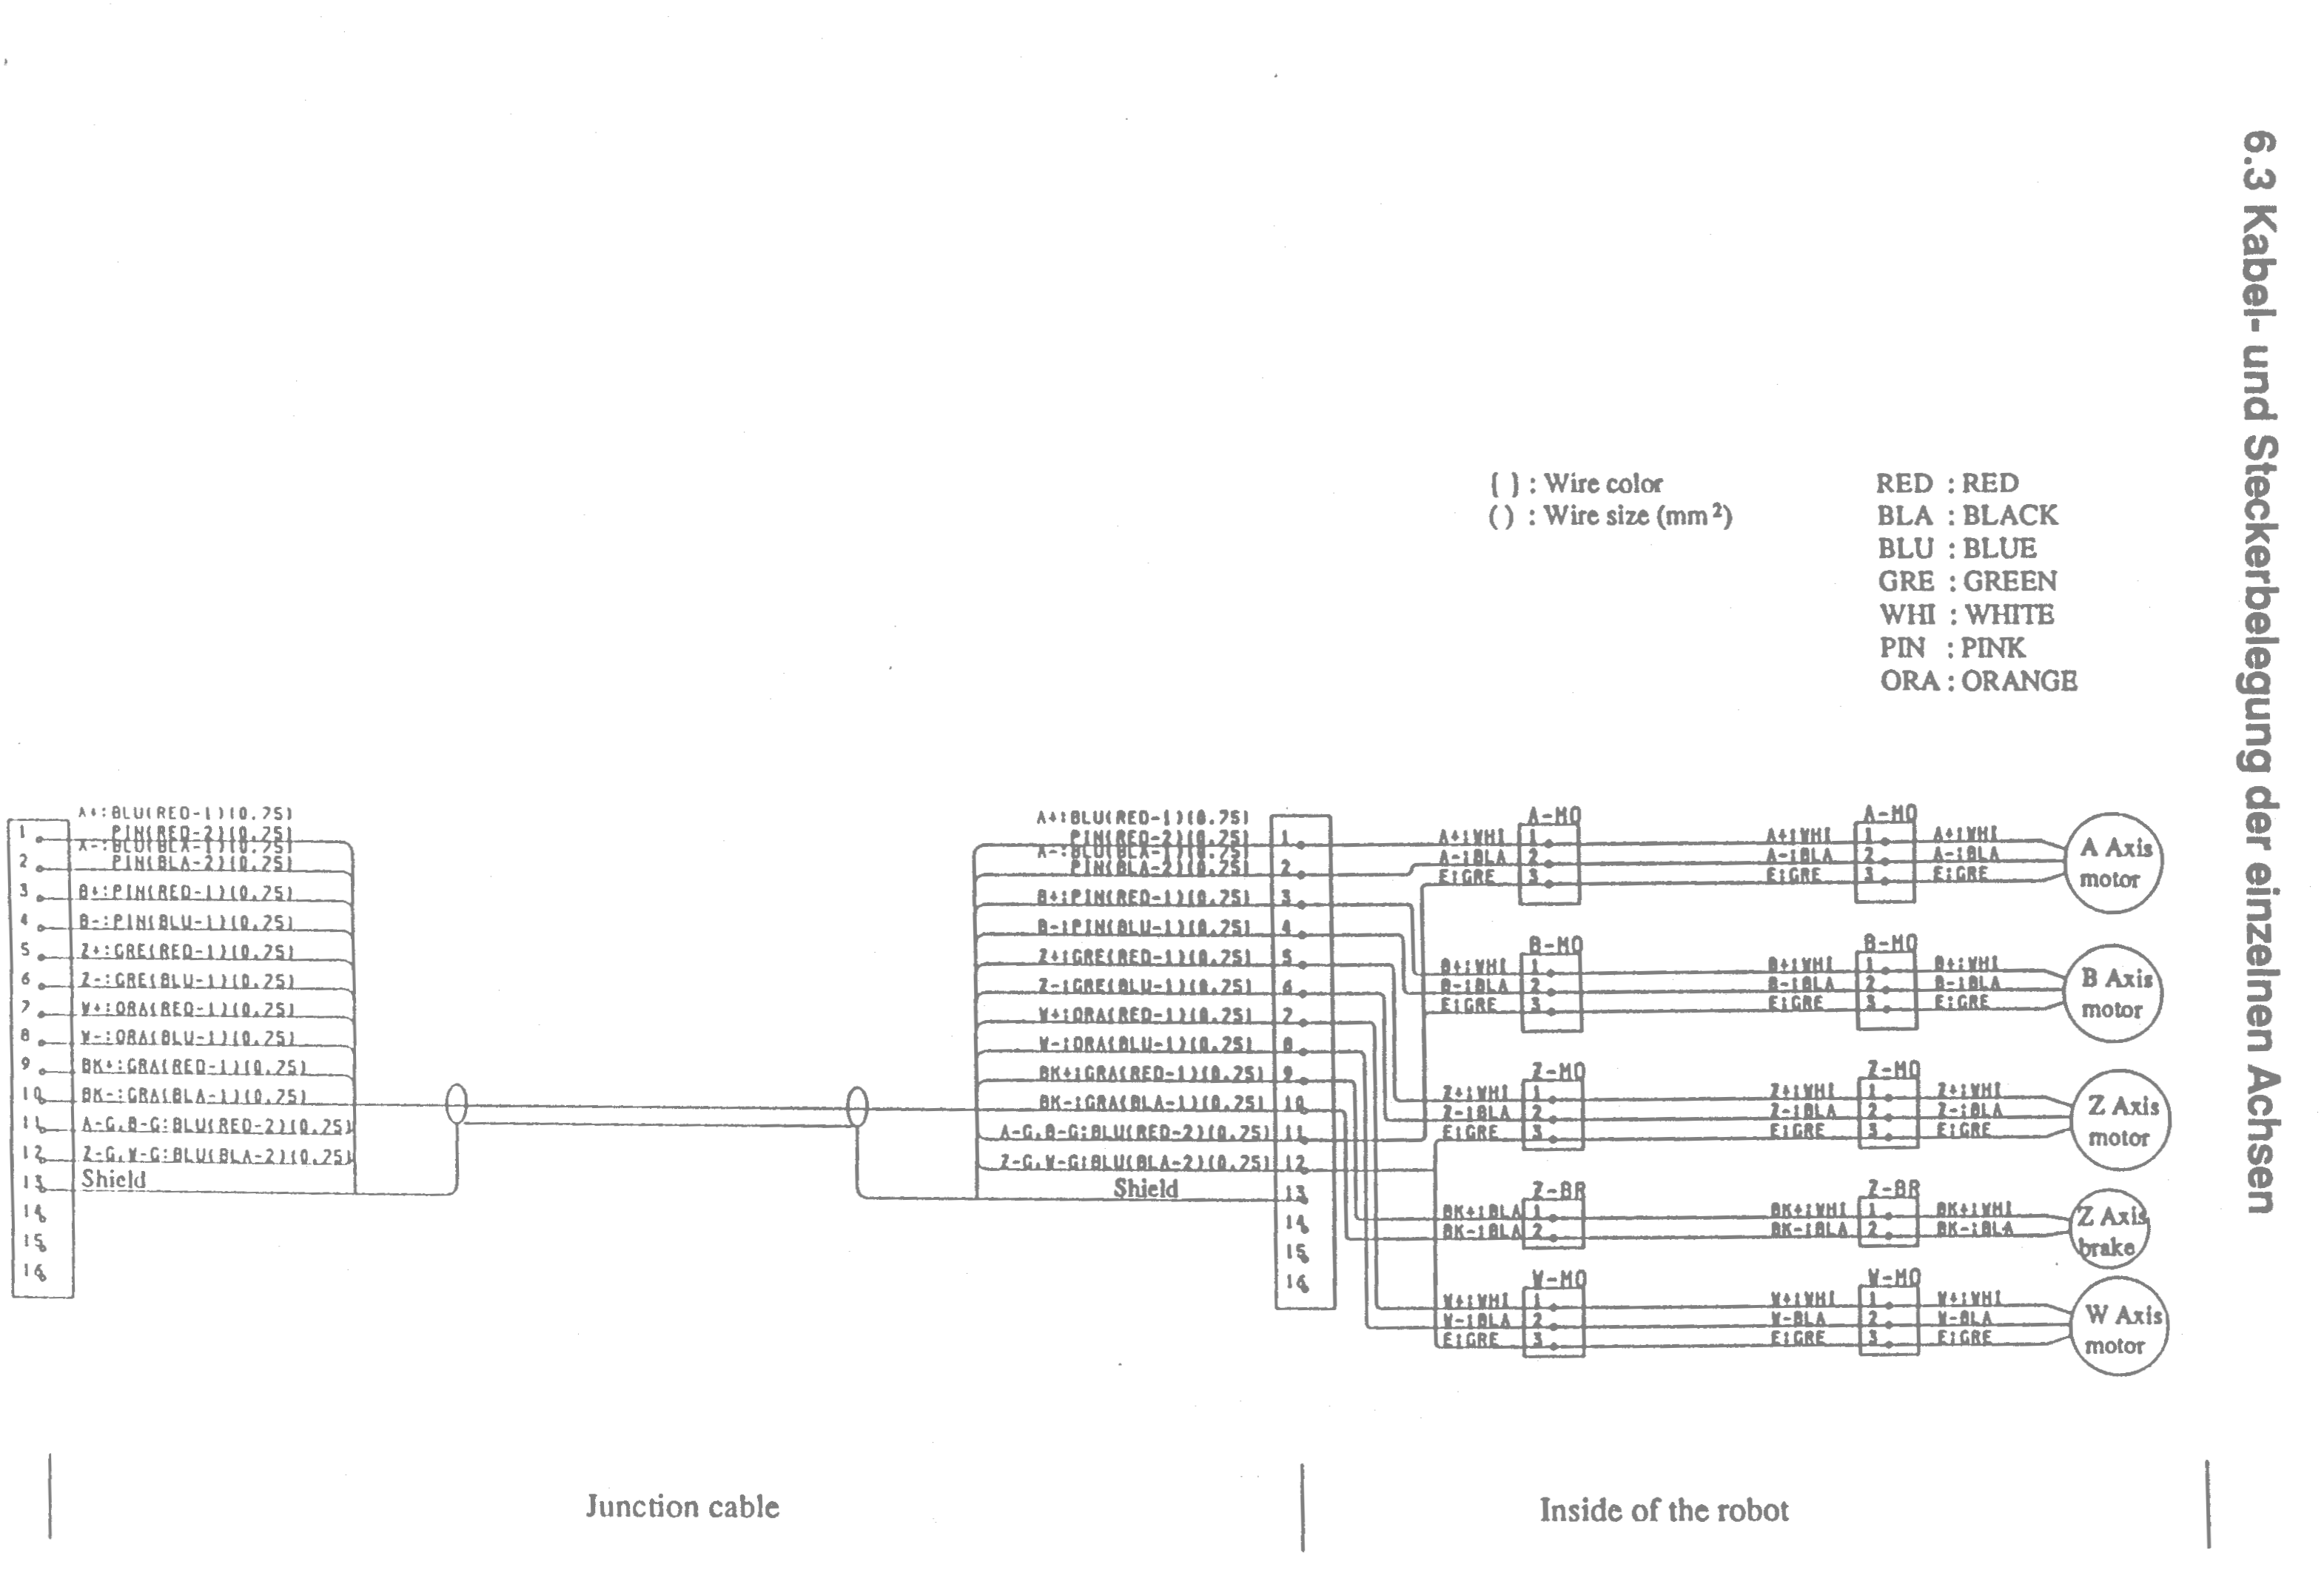
There was quite a lot of documentation included in the Ebay auction, but most of it only covers software. No hints on the pinouts of the servo amp. The company producing the robot still exists, so I gave them a phone-call to request additional docs. I bought the manuals they offered me, but unfortunately they didn’t help at all. So I had to take the thing apart and try to reverse engineer the important parts. My findings so far are all in this 20150422_doku_hac214a.
HPC-53IDI Servo Amplifier
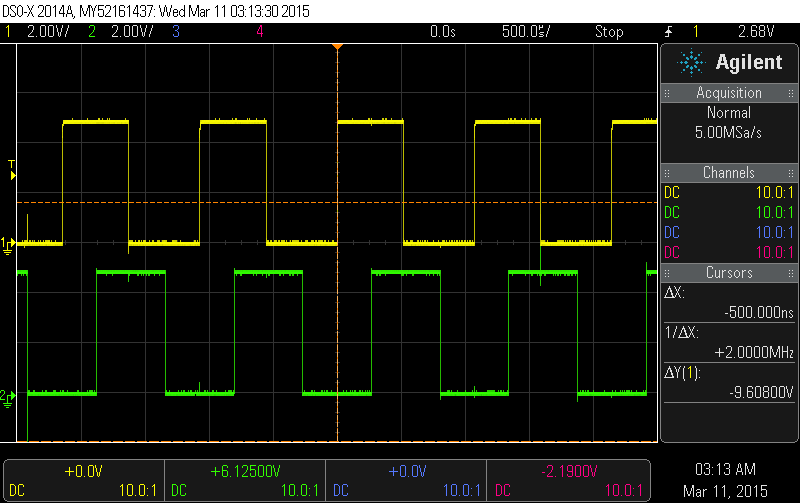
There are some diagramms for the motor- and encoder connections. And yes, the encoders produce a nice A/B-Signal:
Encoder and Limit Switches
Motors and Brake
Encoder pulses
As a next step I will test on of the amps standalone. Hopefully the info extracted so far is okay. Running the amps in velocity mode will make it easy to connect everything to the 7I77.
To make jogging easier (doing this with the keyboard sucks) I decided its time to build a remote pendant for my Mill. From ebay I ordered a Device with a MPG (Manual Pulse Generator) and two rotary switches. Its prebuild with a case and cable. Like most china-ware, there was no documentation. But I could open the case to check the wiring and cable-colors.
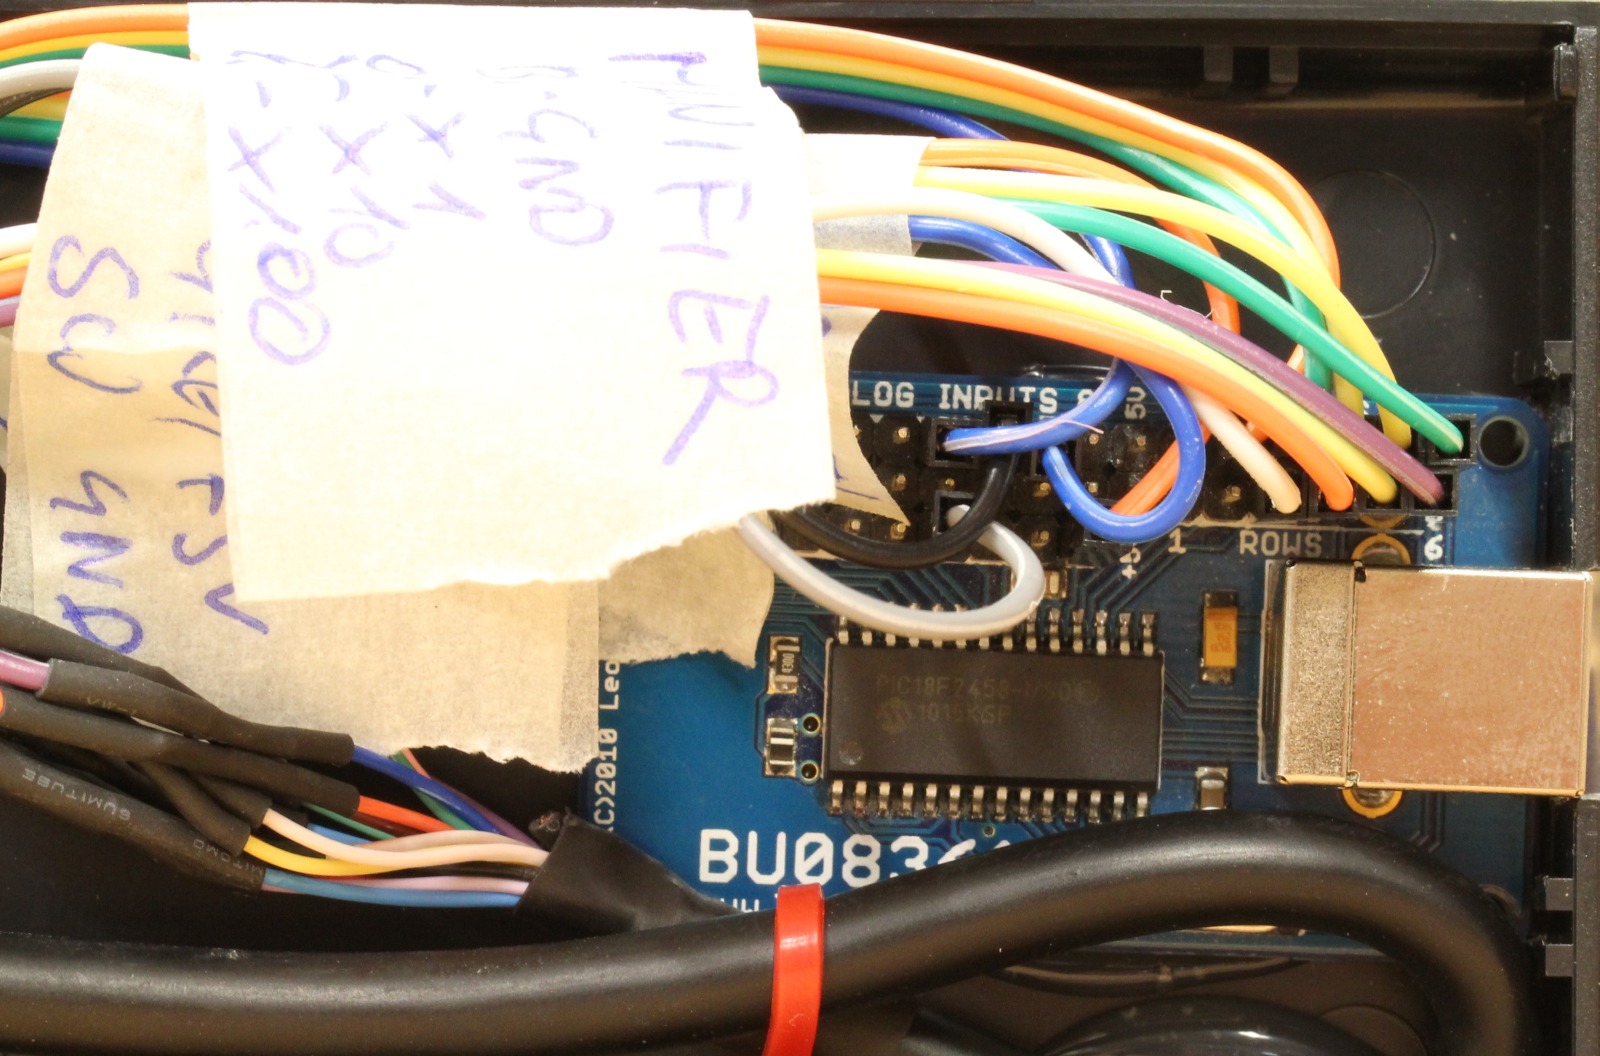
The USB-Interface is a BU0836A device. It allows 8 analog inputs (unused) and 12 switches.
BU0836A USB Interface
LinuxCNC Remote Pendant
To make the MPG work one needs to configure a pair of inputs of the BU0836 for quadrature encoder. Fortunately there is a config utility for linux. The acutual connection was done by soldering female headers to the open cable ends of the pendant (as seen in picture 1). The pinout is as following:
Encoder +5V -> +5V
Encoder GND -> GND
Encoder A -> SW5
Encoder B -> SW6
COMM -> GND
LED- > GND
LED+ -> +5V, with 470R in series
X1 -> SW4
X10 -> SW3
X100 -> SW2
AxisX -> SW12
AxisY -> SW11
AxisZ -> SW10
Axis4 -> SW9
The BU0836 PCB was build into a PVC for protection.
Not only the software-part ist left. To make it work in linuxcnc only a few lines of HAL code are required 🙂