Fixing the DEC VT220 flyback transformer

Unfortunately my VT220 did not work well. The flyback transformator is leaky. It can be heard and smelled (the ozone generated by the arc). In a low light environment the arc is also visible (blue-violet spot in the center of the picture).

flyback transformer with visible arc

Most resources on the internet suggest to just get a replacement. Some comments even say it is dangerous to try a repair, but fail to mention exactly why. Getting a replacement is pretty hard for such an old device. I checked the google-search, ebay and hr diemen. But I was not successful.

The I came upon this post on reddit/imgur: https://imgur.com/a/uEAlQ3j which tackles the same issue.

I choose to do something similar. Use epoxy to re-seal the transformer. But instead of brushing it on I wanted to add a thicker layer.

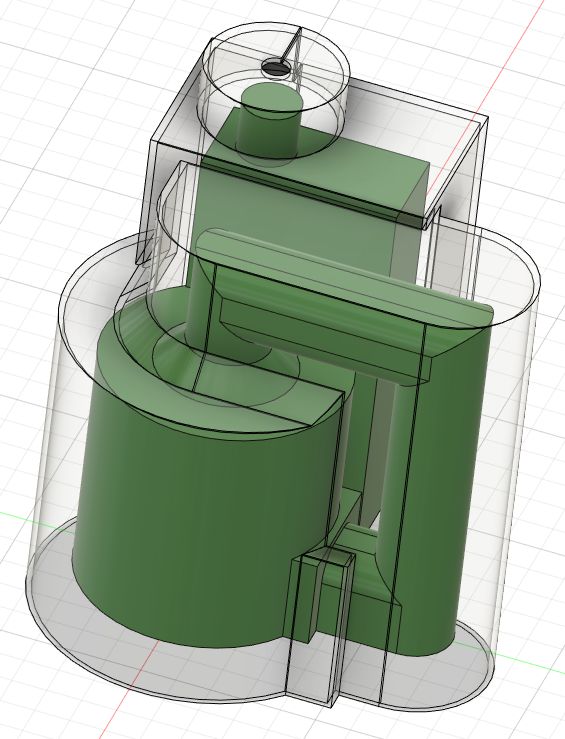
The first step was to make a rough 3D-Model of the existing transformer. Then offset it by 5mm outside to create a mold. That mold was printed in PLA.

3D-Model of the transformer with mold

I did not take any pictures during the casting process. I used hot-glue to fix the flyback in the mold so it does not move while casting. The epoxy used was E45GB with some green pigment mixed in. The volume needed was extracted from the 3D-Model of the mold and the transformer. Make sure to factor in the density of the epoxy, I did not and had to mix a second smaller batch

newly molded flyback mounted in the vt220

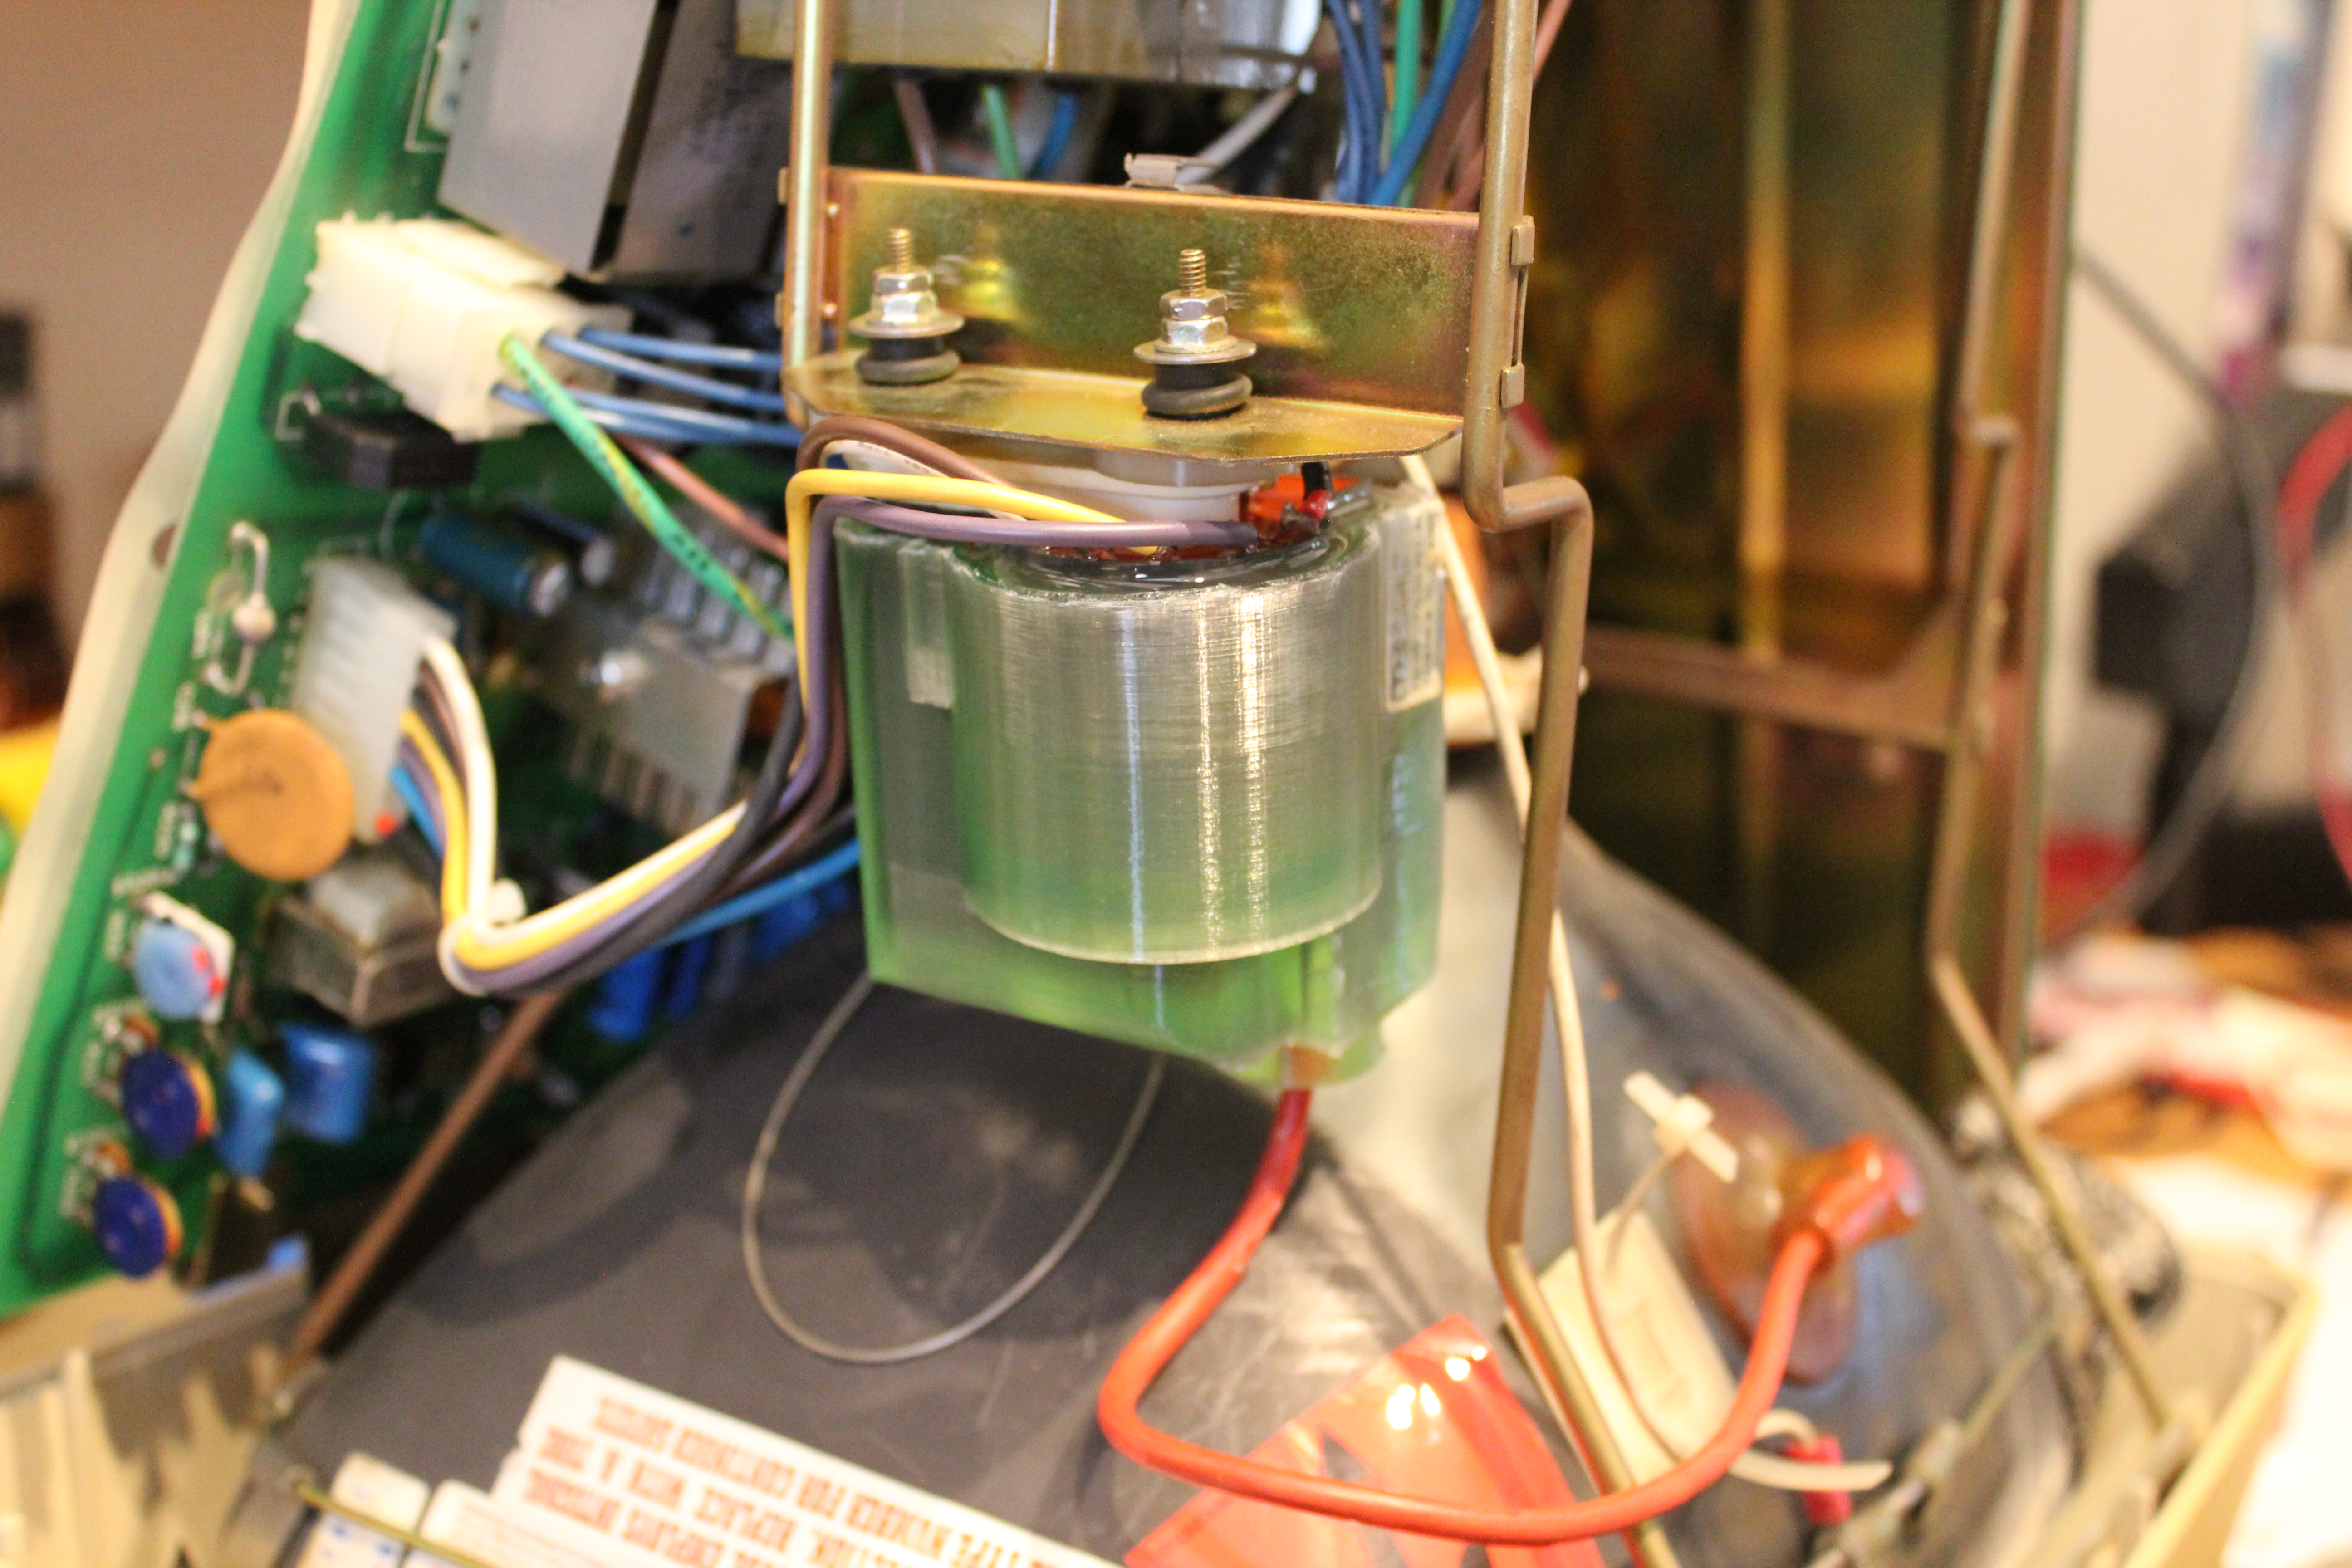
As you can see above I did not remove the mold. Its fixed to the epoxy. Next time I will use a release agent.

But did it work? I would say yes. There is no more arcing and I cant smell any ozone anymore. It also more silent, but the typical 15kHz(?) noise is still present.


Diesel engine cooling-radiator ghetto repair

For this years EMF camp I was traveling together with the belgian embassy. We had two busses filled with people and material to drive from belgium to the campsite and back.

One of the busses had a blown tire on our way, that was fixed by fitting the spare:

Blown tire

On our return trip however, we had a major issue. The radiator was leaky, as seen in this picture. The water on the road used to be in the cooling system.

busWe did discuss how to fix it. One option was to just put an egg into the cooling liquid, in the hope that the protein would coagulate and stop the leak. But that is a process we can’t control, so we switched our focus to other methods.

Next up was soldering. We had lots of solder-equipment with us, after all we were coming form a hacker-camp. But soldering on a heat-sink is doomed to fail. Perhaps we could have done it with a propane torch, but we did not have one with us.

All that was left was to glue it. I had some 5-Minute-Epoxy at hand. First we drained the radiator and dried it with the hot-air. Then some cleaning using wire-brushes and isopropanol was done. The epoxy was mixed and stuffed into the radiator with tootpicks and other pointy objects, then heat-cured with the hotair for 30minutes.

This is how it looked after the curing:

radiatorIts messy and ugly, but it did seal the leak. I did expect that it would still leak a little, but to our surprise it was perfectly sealed. The cooling system was even able to build up pressure again.

With that repair we made it back over the canal back to belgium 🙂