Fixing “108.08” error on a lexmark C546dtn printer

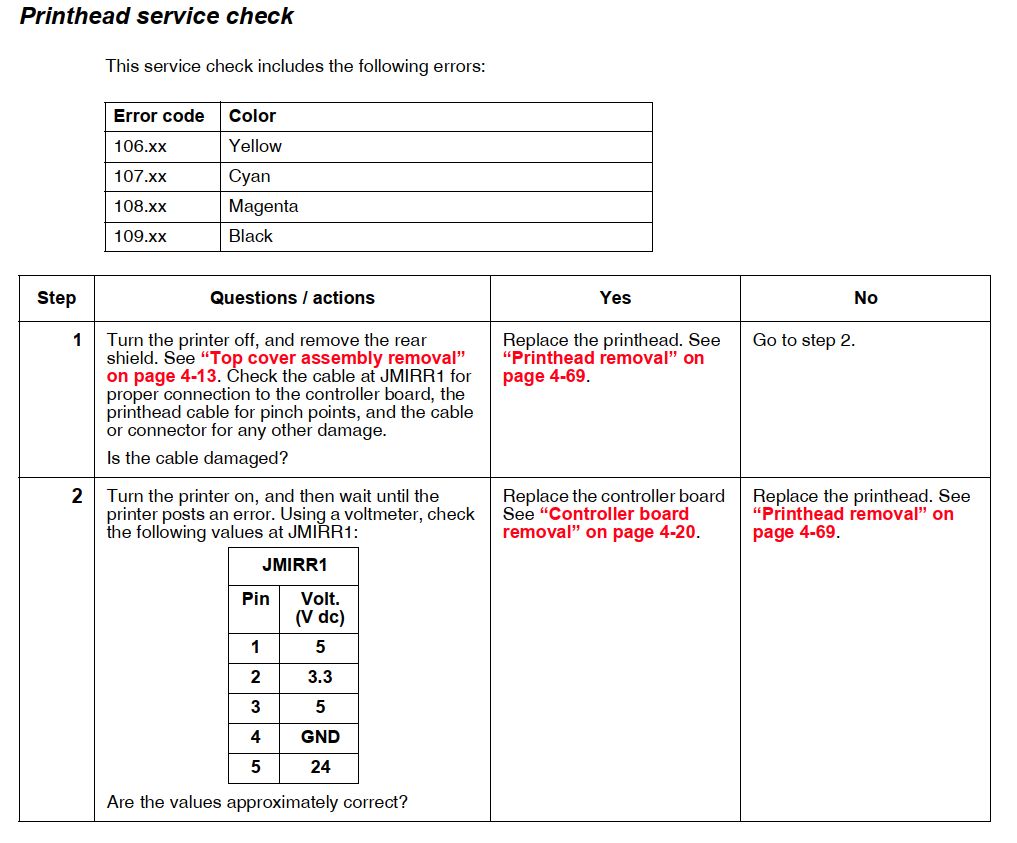
The printer that I have been using for quite some time recently stopped working. The display indicated that the error is “108.08”.

A quick search got me the service-manual for this printer. This is a really great document. It has all the instructions needed to diagnose and fix an error. Detailed disassemly instructions can also be found.

Service instructions for the 108.xx error

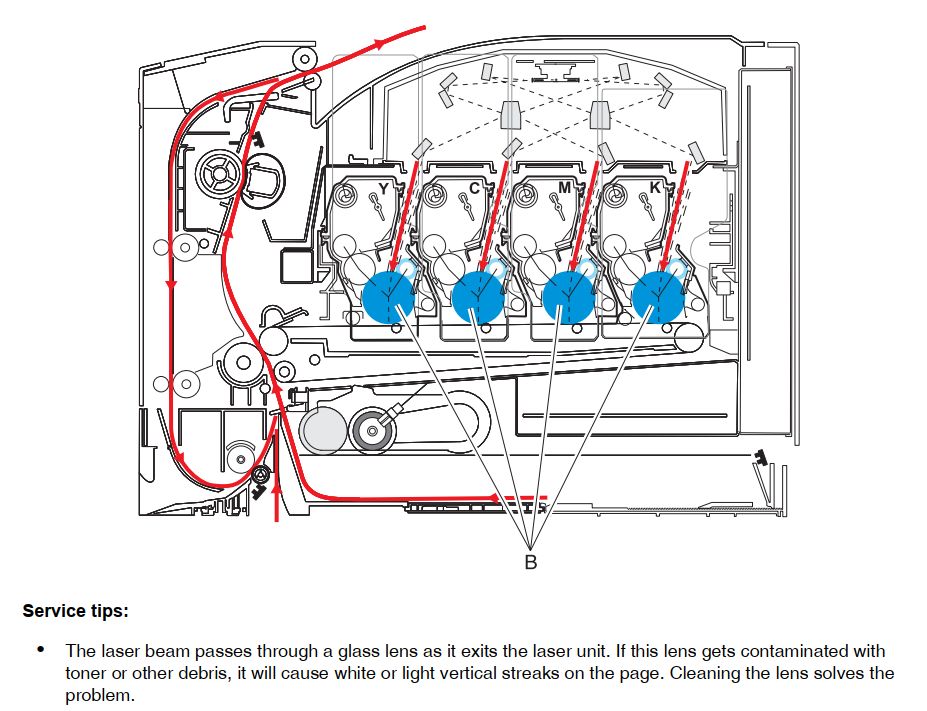
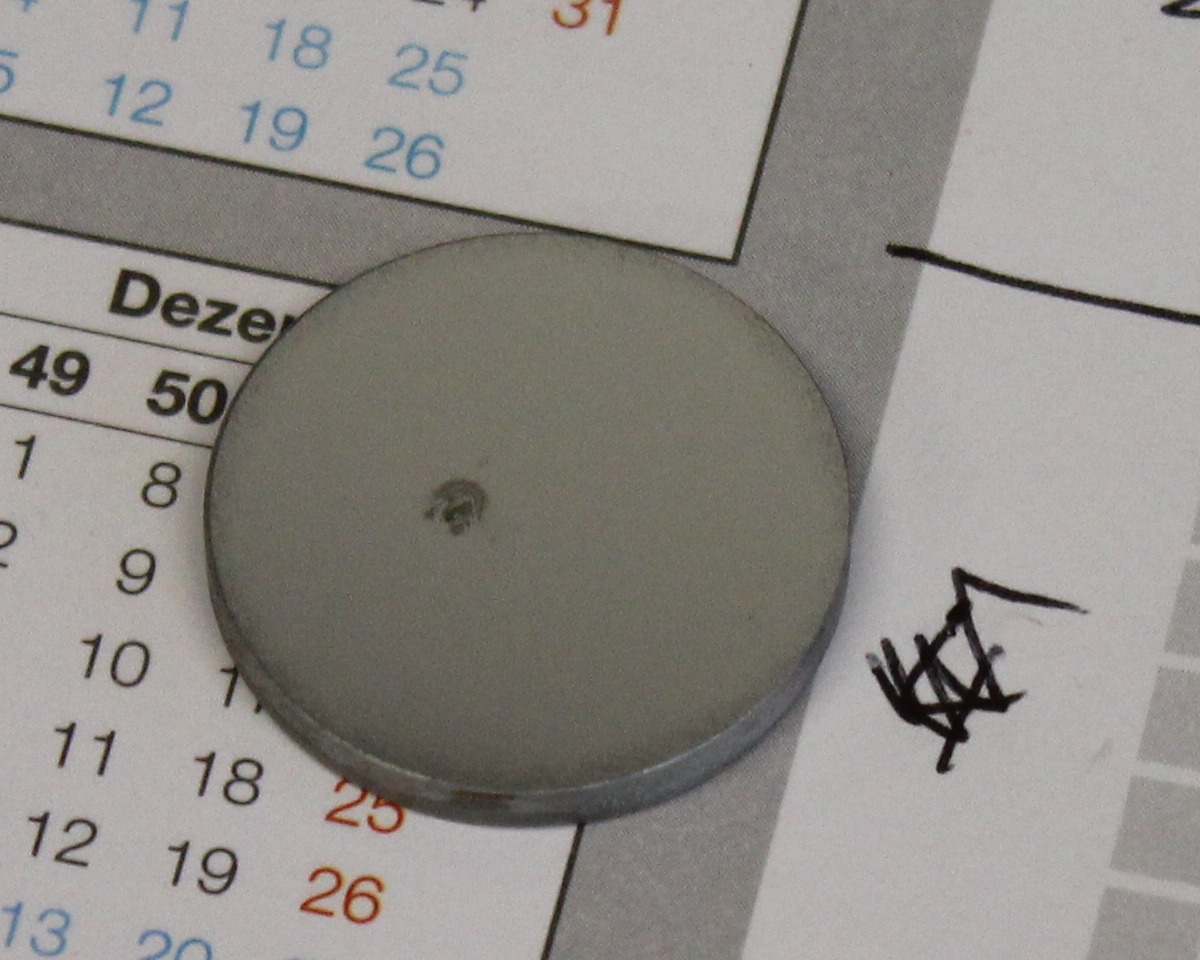
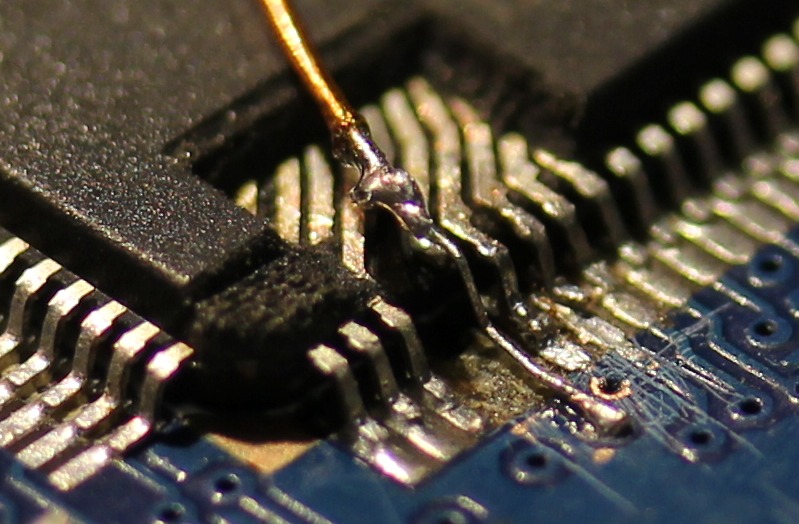
I did all of that, but instead of replacing the printhead I just cleaned it. Over the time dust does accumulate on the windows where the laser light exits the printhead. After disassembly I could clearly see that the windows were cloudy; colorful toner could als be spoted on the windows. My solution was to use a kimtech wipe without any water/solvent to clean the lenses.

The manual actually says to clean those windows, but its on another page/section not directly related to that error.

Illustration how paper and light are routed through the printer

Fix broken pins on QFP Package

That is how my new HW-0.30-mini Quadcopter Flightcontrol looked prior to the repair:

broken pins

Since a few of the Pads already were delaminated I decided to do a repair instead of soldering in a new CPU. For a repair I would need to get rid of the expoxy mold to directly acces the pins of the leadframe. Initially I was thinking of using a ‘dreml’ tool to remove the exoxy, but watching the Uncaging Microchips talk at 31C3 taught me that using a CO2-Laser will also work.

Those pictures were taken during the laser-removal:


After lasering, all left to do was attach new wires. I did use a microscope for that. For scale, the wire running on top of the CPU has a 0.3mm diameter.

I ran some quick tests with the software to make sure the repair worked. Then a blob of hotmelt was applied to secure and protect the repaired pins:

HW-0.30-mini fixed


Backstory: I am also responsible for breaking the pins. I did solder the CPU at 31C3 without proper lighting using borrowed equipment. The temperature on the soldering iron was set to 450°C, I failed to check that. This lead to some major fuckup. Since I wanted to work with the board, the decision was made to simply cut of the broken pins. At the time I didnt need them.

Adding alignment lasers to my laser-cutter

I bought my el-cheapo chinese lasercutter without a pilot laser. They did offer a visible laser for alingment, but that was just a simple laser-pointer mounted next to the main-laser-nozzle. It was kind of expensive (despite the fact that it was a really simple non-coaxial-design) so i decided to build my own.

From ebay i got two laser-modules in a cylindrical housing for about 21€ including shipping which already produce a line (they have a prism build in).

I  order to mount them i designed and build a bracket out of 12mm acrylic. Basically its a ring with a slot, i can slide it up the nozzle and fix its positin by tightening a screw. You can see how it looks mounted to the machine in the first picture.

Unfortunately i wasnt able to mount it further down on the nozzle. Now the laser angle is to steep and part of the laser is blocked by the nozzle itself (you can see the laser on the nozzle in the second picture). I managed to adjust it in a way that at least the pilot lasers cross in one point. Alignment in parallel to the working area required a little patience, but somehow i managed:

As a last job i wired everything up and slid the cables through the drag-chain. Since i was already soldering and installing additional wires, i also added two LED-Stripes to the portal to have better illumination while working.

Making Custom Dice

Everyone who has been to a gaming convention/fair has probably seen chessex or q-workshop selling blank dice. I always wanted to use those blanks to create my own dice. Since I now own a lasercutter the time has come to finally manufacture some 😀

I used 16x16x16mm blanks which i got at this years RPC in Cologne. My lasercutter does not have any fixtures, rulers or clamping devices, so I needed to make my own. My simple fixture is a piece of 5mm HDF with a 16mm square cut out at an absoulte position. This allows me to align any futher engraving to those absolute coordinates.

After engraving the only thing left to do was to add some contrast. I used black acrylic paint to cover the engraving. Its quite hard to apply the paint only to the engraved areas, so I decided to rub the paint into the engraved area and remove excess paint after waiting a few minutes for it to dry.

I think it worked quite well 🙂

Now i am looking forward to create one custom dice for each player of my RPG group with a symbol matching their char.