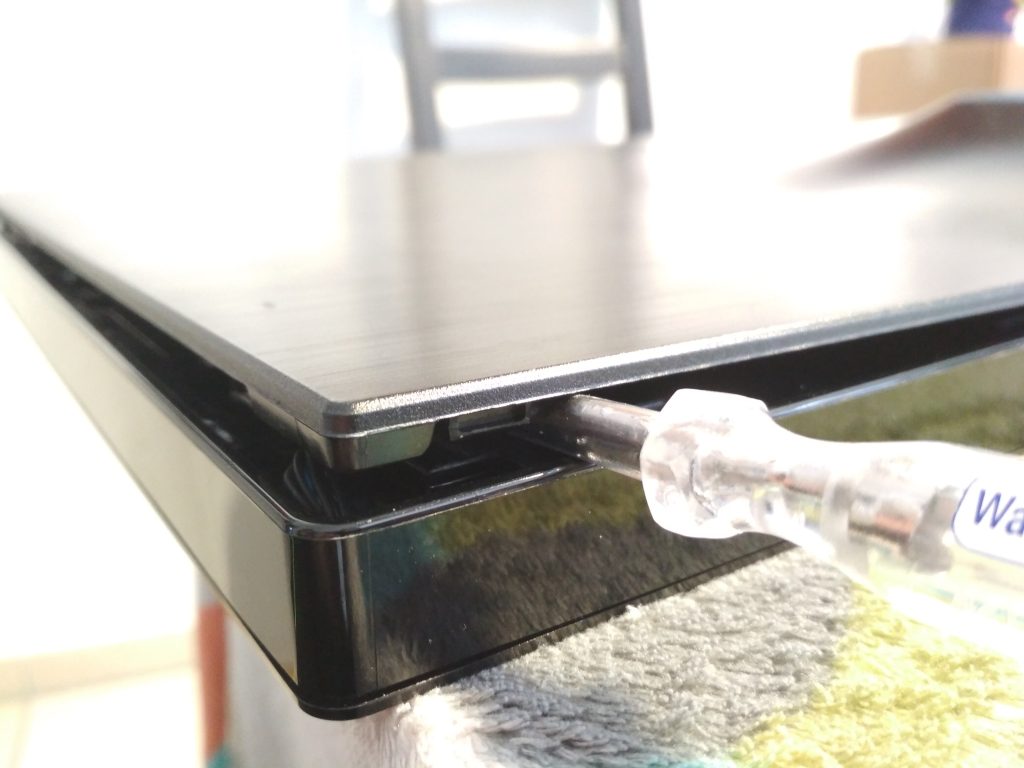
This Samsung 27″ monitor recently stopped working and would not stay on. After power-up, it shows the menu and input-source, but then shuts down again. Interestingly that is the same behavior as described in this reddit post. The only comment in that post says
test the LEDs. if one is bad, the entire system enters shutdown
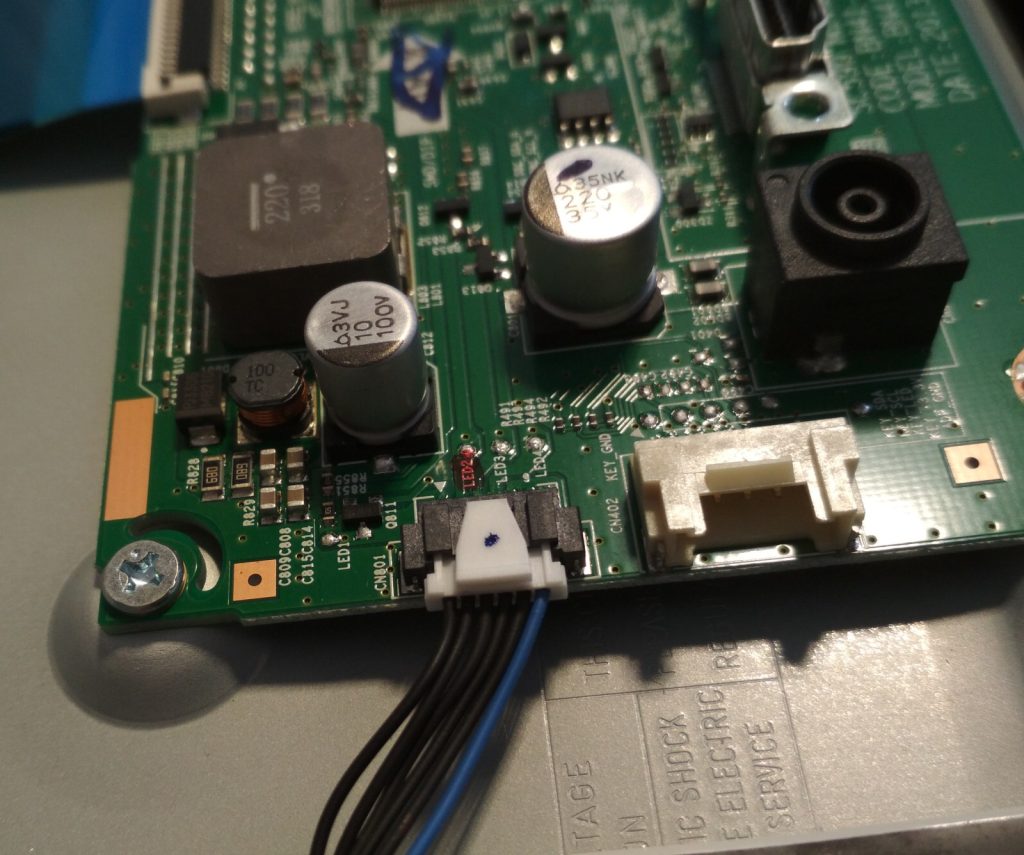
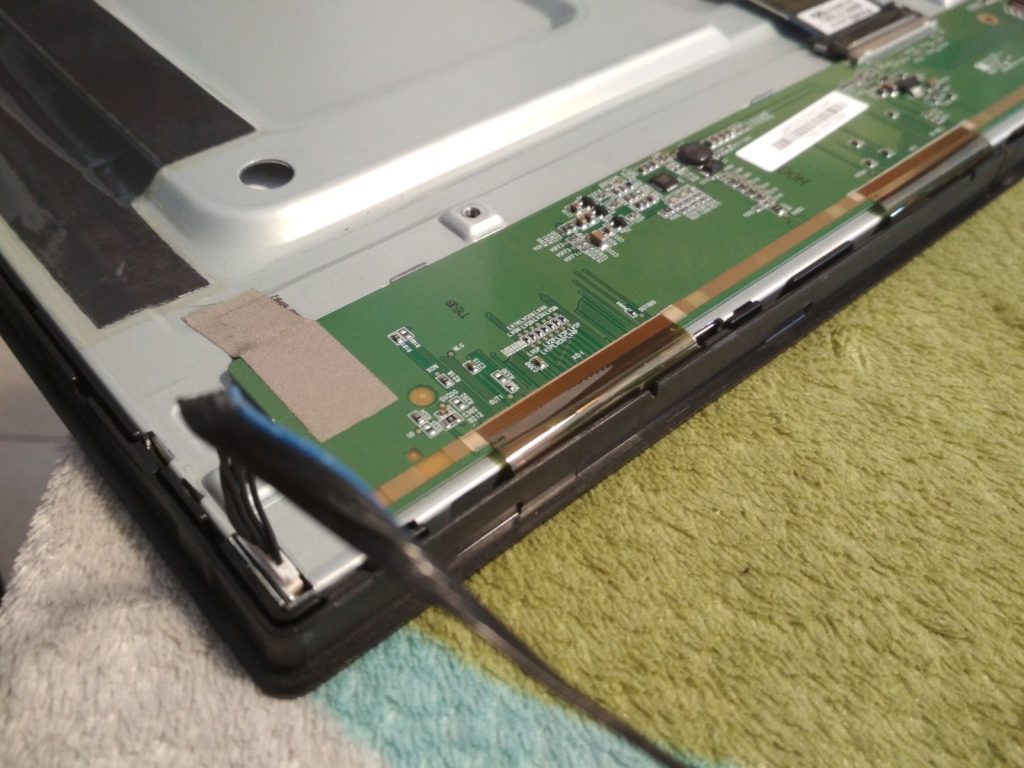
So lets do that (info on how to open that thing is at the end of this post). I started by looking at the negative side of the LED supply on the mainboard. As you can see, I marked of the test-points (LED2) red because that corresponds to the LED stripe that does not work properly. The voltages on the LED test points should be close to zero, the working ones had about 0.8V. The channel with issues was about 18V, but quickly dropped since the controller did detect this and restart the system. The positive supply of the LEDs has 68V. That matches the information from the reddit post.
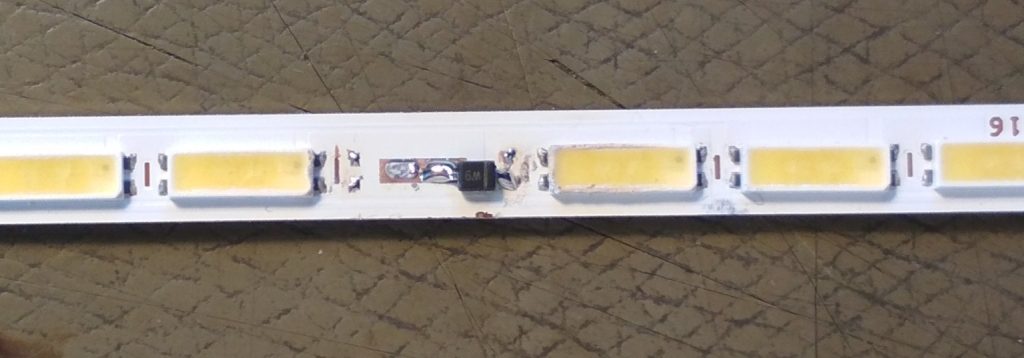
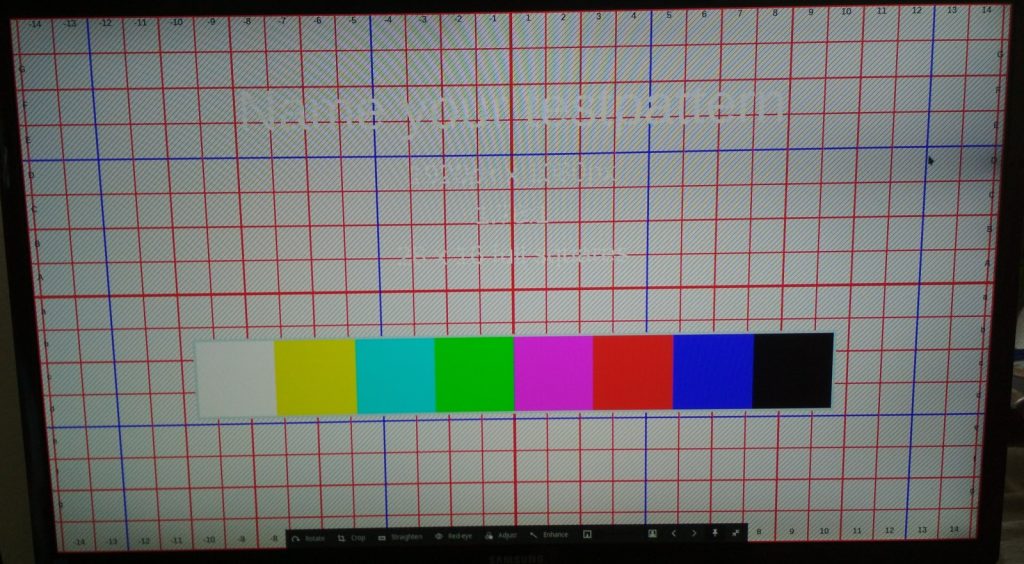
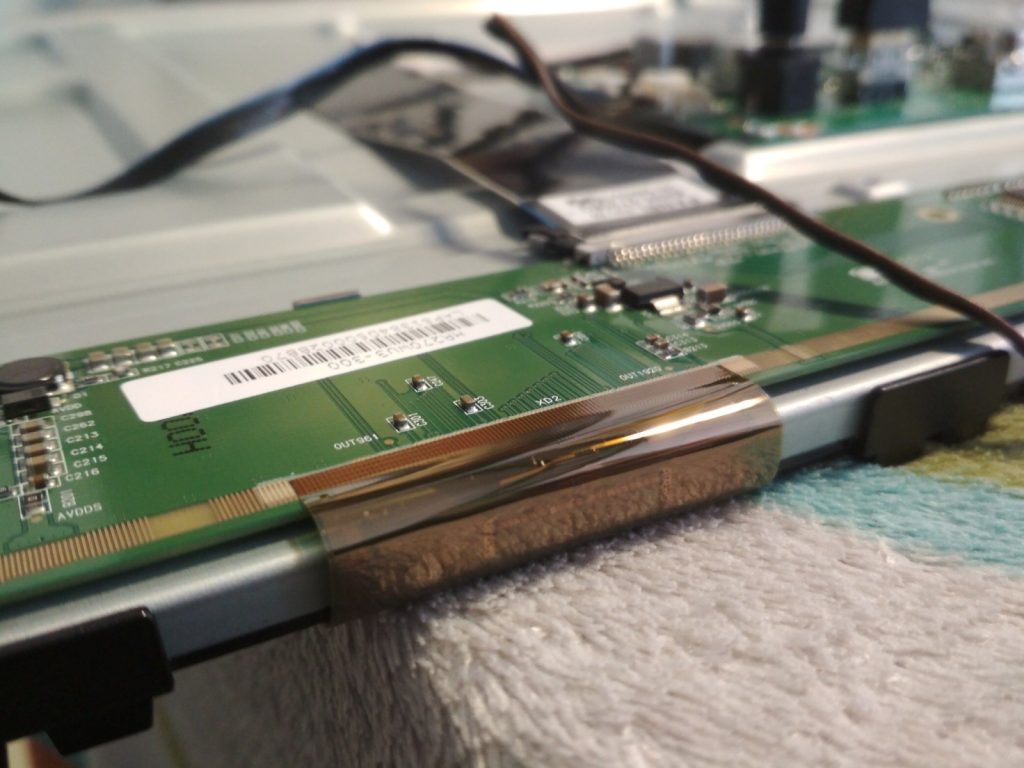
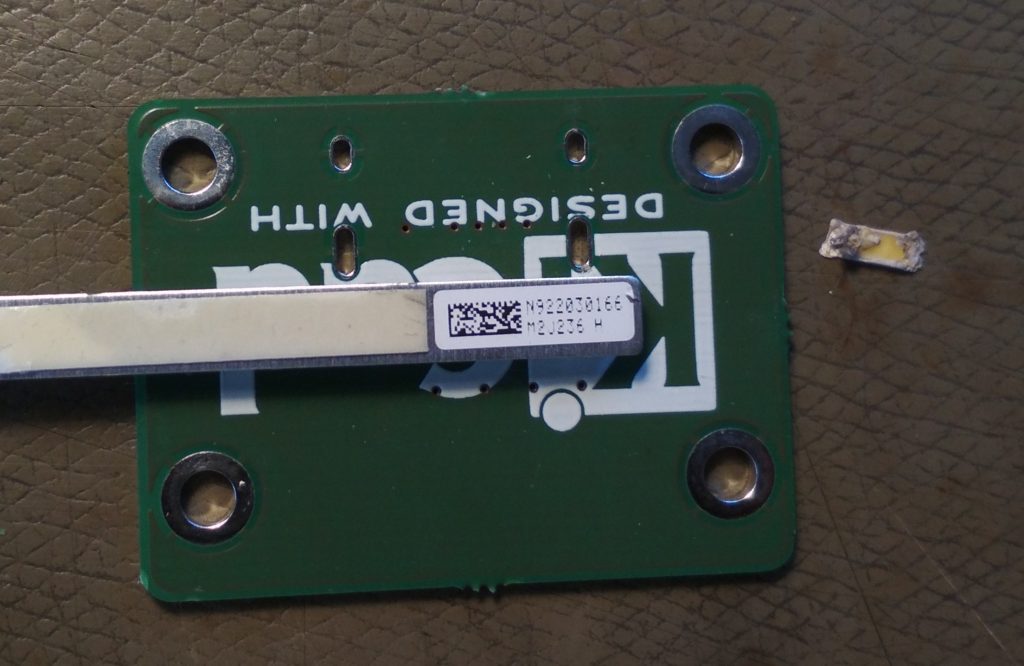
By carefully removing the wires from the LED connector that corresponds to the broken channel I could verify that the rest of the screen is working properly. It stayed on and displayed a picture. Albeit, there was a huge dark streak where part of the backlight is missing. That means we need to remove the backlight and fix it. After some more disassembly, the LEDs could be removed. With a multimeter in diode test mode one of the LEDs was found to be non working. Since I don’t have the correct LED or even something similar (those LEDs seem to have a Vf of 5.5V), the solution was to solder in a zener diode with 5.6V. Fortunately my parts drawer has a set of various zeners.
Dieses mal gibt es einen Blogpost auf Deutsch weil es das Verbraucherinformationsgesetz betrifft. Die VIG Anfrage auf die sich dieser Artikel bezieht ist bei FragDenStaat zu finden.
Motivation
Evtl. ist es euch schon einmal passiert das eine VIG Anfrage abgelehnt wurde weil es einen Betreiberwechsel gab. Das kann da so aussehen.
Das Amt beruft sich darauf das eine Anhörung nicht stattfinden kann. Das ist natürlich Unsinn. Entweder leben die Betreiber noch, dann kann man diese Anhören. Alternativ, wenn die Betreiber gestorben sind, kann die Auskunftserteilung nicht in deren Rechte eingreifen.
Zudem ist es auch so das nach einem Betreiberwechsel trotzdem noch ein Informationsinteresse an den ‘alten’ Kontrollberichten besteht. Typischerweise ändert sich an der baulichen Substanz eines Betriebs wenig, häufig gibt es auch personelle Kontinuitäten. Dementsprechend haben auch alte Berichte durchaus Aussagekraft, insbesondere ist vor allem der Vergleich mit neuen Berichten. Um das dann mal grundsätzlich zu klären habe ich Klage beim VG Aachen erhoben. Aktenzeichen 8 K 1276/21.
Die Zusammenfassung ist: Verfahren vollumfänglich gewonnen. Aber kein Urteil bekommen, nur einen Einstellungsbeschluss. Der Inhalt davon ist aber auch für andere VIG Verfahren nützlich.
Details zum Verfahren
Im VIG gibt es keine Einschränkung auf aktuelle Berichte. Das sieht auch das VG Aachen so:
Auch regt das Gericht an, doch einfach die Betriebsinhaber zu fragen. Es gibt keinen Grund das nicht zu tun. Wenn man nicht weiß wohin genau man diese Anhörung senden soll kann man das ja recherchieren. Dafür gibt es bei den Meldebehörden passende Fachverfahren. Damit kann man sogar raus finden wohin Menschen umgezogen sind. Das hat das Gericht dann auch direkt mal selbst gemacht um der Gegenseite ein wenig auf die Sprünge zu helfen.
Auch über öffentliche Zustellung kann man die Betreiber anhören. Das Gericht hat das angeregt und die Gegenseite hat das dann auch tatsächlich einfach mal gemacht. Das hat sogar funktioniert.
Nach diesem ganzen Austausch von Schriftsätzen vor der Verhandlung (§87 VwGO) war die VIG-Anfrage auf einmal schon erledigt. Weil das das Amt für Verbraucherschutz, Tierschutz und Veterinärwesen mit der Nachhilfe durch das VG Aachen alle Anhörungen durchführen konnte und entsprechend die angefragten Kontrollberichte rausgegeben hat. Witzig ist auch das die Behörde direkt zu Beginn des Verfahrens einen der Kontrollbericht zur Gerichtsakte geben hat – die gleiche Gerichtsakte in die ich als Kläger auch Einsicht habe 🙂
Einstellungsbeschluss und Kostenentscheidung
Das Gericht hat danach angeregt das Verfahren als erledigt zu erklären, was beide Seiten auch getan haben. Anschließend kommt vom Gericht dann der Einstellungsbeschluss und die Kostenentscheidung. Hier die relevanten Punkte daraus:
Lessons Learned
In ähnlich gelagerten Fällen, also wenn eine VIG Anfrage abgelehnt wird weil es einen Betreiberwechsel gab, könnt Ihr also folgende Argumente verwenden:
Im VIG gibt es keine Einschränkung auf aktuelle Berichte
Vergangene Berichte sind auch für den aktuellen Betrieb noch relevant
Wenn ehemalige Betreiber nicht tot sind kann man denen Post schicken
Öffentliche Zustellung ist auch eine Möglichkeit den Anhörungsbescheid zu ‘versenden’
Das VG Aachen sieht die obigen Punkte auch so (8 K 1276/21)
Using the male/female terminology for connectors seems to be the industry standard. In the past I have never questioned this. Its just how things are and how I learned to work with them. In one of my recent KiCad-Workshops I talked to people that would like to get rid of those words. There are a few issues with using the sex-analogy:
Its not always clear what exactly is male. Quite a few connectors that are “inserted” are considered female. There are also female connectors that have protruding pins[1].
The proposed solution is to replace male/female with plug/socket, or pin/receptacle depending on the actual connector. This is quite clever, since it solve the ambiguity of male what means: ‘will be inserted’ vs. ‘does have pins’.
There is no good reason why we, as an open-source community, should not improve our naming. On the contrary, we are not bound by weird corporate rules, but have the ability and freedom to be a leader of change. Both in the technical and inclusion aspect.
So lets do some research next, to see if and how we can untangle this Goardian knot.
D-Subminiature connectors
There are way to many different connectors out there to research them all. So I decided to start with the D-Sub type since they are well known and lots of manufacturers make them. Also there are standard documents describing them.
Vendors
When looking at how vendors name their connectors, there is not a single truth[2].
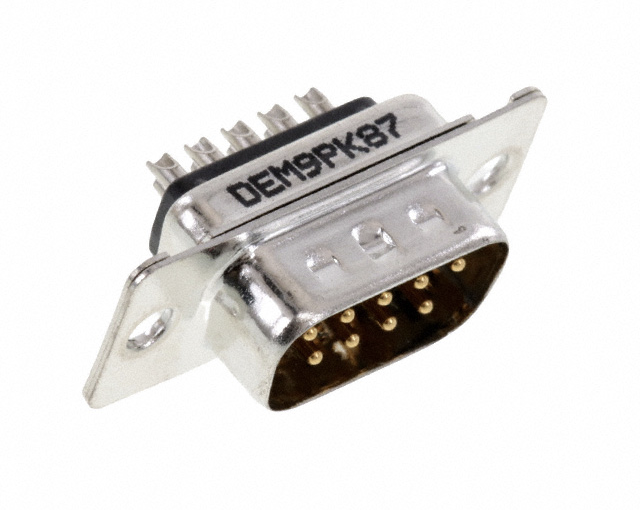
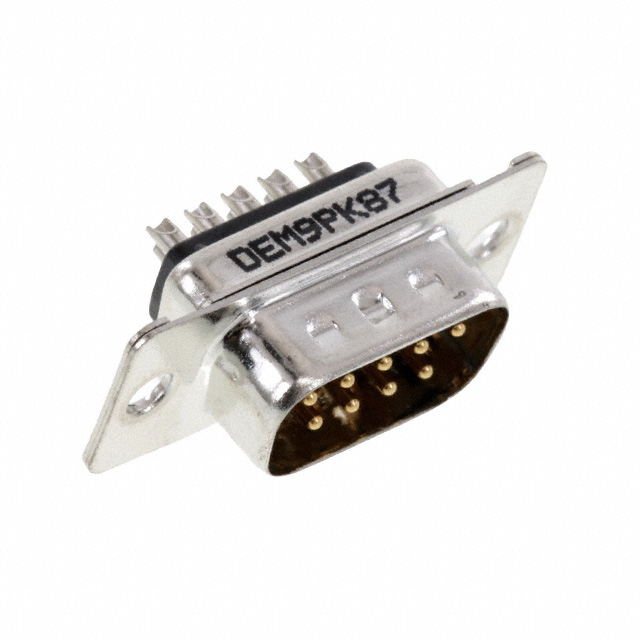
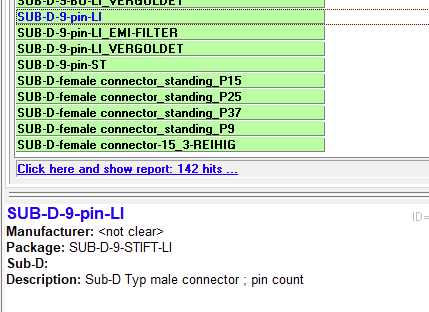
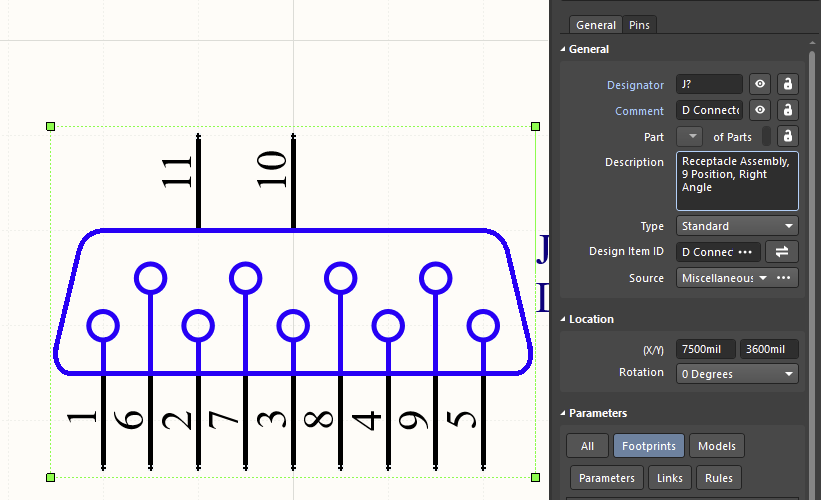
A “male”[3] D-Subminiature DE-9[4] connector. It has a shroud (the metal shell surrounding the pins). One can argue that the counterpart gets inserted into this connector. So this should be female? We will learn later that at least for this type of connector, male == pins. Which is a good argument to just call it pins since its less ambiguous.
There are at least 20 different vendors for DE-9 connectors on Digikey, I did not check all of them. That is not needed, it is quite obvious that vendors don’t agree on naming.
Okay, next up we take a closer look at the standard documents. There are quite a few different standards to consider.
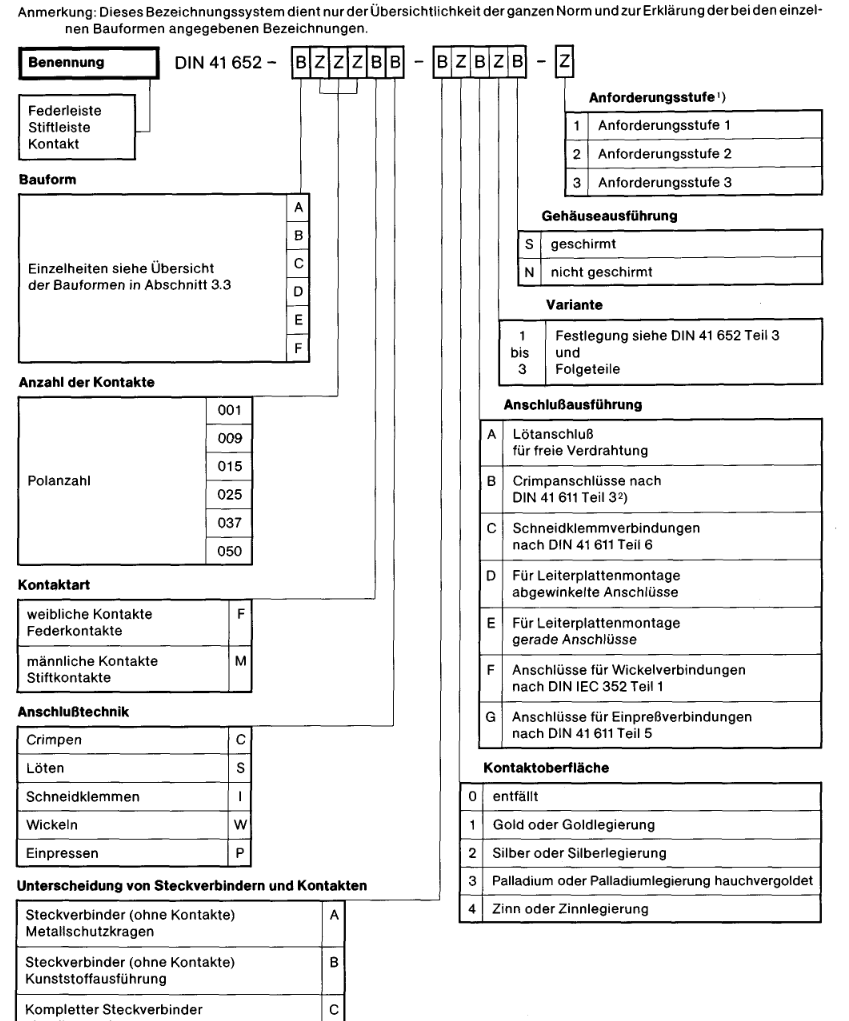
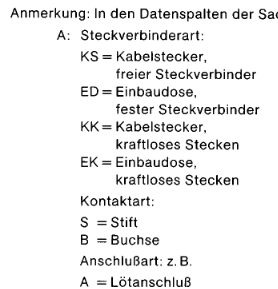
German DIN 41652 (D-Sub connectors)
The German DIN uses
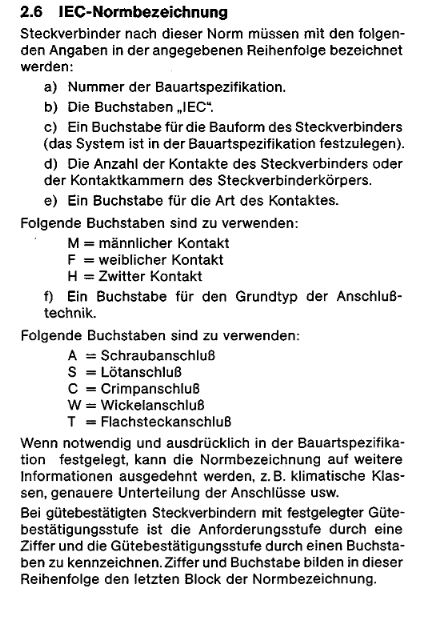
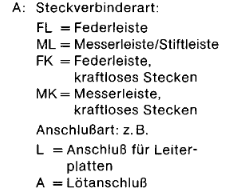
F = female contacts – spring contacts
M = male contacts – pins
The interesting part here is that the proper letter would be W (weiblich) instead of F to indicate the gender. One could argue that the F stands for Federkontakte. Most likely, this is just a translation issue (as in the letters are not translated at all). I guess the letters (m/f) are supposed to indicate gender. What is clear here, the male/female wording aims at the pins, not the connector shell.
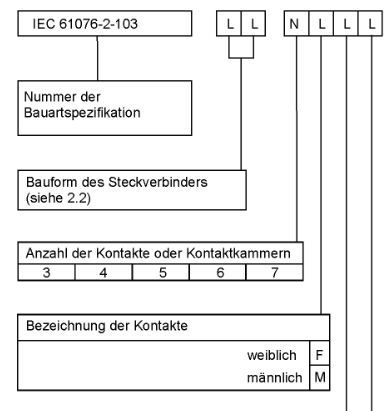
International IEC 60807-2
Unfortunately I only have the German translation of this. Its pretty similar to the the same as DIN 41652:
MIL-C-24308C
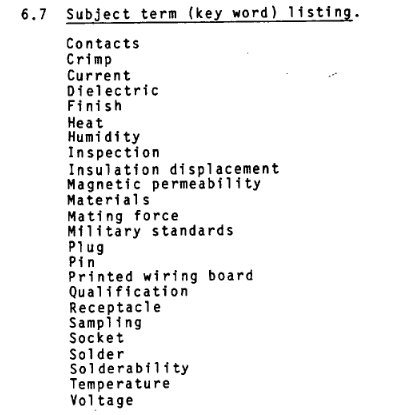
I could not find the words male or female in there at all. The document always refers to “plugs and receptacles”. The key word listing has pin/socket and plug/receptacle.
Data for other connectors
DIN 4000-54 “Sachmerkmal-Leisten”
This norm has rules that specify how different connectors should be described. The tables that describe the contact don’t mention male/female. Instead Messer/Feder (translated to Socket/Pin) is used.
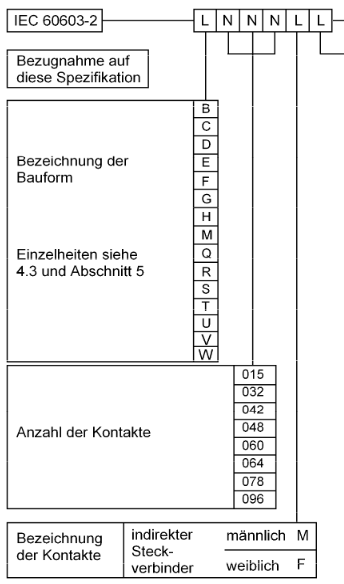
DIN EN 60603-2 (Replaces DIN41612)
Those are connectors used in rack systems. See https://en.wikipedia.org/wiki/DIN_41612 for some pictures. The connectors of this series are named male/female in the spec.
The connectors of this series are named male/female in the spec. As far as I can tell, vendors (Neutrik, Switchcraft) also choose this naming scheme.
So what does ‘inclusive language’ actually mean?
That is hard, perhaps impossible for me to answer. I have always been included in a tech environment. As a member of the dominant culture I don’t experience microagressions when reading those words. Other people however are affected by this language. Those asked me to do something about it. I want KiCad to be a safe space for anybody. That’s my main motivation to change things. Given how small the cost of a change is, I am much in favor of getting rid of non-inclusive words.
Conclusion
We learned that there is no single truth, thus we need to weight our options. Regarding the KiCad-Library I made the following decisions:
D-Subminiature rename to Pin/Socket.
Solves the confusion about what is considered male
About half of the vendors use that naming
XLR and DIN EN 60603-2
Stick with male/female
Its consistent with vendor naming and standards
Its still ambiguous 🙁
Connector_Generic
They are generic, with no footprint and thus not vendor associated
The names are made up, so we can just change them as we like
Pin/Socket seems like a good fit
RJ45 Jacks (I did not explicitly research them)
everybody already calls them jacks
Just rename them to jack or socket
USB Connectors
They don’t have protruding pins
The spec does specify what a jack and plug is
I get that people will be unhappy with this change. Or on the contrary, argue that even the XLR-Connectors need to be renamed now. Saying that I don’t care about other peoples opinion would be a lie. I obvious do, otherwise I would not have spend this much time and effort on trying to making KiCad more inclusive.
Applies to the “Reverse” SMA or BNC connectors
as always with electronic components. There is at least one vendor that has a totally different system.
also known as “Plug” or “Pin”
a common misconception is to call this connector DB-9 which is technically wrong.
For some people it is rather easy to fix bugs in symbols, or create some new footprints. But the actual contributing step requires some working knowledge of git. As always with git, there are lots of different ways to reach the same goal. I will write down my preferred way, together with some explanations on why and how we do this. This post will only cover schematic symbols since the workflow for footprints or 3D-Models is identical.
Not everything is covered in this blog post, for example, the generation of a gitlab user account and its setup are out of scope. Here are a few resource to read up:
On a typical kicad install, there are also symbol- and footprint-libraries installed. On a linux system they are read-only, so we can’t edit them. On windows we can change the files, but they might not be up to date with the latest version on gitlab (where all library development takes place). So what we want to do is clone the official repository and work with those symbols.
cd /home/cpresser/Documents/KiCad/
git clone git@gitlab.com:kicad/libraries/kicad-symbols.git
We also need to setup a fork of the symbols-library on gitlab where we can publish our changes. This can be done on the gitlab webpage by pressing the ‘fork’ button in the top right on the project page (https://gitlab.com/kicad/libraries/kicad-symbols/). Next we need to add this repository as a second remote to our local git repository.
Next we want that Kicad also uses the library we just cloned. Depending on the operating system you are using, or even the package, there might be differences. On my system, I had to do two things.
1. Set the path to the library in Kicad, go to Preferences->Paths
2. Use the sym-lib-table from git. It resides in the config folder. So on my system I did the following:
cd /home/cpresser/.config/kicad/6.0
mv sym-lib-table sym-lib-table.old
ln -s /home/cpresser/Documents/KiCad/kicad-symbols/sym-lib-table .
3. Verify that its working. Open Kicad, go to the symbol editor and make some change, e.g. add a text to the default capacitor symbol in the Device library. After that, type git status and it should look something like this.
Since that was a useless change, just as a test, undo it with git restore Device.kicad_sym. Now you are set up do do library work. Yay!
Adding a symbol and opening a MR
Now the setup is complete, we can do some actual work. Lets assume we want to add a new symbol for a Lattice FPGA. In this case, just head over to the library editor inside Kicad and create a new symbol. When done, head back to the command line and type git diff so see if there are the changes you expect:
This looks good, there is exactly one hunk (= a group of changed lines) that correspond to the symbol we created in the editor. To upstream this, we need to do a few steps:
Create a new (local) branch
Commit our changes to that branch and write a good commit message
4. Create a merge request, just use the provided link
Make sure to fill out the merge request template to the best of you knowledge. And please don’t uncheck the “Allow commits from members who can merge to the target branch” checkbox. It make take some time until a librarian makes a review of you contribution, we are only volunteers and short staffed.
You can repeat this process for every contribution. Make a new branch with a descriptive name for each one. You can switch around different branches using the git branch <branchname> command.
Once your contribution gets accepted it will get merged into the master branch. You can then safely delete your local branch with git branch -D <branchname>.
Adding changes
In quite a few cases, the library maintainers will require you to do some changes during the review. As a first step, you need to switch back to your local branch that corresponds to the MR. Next do the changes in the Kicad symbol editor, then head back to the command line to create a commit and push it. Your merge request will automatically get updated.
git checkout Add_fake_Lattice_FPGA
# <now do changes in kicad symbol editor>
git add -p #(stage the changes for a commit)
git commit #(create a commit)
git push #(push that commit to the remote)
Ikea does sell a reasonably nice Ringlight called ‘LÅNESPELARE’. It runs of 5V and has a USB-A-Plug for its supply. A simple controller is build into the cord. Unfortunately, it does not remember its last setting/power status after it has been unplugged. If I switch it off via my home-automation using a zigbee outlet, I always need to also switch it on using its own controller. That kinda defeats the whole idea.
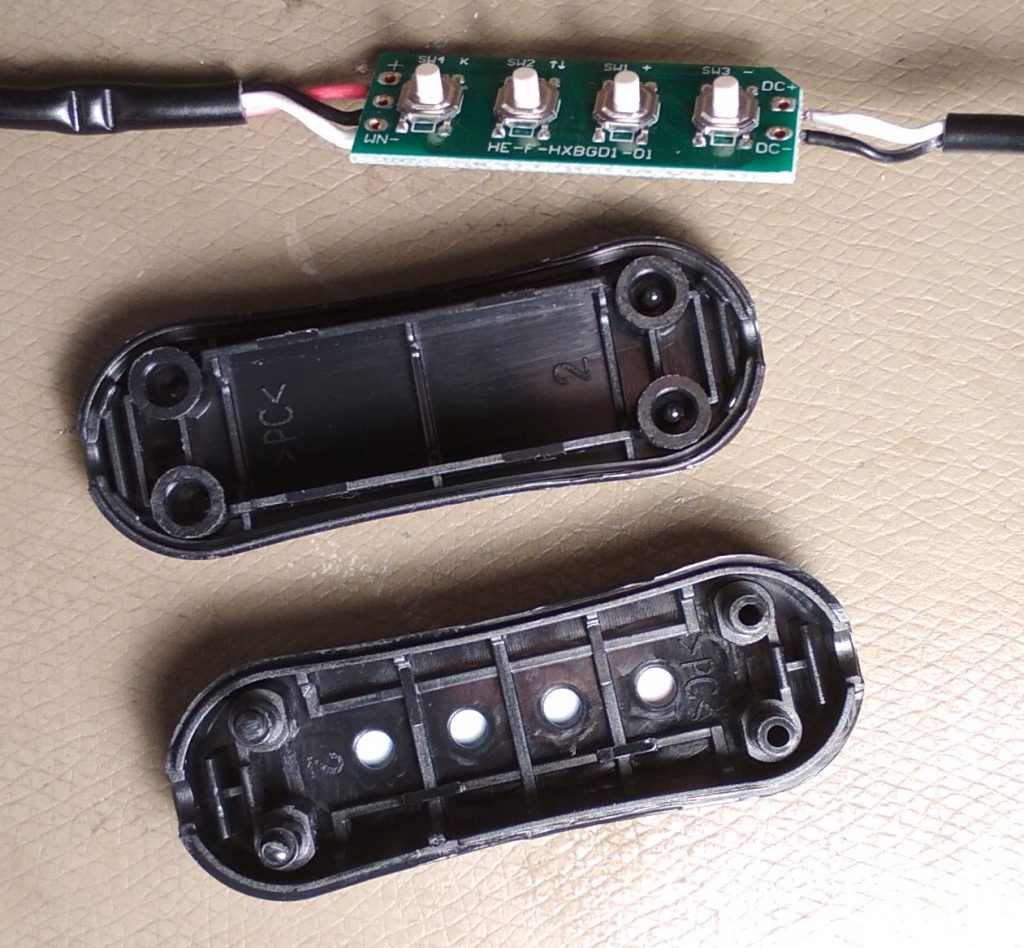
The case does not open that easy. I had to use some force, but managed to not break it. Perhaps the left domes have been welded, I heard a crack when I finally got it open.
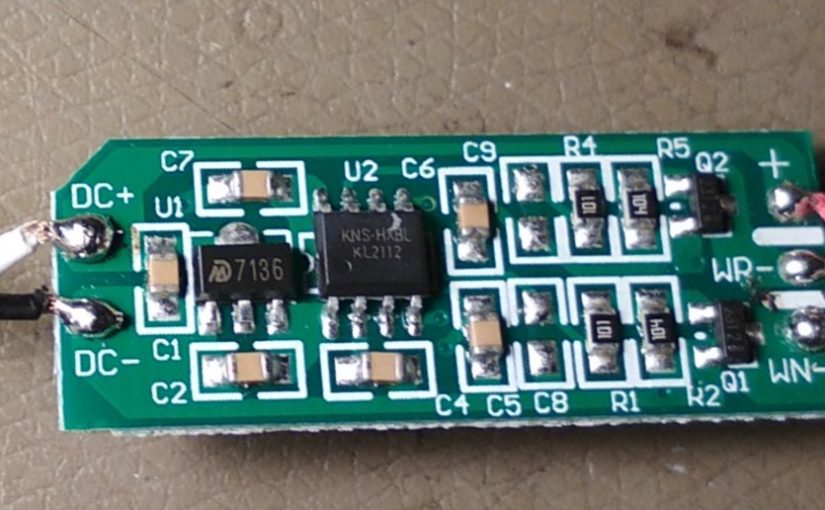
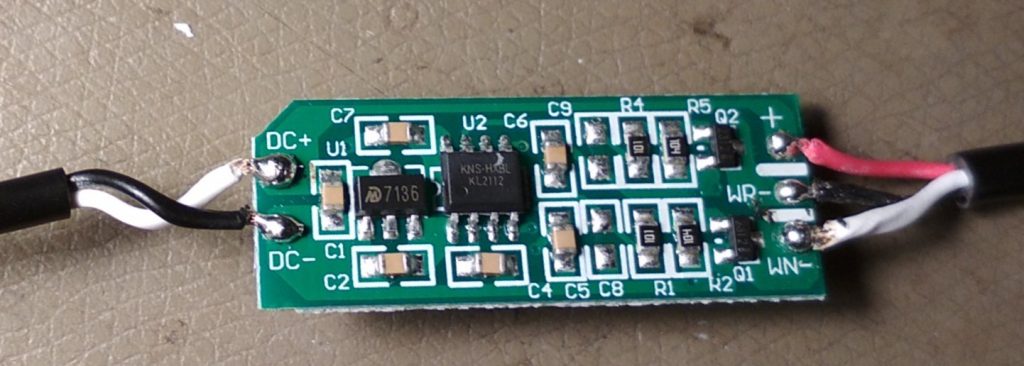
The original controller is pretty straightforward. It has a LDO (U1, “7136”, SOT-89 package) some kind of microcontoller (U2, SO-8 package), and two output transistors. One for Warmwhite and one for Coldwhite. The slikscreen reveals that those are low side switches. Seems like a simple PWM output.
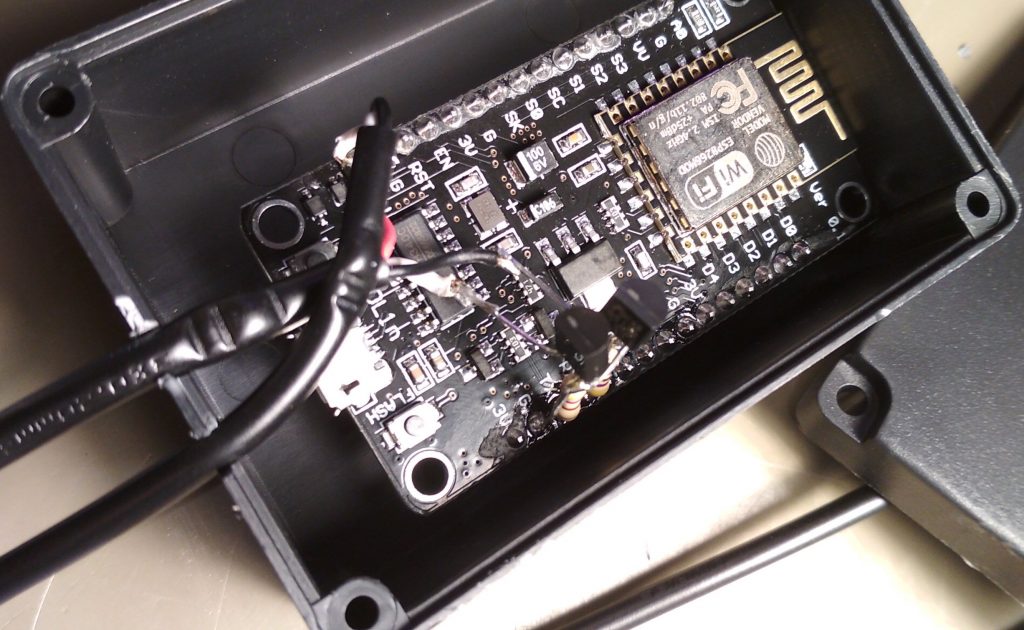
So we can replace it with another PWM controller. I choose to use https://github.com/Aircoookie/WLED since it integrates nicely into home-assistant. Its also really easy to configure and use. It already comes with a mode for PWM Output for warm/cold-white LEDs. All I had to do is to upload the firmware using esptool.py, no coding required at all. On the hardware-side two N-Channel-FETs (BS170) in TO-92 were used as low-side-switches. Then everything was fitted into a plastic case using excessive amounts of hot glue.
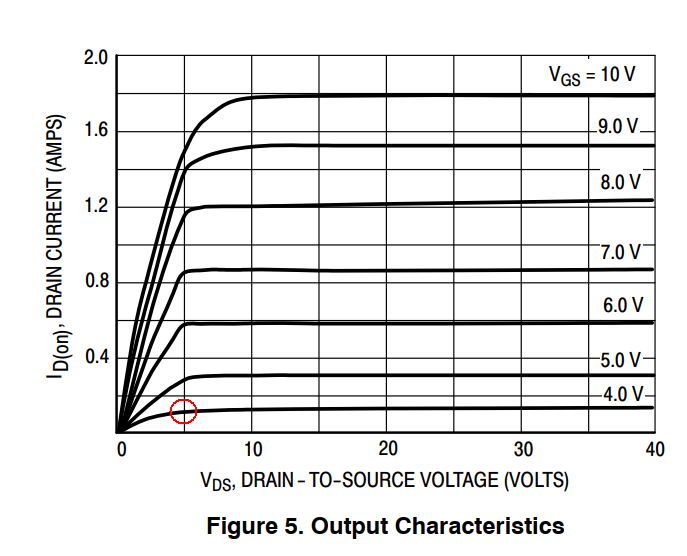
The BS170 is not the best FET for this application. Its Threshold-Voltage does not work well with the 3.3V of the esp8266. But those were the only available at the time. Below it the chart from its datasheet, with the working point circled in red. Perhaps I should just use the transistors from the original controller board 🙂
Usually it does not pay of to repair printers. The consumables are really expensive. New printers are cheap and come with consumables. But what if we can repair the consumables? :-
The printer was acquired from friends/family that did not invest the money for new toner. Usually all it takes to get a few more pages out of toner is a good shake of the cartridge. Unfortunately, printers do record how many pages they already printed with that cartridge. Some even come with DRM
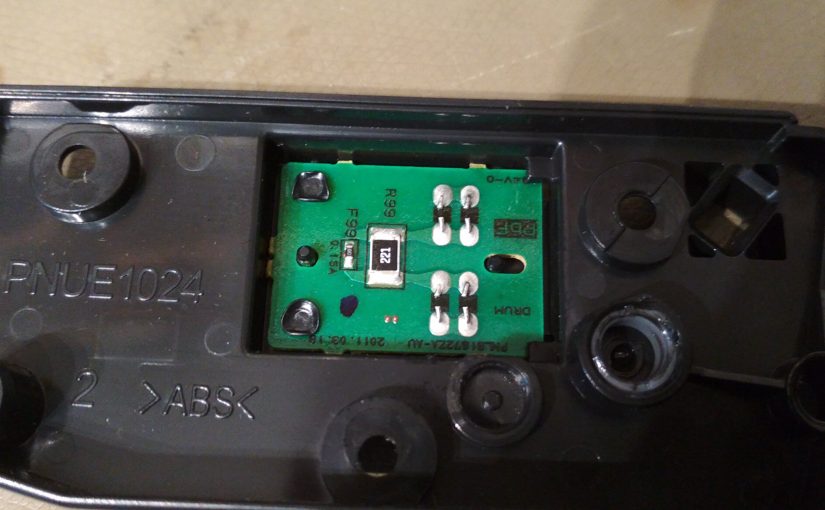
Turns out, all one has to do is to replace one resistor that acts as a fuse. The service-manual has a nice schematic that shows how it works.
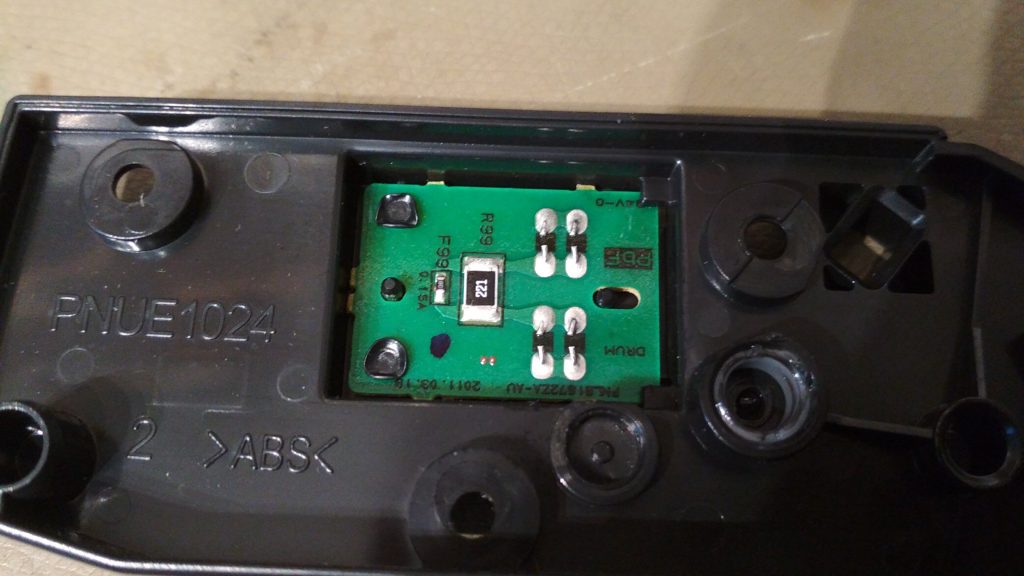
So, lets open the small circuit board on the cartridge and solder in a new resistor (R99). Fortunately I have a assortment of 0603 resistors from a ‘sample kit book’ one can get on aliexpress.
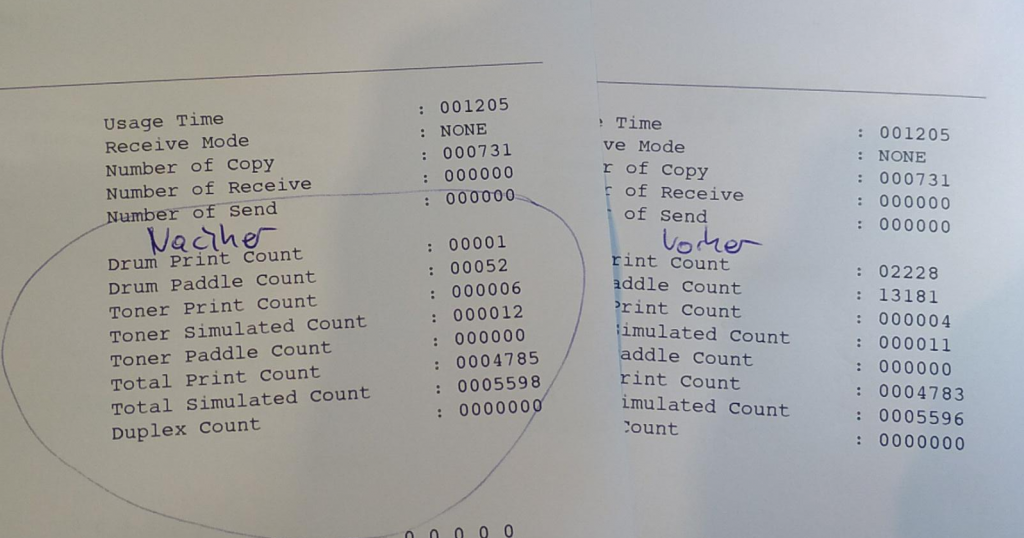
The toner sensor does not need to be cheated. Just a few taps to re-distribute the toner was enough to have the paddle tell the printer that enough toner is present. The last thing to do is use the service menu to clear the amount of pages printed. I am not quite sure which code I used. Perhaps it was #550. The required info is in section 11.1.2 of the manual. Anyways, the end result was this:
Earlier this year I started to look at food deliveries, more specifically fresh and local vegetables and fruits. There are quite a few companies that provide that service in Germany. Really nice.
I found a local one that delivers to my home. They offer a convenient web shop where I registered.
Vulnerability ‘research’
The weird part was the registration confirmation: they did set the initial password to my post-code. That immediately caught my attention. The user names are numeric and seem to be incrementing. That can’t be good. So I wrote a small piece of python code that just enumerates users and tries to login with post-codes from the area. And bingo, I got quite a few successful logins. I did verify one of them by looking at the user profile of the poor person that did not change their password. And yes, I could see personal data.
Since my goal was not to steal data I stopped there and did concentrate at the API again. I did some googling to see if there are similar shops. And yes, actually quite a few. They are all provided by oekobox-online.de. A quick check of a arbitrary other shop in another part of Germany proved that the same method of guessing the postcode and just enumerating the user-ids also worked to perform a successful login.
The API is actually well documented by the vendor:
I personally think that a verbose API answer like in the table below adds to the problem. This allows the attacker to first figure out if a user-id is valid before starting to guess the password. Instead the API should just return success of fail, but now why it failed.
The tblocked response was also not well implemented. First of all, it took quite a while for me to be blocked. And even if one is blocked, logins with the correct username/password combo still work.
Contacting the vendor
I did contact the vendor the same day (06.01.2021) and received an answer less than 24 after that. This seems to be one of the few cases where responsible disclosure actually works.
The communication was friendly even though we have quite different opinions about the actual issue. The vendor was already aware of it, but because customers like the easy workflow did not change it.
Nevertheless, a few weeks later (02.02.2021) I received a mail with promising news:
Affected customers have been informed
The rate-limit is now better enforced
Login via user-ID will be disabled soon. Only logon via email-address will be possible
Better passwords will be enforced step-by-step in the next weeks
To be honest, I did not check if all of that is actually properly implemented now. I am to lazy for that.
In one of my pen’n’paper groups we are playing “Niobaras Vermächtnis“. One of the riddles given in it involves solving a sudoku.
Its a variant of a regular sudoku called “greater than sudoku”, or in german “Vergleichssudoku”. Since I am to lazy to solve such a thing manually, I looked for a constraints solver to do that for me. I have never used something like that, so I started looking into different options:
prolog -> I checked the wikipedia page and decided its to complicated for me^^
clasp -> there was a python binding, I played around with that, but its python2 only
z3 -> it has python3 bindings and a sudoku example. So lets use that.
I started from the example and added the greater-than constraints. They are encoded as strings, in horizontal and vertical direction.
Because the solver did not work, I added a hacky visualization to check the constraints visually. Then used some image processing to overlay that with the original riddle
I did quite some more checking, and finally decided to test a known good sudoku. I found this one which solves fine
Thus, the reasonable explanation was that my solver is fine, but the riddle is not. Turns out, somebody already made the same discovery as me.
The people over at a DSA fanpage asboran.de already figured that out more than two years ago. After applying their proposed fix, the solver finally returns sat and produces an output:
Here is my code if you like to laugh about it, or copy it. License is the same as the example I copied it from
from z3 import Int, Solver, And, Distinct, If, sat;
debug = False
# most of this code was taken and copied from the example at
# https://ericpony.github.io/z3py-tutorial/guide-examples.htm
# other reference for 'greater than sudokus'
# https://github.com/kit1980/grid-puzzle-solver/blob/master/greater-than-sudoku.ecl
# From niobaras vermächtnis (does not work)
# Horizontal constraints
GH = ["><><<>",
"><<><>",
"<<<>><",
">>><>>",
"><<<<<",
"><>><>",
"<>><><",
"<><>><",
"<<><<<"]
# vertical
GV = ["<>>>><",
"><>>><",
"<><><<",
"><><<>",
"><<<<>",
"><<>><",
"<<><<>",
"><><><", # original constraints with error
"<<<>><"]
# | this char was changed
GV[7] = ">>><><"
# from: https://plus.maths.org/content/puzzle-page-77
# we know a solution for this!
# Horizontal constraints
GH1 = ["><><<>",
"<<><<<",
"<<<<<>",
">>><<>",
"<>>><>",
">>>><<",
"<<<>><",
"><<<><",
"<>><><"]
# vertical
GV1 = ["<>><<<",
"<><><<",
"<>><<>",
"><<>><",
"><<>>>",
">>>>>>",
"><<><>",
"><><>>",
"<>><<<"]
# very hacky visualization
def print_matrix(m):
print("\n?????????????????????????????????????")
lineidx=0
for line in range(9):
print("?", end='')
colidx = 0
for col in range(9):
print(" {} ".format(str(m[line][col])), end='')
if (col+1) % 3 != 0:
ch = u"\u140a"
if GH[line][colidx] == ">":
ch = u"\u1405"
print(ch, end='')
colidx+=1
else:
print("?", end='')
if (line+1) % 3 == 0:
if (line != 8):
print("\n?????????????????????????????????????")
else:
a = ["i"]*9
for foo in range(9):
a[foo] = u"\u25bc"
if GV[foo][lineidx] == "<":
a[foo] = u"\u25b2"
print("\n? {} {} {} ? {} {} {} ? {} {} {} ?".format(a[0], a[1], a[2], a[3], a[4], a[5], a[6], a[7], a[8]))
lineidx+=1
print("\n?????????????????????????????????????")
## Begin adding constraints
###Jede Zahl nur eine Stelle; jede Spalte, jede Zeile, jedes Quadrat darin einmal jede Zahl.
# 9x9 matrix of integer variables
X = [ [ Int("x_%s_%s" % (i, j)) for j in range(9) ]
for i in range(9) ]
#Jede Zahl nur eine Stelle;
# each cell contains a value in {1, ..., 9}
cells_c = [ And(1 <= X[i][j], X[i][j] <= 9)
for i in range(9) for j in range(9) ]
cols_c = []
rows_c = []
for i in range(9):
# jede Zeile,
# each row contains a digit at most once
rows_c.append(Distinct([X[i][j] for j in range(9)]))
# jede Spalte,
# each column contains a digit at most once
cols_c.append(Distinct([X[j][i] for j in range(9)]))
#jedes Quadrat darin einmal jede Zahl.
# each 3x3 square contains a digit at most once
sq_c = [ Distinct([ X[3*i0 + i][3*j0 + j]
for i in range(3) for j in range(3) ])
for i0 in range(3) for j0 in range(3) ]
# the basic sudoku constraints
sudoku_c = cells_c + cols_c + rows_c + sq_c
# build our DSA horizontal constraints
xl= [0,1,3,4,6,7] # have a stupid lookup-thingy, only 6 out of 9 items have a constraint
h_c = []
for lidx, line in enumerate(GH, start=0):
for cidx, c in enumerate(line, start=0):
if c == ">":
h_c.append(X[lidx][xl[cidx]] > X[lidx][xl[cidx]+1])
#print("X{}_{} > X{}_{}".format(lidx, xl[cidx], lidx, xl[cidx]+1))
else:
h_c.append(X[lidx][xl[cidx]] < X[lidx][xl[cidx]+1])
#print("X{}_{} < X{}_{}".format(lidx, xl[cidx], lidx, xl[cidx]+1))
# build our DSA vertical constraints
v_c = []
for ridx, row in enumerate(GV, start=0):
for cidx, c in enumerate(row, start=0):
if c == ">":
v_c.append(X[xl[cidx]][ridx] > X[xl[cidx]+1][ridx])
#print("X{}_{} > X{}_{}".format(xl[cidx], ridx, xl[cidx]+1, ridx))
else:
v_c.append(X[xl[cidx]][ridx] < X[xl[cidx]+1][ridx])
#print("X{}_{} < X{}_{}".format(xl[cidx], ridx, xl[cidx]+1, ridx))
if debug:
print("Cells 1..9:", cells_c)
print("Rows:", rows_c)
print("Cols:", cols_c)
print("SubSquares:", sq_c)
print("Horizontal:", h_c)
print("Vertical:", v_c)
for co in sudoku_c + h_c + v_c:
print (co)
# print a empty matrix so we van visually inspect the constraints
empty = [["?"]*9]*9
print_matrix(empty)
# create a solver, add all constraints
s = Solver()
s.add(sudoku_c + h_c + v_c)
if s.check() == sat:
print("done")
m = s.model()
r = [ [ m.evaluate(X[i][j]) for j in range(9) ]
for i in range(9) ]
print_matrix(r)
else:
print ("failed to solve")
print (s.statistics())
Unfortunately my VT220 did not work well. The flyback transformator is leaky. It can be heard and smelled (the ozone generated by the arc). In a low light environment the arc is also visible (blue-violet spot in the center of the picture).
Most resources on the internet suggest to just get a replacement. Some comments even say it is dangerous to try a repair, but fail to mention exactly why. Getting a replacement is pretty hard for such an old device. I checked the google-search, ebay and hr diemen. But I was not successful.
I choose to do something similar. Use epoxy to re-seal the transformer. But instead of brushing it on I wanted to add a thicker layer.
The first step was to make a rough 3D-Model of the existing transformer. Then offset it by 5mm outside to create a mold. That mold was printed in PLA.
I did not take any pictures during the casting process. I used hot-glue to fix the flyback in the mold so it does not move while casting. The epoxy used was E45GB with some green pigment mixed in. The volume needed was extracted from the 3D-Model of the mold and the transformer. Make sure to factor in the density of the epoxy, I did not and had to mix a second smaller batch
As you can see above I did not remove the mold. Its fixed to the epoxy. Next time I will use a release agent.
But did it work? I would say yes. There is no more arcing and I cant smell any ozone anymore. It also more silent, but the typical 15kHz(?) noise is still present.
The printer that I have been using for quite some time recently stopped working. The display indicated that the error is “108.08”.
A quick search got me the service-manual for this printer. This is a really great document. It has all the instructions needed to diagnose and fix an error. Detailed disassemly instructions can also be found.
I did all of that, but instead of replacing the printhead I just cleaned it. Over the time dust does accumulate on the windows where the laser light exits the printhead. After disassembly I could clearly see that the windows were cloudy; colorful toner could als be spoted on the windows. My solution was to use a kimtech wipe without any water/solvent to clean the lenses.
The manual actually says to clean those windows, but its on another page/section not directly related to that error.